Shinobi Tactics (BTD6): Difference between revisions
Qwertyxp2000 (talk | contribs) →Strategy: btw, the not crosspath due to lag is real; in freeplay runs it is a human consideration is that is notable enough to be a consideration, mainly due to device limitations (despite being technically better at popping bloons) |
lede |
||
| (6 intermediate revisions by 3 users not shown) | |||
| Line 17: | Line 17: | ||
|xp =2000 | |xp =2000 | ||
}} | }} | ||
'''Shinobi Tactics''' is the [[Ninja Monkey (BTD6)|Ninja Monkey]]'s path 2 tier 3 [[upgrade]] in ''[[Bloons TD 6]]''. | '''Shinobi Tactics''' is the [[Ninja Monkey (BTD6)|Ninja Monkey]]'s path 2 tier 3 [[upgrade]] in ''[[Bloons TD 6]]''. <section begin="lede" />This upgrade increases the [[attack speed]] and [[pierce]] of all Ninja Monkeys (including itself) within its [[range]], which can stack with other Shinobi buffs up to 20 times on a single Ninja Monkey. It reduces attack cooldown by 8% multiplicatively and pierce by 8% additively, for a maximum of ~5.3× attack speed and 2.6× pierce when fully stacked.<section end="lede" /> | ||
==Buff amounts== | ==Buff amounts== | ||
| Line 88: | Line 88: | ||
==Stats== | ==Stats== | ||
These stats do not | These stats do not factor in the Shinobi Tactics' buff, which it virtually always has at least 1 stack of. | ||
{{BTD6 stat list by tiers|Ninja Monkey|030}} | |||
==Costs and sell values== | ==Costs and sell values== | ||
| Line 94: | Line 95: | ||
==Strategy== | ==Strategy== | ||
{{BTD6 last updated| | {{BTD6 last updated|55.2|section=y}} | ||
Shinobi Tactics | Shinobi Tactics is near-essential for Ninja-oriented setups, both for increasing their DPS considerably and consistently [[Distraction (BTD6)|Distraction]]-stalling [[Ceramic Bloon (BTD6)|Ceramic Bloon]]s with enough stacks. Generally, 16–20 Shinobis are worth getting. Most of the hardest maps heavily restrict space for Shinobi armies, making them difficult or impossible to use, though they shine on [[Ouch|#Ouch]] with the water removed. | ||
Shinobis make [[Bloonjitsu (BTD6)|Bloonjitsu]] a midgame carry | Shinobis make [[Bloonjitsu (BTD6)|Bloonjitsu]] a midgame carry that transitions smoothly into [[Grandmaster Ninja (BTD6)|Grandmaster Ninja]] in the lategame, with [[Glue Strike (BTD6)|Glue Strike]] supporting it for dense rounds and [[DDT (BTD6)|DDT]]s. Alternatively, swapping the tier 5 for a [[Permanent Brew (BTD6)|Permanent Brew]] and more Bloonjitsus trades general DPS for more consistency against immune Bloons. In [[Freeplay]], said strategy can even outperform [[Sun Temple (BTD6)|Sun Temples]], especially with an [[Ascended Shadow]] buffing their range. | ||
[[Flash Bomb (BTD6)|Flash Bomb]] is a decent source of Ceramic control in Shinobi armies while saving up for [[Master Bomber (BTD6)|Master Bomber]]. Master Bomber is usable without Shinobis, but they make it much better against dense rounds and DDTs. | |||
Shinobi | [[Monkey Commerce (BTD6)|Monkey Commerce]] is very helpful for building Shinobi armies, greatly reducing their costs and increasing their buffing range. [[Geraldo (BTD6)|Geraldo]] also has a good synergy with Shinobi armies, since [[Bottle of 'Gerry's Fire' Hot Sauce|Gerry's Fire]] on a Ninja also benefits from Shinobi buffs. | ||
Crosspathing Shinobis is generally not worth it, though [[Seeking Shuriken (BTD6)|Seeking Shuriken]] is sometimes needed for extra buffing range. The [[Caltrops (BTD6)|Caltrops]] crosspath can build up a decent amount of extra damage on some rounds (especially with Permanent Brew), but also causes a lot more lag. The first path makes Shinobis even more consistent at distracting [[Super Ceramic Bloon]]s in the lategame, but is usually unnecessary. | |||
==Update history== | ==Update history== | ||
Latest revision as of 09:02, 16 September 2026

|
 Increases attack speed and pierce of nearby Ninjas. Stacks 20 times. Increases attack speed and pierce of nearby Ninjas. Stacks 20 times.
|
| Tower | Ninja Monkey — Path 2 — Tier 3 | |
|---|---|---|
| XP cost | 2,000 | |
| Cash cost | $1,020 — Easy $1,200 — Medium $1,295 — Hard $1,440 — Impoppable | |
Shinobi Tactics is the Ninja Monkey's path 2 tier 3 upgrade in Bloons TD 6. This upgrade increases the attack speed and pierce of all Ninja Monkeys (including itself) within its range, which can stack with other Shinobi buffs up to 20 times on a single Ninja Monkey. It reduces attack cooldown by 8% multiplicatively and pierce by 8% additively, for a maximum of ~5.3× attack speed and 2.6× pierce when fully stacked.
Buff amounts
[edit | edit source]| Stack | Cooldown | Attack speed | Pierce |
|---|---|---|---|
| 1 | ×0.9200 | ×1.0870 | ×1.08 |
| 2 | ×0.8464 | ×1.1815 | ×1.16 |
| 3 | ×0.7787 | ×1.2842 | ×1.24 |
| 4 | ×0.7164 | ×1.3959 | ×1.32 |
| 5 | ×0.6591 | ×1.5173 | ×1.40 |
| 6 | ×0.6064 | ×1.6492 | ×1.48 |
| 7 | ×0.5578 | ×1.7926 | ×1.56 |
| 8 | ×0.5132 | ×1.9485 | ×1.64 |
| 9 | ×0.4722 | ×2.1179 | ×1.72 |
| 10 | ×0.4344 | ×2.3021 | ×1.80 |
| 11 | ×0.3996 | ×2.5023 | ×1.88 |
| 12 | ×0.3677 | ×2.7199 | ×1.96 |
| 13 | ×0.3383 | ×2.9564 | ×2.04 |
| 14 | ×0.3112 | ×3.2134 | ×2.12 |
| 15 | ×0.2863 | ×3.4929 | ×2.20 |
| 16 | ×0.2634 | ×3.7966 | ×2.28 |
| 17 | ×0.2423 | ×4.1267 | ×2.36 |
| 18 | ×0.2229 | ×4.4856 | ×2.44 |
| 19 | ×0.2051 | ×4.8756 | ×2.52 |
| 20 | ×0.1887 | ×5.2996 | ×2.60 |
Stats
[edit | edit source]These stats do not factor in the Shinobi Tactics' buff, which it virtually always has at least 1 stack of.
| Tower | ||||||
|---|---|---|---|---|---|---|
| ||||||
| Attack | |||||||||||||||||||||||||||
|---|---|---|---|---|---|---|---|---|---|---|---|---|---|---|---|---|---|---|---|---|---|---|---|---|---|---|---|
| |||||||||||||||||||||||||||
|
| Shinobi Tactics | ||||||
|---|---|---|---|---|---|---|
| ||||||
1-3-0
| Attack | ||
|---|---|---|
|
2-3-0
| Attack | |||||
|---|---|---|---|---|---|
|
0-3-1
| Tower | ||
|---|---|---|
| ||
| Attack | |||||||||||
|---|---|---|---|---|---|---|---|---|---|---|---|
| |||||||||||
|
0-3-2
| Caltrops | |||||||||||||||||||||||||||
|---|---|---|---|---|---|---|---|---|---|---|---|---|---|---|---|---|---|---|---|---|---|---|---|---|---|---|---|
| |||||||||||||||||||||||||||
|
Costs and sell values
[edit | edit source]| Tiers | Total cost | Sell value | ||||||
|---|---|---|---|---|---|---|---|---|
| Easy | Medium | Hard | Impoppable | Easy | Medium | Hard | Impoppable | |
| 0-3-0 | $1,910 | $2,250 | $2,425 | $2,700 | $1,337 | $1,575 | $1,698 | $1,890 |
| 1-3-0 | $2,210 | $2,600 | $2,805 | $3,120 | $1,547 | $1,820 | $1,964 | $2,184 |
| 2-3-0 | $2,510 | $2,950 | $3,185 | $3,540 | $1,757 | $2,065 | $2,230 | $2,478 |
| 0-3-1 | $2,165 | $2,550 | $2,750 | $3,060 | $1,516 | $1,785 | $1,925 | $2,142 |
| 0-3-2 | $2,550 | $3,000 | $3,235 | $3,600 | $1,785 | $2,100 | $2,265 | $2,520 |
Strategy
[edit | edit source]Shinobi Tactics is near-essential for Ninja-oriented setups, both for increasing their DPS considerably and consistently Distraction-stalling Ceramic Bloons with enough stacks. Generally, 16–20 Shinobis are worth getting. Most of the hardest maps heavily restrict space for Shinobi armies, making them difficult or impossible to use, though they shine on #Ouch with the water removed.
Shinobis make Bloonjitsu a midgame carry that transitions smoothly into Grandmaster Ninja in the lategame, with Glue Strike supporting it for dense rounds and DDTs. Alternatively, swapping the tier 5 for a Permanent Brew and more Bloonjitsus trades general DPS for more consistency against immune Bloons. In Freeplay, said strategy can even outperform Sun Temples, especially with an Ascended Shadow buffing their range.
Flash Bomb is a decent source of Ceramic control in Shinobi armies while saving up for Master Bomber. Master Bomber is usable without Shinobis, but they make it much better against dense rounds and DDTs.
Monkey Commerce is very helpful for building Shinobi armies, greatly reducing their costs and increasing their buffing range. Geraldo also has a good synergy with Shinobi armies, since Gerry's Fire on a Ninja also benefits from Shinobi buffs.
Crosspathing Shinobis is generally not worth it, though Seeking Shuriken is sometimes needed for extra buffing range. The Caltrops crosspath can build up a decent amount of extra damage on some rounds (especially with Permanent Brew), but also causes a lot more lag. The first path makes Shinobis even more consistent at distracting Super Ceramic Bloons in the lategame, but is usually unnecessary.
Update history
[edit | edit source]
|
This article or section uses Cargo to generate its content. It will automatically fill up as other articles are completed. To add to this section, create the articles it is looking up. Do not add content to this section manually and do not remove this notice until you are sure this section is complete. |
 Can now decamo Bloons that are normally immune to its projectiles if a buff allows its projectiles to damage them, such as from Acidic Mixture Dip or MIB (bug fix)
- Shinobi buff: Now also buffs pierce by 8% per stack, up to +160%
 "[S]hould no longer be able to occasionally shoot with an infinite range in specific setups" (bug fix)
- Description changed ― "Increases attack speed of all ninjas nearby - more Shinobi means more attack speed." → "Increases attack speed and pierce of nearby Ninjas. Stacks 20 times."
— Update notes
- Camo Prioritization filter added
- 0-3-2
- Caltrop attack: Gains 15% distraction chance (bug fix)
— Update notes
 Blowback distance changed ― 10–250 units → 100–150 units
- Blowback distance is now reduced by 50% for Ceramics (50–75 units)
- 0-3-2
- Caltrop attack: Blowback distance changed ― 10–250 units → 100–150 units
- Caltrop attack: Blowback distance is now reduced by 50% for Ceramics (50–75 units)
- Caltrop attack: Blowback chance reduced ― 15% → 10%
— Update notes
- Upgrade cost increased ― $900 → $1,200
- Overall cost is unchanged (due to cost changes for previous tiers)
- Main attack: Attack cooldown reduced ― 0.7s → 0.62s (attack speed increased by 12.9%)
- Note: Attack cooldown with Ninja Discipline is unchanged
- Counter-Espionage now grants the main attack +2 damage to Camo Bloons (undocumented)
- 0-3-2
- Counter-Espionage now grants Caltrops +2 damage to Camo Bloons (undocumented)
Gallery
[edit | edit source]Screenshots
[edit | edit source]-
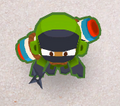 Shinobi Tactics with no crosspath
 -
 Shinobi Tactics with 130 crosspath
 -
 Shinobi Tactics with 230 crosspath
 -
 Shinobi Tactics with 031 crosspath
 -
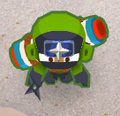 Shinobi Tactics with 032 crosspath


Assets
[edit | edit source]-
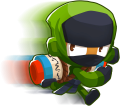 Portrait
 -
 Upgrade icon
 -
 Insta Monkey icon
 -
 Buff icon


In other languages
[edit | edit source]| Language | Name / Description | Notes | |
|---|---|---|---|
| Arabic | تكتيكات شينوبي زيادة سرعة الهجوم واختراق النينجا القريبين. تكدس 20 مرة. |
— | |
| Danish | Shinobi-taktik Øger agrebshastigheden og springkraften af ninja'er i nærheden. Kan stables 20 gange. |
— | |
| German | Shinobi-Taktik Erhöhte Angriffsgeschwindigkeit und Durchschlagskraft bei Ninjas in der Nähe. Kann bis zu 20-mal angehäuft werden. |
— | |
| Spanish | Tácticas shinobi Aumenta la velocidad de ataque y la perforación de los ninjas cercanos. Se acumula 20 veces. |
— | |
| Spanish (LA) | Tácticas shinobi Aumenta la velocidad de ataque y la perforación de los ninjas cercanos. Se acumula 20 veces. |
— | |
| Finnish | Shinobi-taktiikat Lisää läheisten ninjojen hyökkäysnopeutta ja läpäisyä. Pinoutuu 20 kertaa. |
— | |
| French | Tactiques shinobi Augmente la vitesse d'attaque et le pouvoir perforant des ninjas à proximité. Cumulable 20 fois. |
— | |
| Italian | Tattiche ninja Aumenta velocità d'attacco e penetrazione dei ninja vicini. Si accumula 20 volte. |
— | |
| Japanese | 忍び戦術 付近の忍者の攻撃速度と貫通度を上げる。20回まで効果を重ねられる。 |
— | |
| Korean | 시노비 전술 주변 닌자의 공격 속도와 관통력이 증가합니다. 20번까지 중첩됩니다. |
— | |
| Dutch | Shinobi-tactieken Verhoogt aanvalssnelheid en doorboring van nabijgelegen Ninja's. Stapelt 20 keer. |
— | |
| Norwegian | Shinobi-taktikker Øker angrepshastigheten og gjennomtrengningen til ninjaer i nærheten. Kan stables 20 ganger. |
— | |
| Polish | Taktyki Shinobi Zwiększa prędkość ataku i przebicie pobliskich ninja. Sumuje się 20 razy. |
— | |
| Portuguese (Brazil) | Tática Shinobi Aumenta a velocidade de ataque e a perfuração de ninjas próximos. Acumula 20 vezes. |
— | |
| Russian | Тактика синоби Увеличивает скорость атаки и пробивную способность ниндзя поблизости. Суммируется 20 раз. |
— | |
| Swedish | Shinobitaktik Ökar attackhastigheten och genomslaget för Ninjor i närheten. Kan staplas 20 gånger. |
— | |
| Thai | กลยุทธ์ชิโนบิ ทำให้นินจาที่อยู่ใกล้เคียงมีความเร็วโจมตีเพิ่มขึ้น และโจมตีศัตรูหลายลูกขึ้น สะสมได้ 20 ครั้ง |
— | |
| Turkish | Ninja Taktikleri Yakındaki Ninjaların saldırı hızını ve delme gücünü artırır. 20 kez yığın oluşturur. |
— | |
| Chinese (simplified) | 忍者战术 提高附近忍者猴子的攻击速度和穿刺,可叠加20次。 |
— | |
| Chinese (traditional) | 忍者戰術 提高附近忍者的攻擊速度和穿透力。堆疊20次。 |
— | |
| This list was last updated for: version | |||
Navigation
[edit | edit source]| Ninja Monkey in Bloons TD 6 | ||||||||
|---|---|---|---|---|---|---|---|---|
| ||||||||
| Stats • Strategies • Update history |