User:Planterror/Project Water Placement: Difference between revisions
Planterror (talk | contribs) →Bloons Monkey City Mobile/Steam: adjusted columns |
Planterror (talk | contribs) →Bloons TD 5 Flash/Deluxe: flattening |
||
| Line 11: | Line 11: | ||
===Bloons TD 5 Flash/Deluxe=== | ===Bloons TD 5 Flash/Deluxe=== | ||
<div style="text-align:center">{{ | <div style="text-align:center"><table class="cargoTable noMerge sortable"><thead><tr><th class="field_Map">Map</th> | ||
<th class="field_Difficulty">Difficulty</th> | |||
<th class="field_Introduced_(Flash)">Introduced (Flash)</th> | |||
<th class="field_Introduced_(Deluxe)">Introduced (Deluxe)</th> | |||
</tr></thead> | |||
<tbody><tr> | |||
<td class="field_Map">[[File:BTD5F Brick Wall.png{{!}}x100px{{!}}link=Brick Wall]]<br>[[Brick Wall{{!}}Brick Wall]]</td> | |||
<td class="field_Difficulty">Beginner</td> | |||
<td class="field_Introduced_(Flash)"></td> | |||
}}</div> | <td class="field_Introduced_(Deluxe)"></td> | ||
</tr> | |||
<tr> | |||
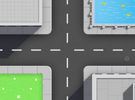
<td class="field_Map">[[File:BTD5D Military Base.png{{!}}x100px{{!}}link=Military Base (BTD5 Deluxe)]]<br>[[Military Base (BTD5 Deluxe){{!}}Military Base]]</td> | |||
<td class="field_Difficulty">Beginner</td> | |||
<td class="field_Introduced_(Flash)"></td> | |||
<td class="field_Introduced_(Deluxe)"></td> | |||
</tr> | |||
<tr> | |||
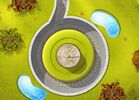
<td class="field_Map">[[File:BTD5D Ocean Road.png{{!}}x100px{{!}}link=Ocean Road (BTD5 Deluxe)]]<br>[[Ocean Road (BTD5 Deluxe){{!}}Ocean Road]]</td> | |||
<td class="field_Difficulty">Beginner</td> | |||
<td class="field_Introduced_(Flash)"></td> | |||
<td class="field_Introduced_(Deluxe)"></td> | |||
</tr> | |||
<tr> | |||
<td class="field_Map">[[File:BTD5F Alpine Lake.png{{!}}x100px{{!}}link=Alpine Lake]]<br>[[Alpine Lake{{!}}Alpine Lake]]</td> | |||
<td class="field_Difficulty">Beginner</td> | |||
<td class="field_Introduced_(Flash)"></td> | |||
<td class="field_Introduced_(Deluxe)"></td> | |||
</tr> | |||
<tr> | |||
<td class="field_Map">[[File:BTD5F North Pole.png{{!}}x100px{{!}}link=North Pole (BTD5)]]<br>[[North Pole (BTD5){{!}}North Pole]]</td> | |||
<td class="field_Difficulty">Beginner</td> | |||
<td class="field_Introduced_(Flash)"></td> | |||
<td class="field_Introduced_(Deluxe)"></td> | |||
</tr> | |||
<tr> | |||
<td class="field_Map">[[File:BTD5F Space Truckin.png{{!}}x100px{{!}}link=Space Truckin]]<br>[[Space Truckin{{!}}Space Truckin']]</td> | |||
<td class="field_Difficulty">Beginner</td> | |||
<td class="field_Introduced_(Flash)"></td> | |||
<td class="field_Introduced_(Deluxe)"></td> | |||
</tr> | |||
<tr> | |||
<td class="field_Map">[[File:BTD5F Snowy Backyard.png{{!}}x100px{{!}}link=Snowy Backyard]]<br>[[Snowy Backyard{{!}}Snowy Backyard]]</td> | |||
<td class="field_Difficulty">Beginner</td> | |||
<td class="field_Introduced_(Flash)"></td> | |||
<td class="field_Introduced_(Deluxe)"></td> | |||
</tr> | |||
<tr> | |||
<td class="field_Map">[[File:BTD5F Skull Peak.png{{!}}x100px{{!}}link=Skull Peak]]<br>[[Skull Peak{{!}}Skull Peak]]</td> | |||
<td class="field_Difficulty">Beginner</td> | |||
<td class="field_Introduced_(Flash)"></td> | |||
<td class="field_Introduced_(Deluxe)"></td> | |||
</tr> | |||
<tr> | |||
<td class="field_Map">[[File:BTD5F 3 Times Around.png{{!}}x100px{{!}}link=3 Times Around]]<br>[[3 Times Around{{!}}3 Times Around]]</td> | |||
<td class="field_Difficulty">Beginner</td> | |||
<td class="field_Introduced_(Flash)"></td> | |||
<td class="field_Introduced_(Deluxe)"></td> | |||
</tr> | |||
<tr> | |||
<td class="field_Map">[[File:BTD5F The Rink.png{{!}}x100px{{!}}link=The Rink]]<br>[[The Rink{{!}}The Rink]]</td> | |||
<td class="field_Difficulty">Beginner</td> | |||
<td class="field_Introduced_(Flash)"></td> | |||
<td class="field_Introduced_(Deluxe)"></td> | |||
</tr> | |||
<tr> | |||
<td class="field_Map">[[File:BTD5F Pumpkin Patch.png{{!}}x100px{{!}}link=Patch (BTD5)]]<br>[[Patch (BTD5){{!}}Pumpkin Patch]]</td> | |||
<td class="field_Difficulty">Beginner</td> | |||
<td class="field_Introduced_(Flash)"></td> | |||
<td class="field_Introduced_(Deluxe)"></td> | |||
</tr> | |||
<tr> | |||
<td class="field_Map">[[File:BTD5F Lobby.png{{!}}x100px{{!}}link=Lobby]]<br>[[Lobby{{!}}Lobby]]</td> | |||
<td class="field_Difficulty">Beginner</td> | |||
<td class="field_Introduced_(Flash)"></td> | |||
<td class="field_Introduced_(Deluxe)"></td> | |||
</tr> | |||
<tr> | |||
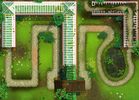
<td class="field_Map">[[File:BTD5F Park Path.png{{!}}x100px{{!}}link=Park Path (BTD5)]]<br>[[Park Path (BTD5){{!}}Park Path]]</td> | |||
<td class="field_Difficulty">Beginner</td> | |||
<td class="field_Introduced_(Flash)"></td> | |||
<td class="field_Introduced_(Deluxe)"></td> | |||
</tr> | |||
<tr> | |||
<td class="field_Map">[[File:BTD5F Blooms.png{{!}}x100px{{!}}link=Bloom]]<br>[[Bloom{{!}}Blooms]]</td> | |||
<td class="field_Difficulty">Beginner</td> | |||
<td class="field_Introduced_(Flash)"></td> | |||
<td class="field_Introduced_(Deluxe)"></td> | |||
</tr> | |||
<tr> | |||
<td class="field_Map">[[File:BTD5F Sprint Track.png{{!}}x100px{{!}}link=Sprint Track]]<br>[[Sprint Track{{!}}Sprint Track]]</td> | |||
<td class="field_Difficulty">Beginner</td> | |||
<td class="field_Introduced_(Flash)"></td> | |||
<td class="field_Introduced_(Deluxe)"></td> | |||
</tr> | |||
<tr> | |||
<td class="field_Map">[[File:BTD5F MOAB Desert.png{{!}}x100px{{!}}link=MOAB Desert]]<br>[[MOAB Desert{{!}}MOAB Desert]]</td> | |||
<td class="field_Difficulty">Intermediate</td> | |||
<td class="field_Introduced_(Flash)"></td> | |||
<td class="field_Introduced_(Deluxe)"></td> | |||
</tr> | |||
<tr> | |||
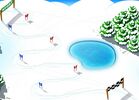
<td class="field_Map">[[File:BTD5F Slalom.png{{!}}x100px{{!}}link=Slalom]]<br>[[Slalom{{!}}Slalom]]</td> | |||
<td class="field_Difficulty">Intermediate</td> | |||
<td class="field_Introduced_(Flash)"></td> | |||
<td class="field_Introduced_(Deluxe)"></td> | |||
</tr> | |||
<tr> | |||
<td class="field_Map">[[File:BTD5D Banana Factory.png{{!}}x100px{{!}}link=Banana Factory]]<br>[[Banana Factory{{!}}Banana Factory]]</td> | |||
<td class="field_Difficulty">Intermediate</td> | |||
<td class="field_Introduced_(Flash)"></td> | |||
<td class="field_Introduced_(Deluxe)"></td> | |||
</tr> | |||
<tr> | |||
<td class="field_Map">[[File:BTD5F Haunted Swamp.png{{!}}x100px{{!}}link=Haunted Swamp]]<br>[[Haunted Swamp{{!}}Haunted Swamp]]</td> | |||
<td class="field_Difficulty">Intermediate</td> | |||
<td class="field_Introduced_(Flash)"></td> | |||
<td class="field_Introduced_(Deluxe)"></td> | |||
</tr> | |||
<tr> | |||
<td class="field_Map">[[File:BTD5F Country Road.png{{!}}x100px{{!}}link=Country Road]]<br>[[Country Road{{!}}Country Road]]</td> | |||
<td class="field_Difficulty">Intermediate</td> | |||
<td class="field_Introduced_(Flash)"></td> | |||
<td class="field_Introduced_(Deluxe)"></td> | |||
</tr> | |||
<tr> | |||
<td class="field_Map">[[File:BTD5F Water Hazard.png{{!}}x100px{{!}}link=Water Hazard (BTD5)]]<br>[[Water Hazard (BTD5){{!}}Water Hazard]]</td> | |||
<td class="field_Difficulty">Intermediate</td> | |||
<td class="field_Introduced_(Flash)"></td> | |||
<td class="field_Introduced_(Deluxe)"></td> | |||
</tr> | |||
<tr> | |||
<td class="field_Map">[[File:BTD5F Hearthside.png{{!}}x100px{{!}}link=Hearthside]]<br>[[Hearthside{{!}}Hearthside]]</td> | |||
<td class="field_Difficulty">Intermediate</td> | |||
<td class="field_Introduced_(Flash)"></td> | |||
<td class="field_Introduced_(Deluxe)"></td> | |||
</tr> | |||
<tr> | |||
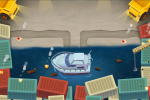
<td class="field_Map">[[File:BTD5F Dockside.png{{!}}x100px{{!}}link=Dockside]]<br>[[Dockside{{!}}Dockside]]</td> | |||
<td class="field_Difficulty">Intermediate</td> | |||
<td class="field_Introduced_(Flash)"></td> | |||
<td class="field_Introduced_(Deluxe)"></td> | |||
</tr> | |||
<tr> | |||
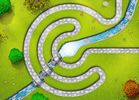
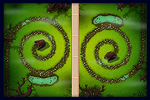
<td class="field_Map">[[File:BTD5F Snake River.png{{!}}x100px{{!}}link=Snake River]]<br>[[Snake River{{!}}Snake River]]</td> | |||
<td class="field_Difficulty">Intermediate</td> | |||
<td class="field_Introduced_(Flash)"></td> | |||
<td class="field_Introduced_(Deluxe)"></td> | |||
</tr> | |||
<tr> | |||
<td class="field_Map">[[File:BTD5F Trick Or Treat.png{{!}}x100px{{!}}link=Trick or Treat (BTD5)]]<br>[[Trick or Treat (BTD5){{!}}Trick Or Treat]]</td> | |||
<td class="field_Difficulty">Intermediate</td> | |||
<td class="field_Introduced_(Flash)"></td> | |||
<td class="field_Introduced_(Deluxe)"></td> | |||
</tr> | |||
<tr> | |||
<td class="field_Map">[[File:BTD5F Ice Flow.png{{!}}x100px{{!}}link=Ice Flow (BTD5)]]<br>[[Ice Flow (BTD5){{!}}Ice Flow]]</td> | |||
<td class="field_Difficulty">Intermediate</td> | |||
<td class="field_Introduced_(Flash)"></td> | |||
<td class="field_Introduced_(Deluxe)"></td> | |||
</tr> | |||
<tr> | |||
<td class="field_Map">[[File:BTD5F Snowflake.png{{!}}x100px{{!}}link=Snowflake]]<br>[[Snowflake{{!}}Snowflake]]</td> | |||
<td class="field_Difficulty">Intermediate</td> | |||
<td class="field_Introduced_(Flash)"></td> | |||
<td class="field_Introduced_(Deluxe)"></td> | |||
</tr> | |||
<tr> | |||
<td class="field_Map">[[File:BTD5F River Rapids.png{{!}}x100px{{!}}link=River Rapids]]<br>[[River Rapids{{!}}River Rapids]]</td> | |||
<td class="field_Difficulty">Intermediate</td> | |||
<td class="field_Introduced_(Flash)"></td> | |||
<td class="field_Introduced_(Deluxe)"></td> | |||
</tr> | |||
<tr> | |||
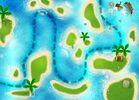
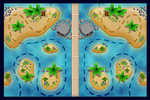
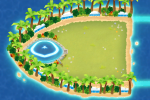
<td class="field_Map">[[File:BTD5F Archipelago.png{{!}}x100px{{!}}link=Archipelago]]<br>[[Archipelago{{!}}Archipelago]]</td> | |||
<td class="field_Difficulty">Intermediate</td> | |||
<td class="field_Introduced_(Flash)"></td> | |||
<td class="field_Introduced_(Deluxe)"></td> | |||
</tr> | |||
<tr> | |||
<td class="field_Map">[[File:BTD5F Rink Revenge.png{{!}}x100px{{!}}link=Rink Revenge]]<br>[[Rink Revenge{{!}}Rink Revenge]]</td> | |||
<td class="field_Difficulty">Advanced</td> | |||
<td class="field_Introduced_(Flash)"></td> | |||
<td class="field_Introduced_(Deluxe)"></td> | |||
</tr> | |||
<tr> | |||
<td class="field_Map">[[File:BTD5F Dune Sea.png{{!}}x100px{{!}}link=Dune Sea]]<br>[[Dune Sea{{!}}Dune Sea]]</td> | |||
<td class="field_Difficulty">Advanced</td> | |||
<td class="field_Introduced_(Flash)"></td> | |||
<td class="field_Introduced_(Deluxe)"></td> | |||
</tr> | |||
<tr> | |||
<td class="field_Map">[[File:BTD5F Downstream.png{{!}}x100px{{!}}link=Downstream (BTD5)]]<br>[[Downstream (BTD5){{!}}Downstream]]</td> | |||
<td class="field_Difficulty">Advanced</td> | |||
<td class="field_Introduced_(Flash)"></td> | |||
<td class="field_Introduced_(Deluxe)"></td> | |||
</tr> | |||
<tr> | |||
<td class="field_Map">[[File:BTD5F Crypt Keeper.png{{!}}x100px{{!}}link=Crypt Keeper]]<br>[[Crypt Keeper{{!}}Crypt Keeper]]</td> | |||
<td class="field_Difficulty">Advanced</td> | |||
<td class="field_Introduced_(Flash)"></td> | |||
<td class="field_Introduced_(Deluxe)"></td> | |||
</tr> | |||
<tr> | |||
<td class="field_Map">[[File:BTD5F Cash Money.png{{!}}x100px{{!}}link=Cash Money]]<br>[[Cash Money{{!}}Cash Money]]</td> | |||
<td class="field_Difficulty">Advanced</td> | |||
<td class="field_Introduced_(Flash)"></td> | |||
<td class="field_Introduced_(Deluxe)"></td> | |||
</tr> | |||
<tr> | |||
<td class="field_Map">[[File:BTD5F Dark Forest.png{{!}}x100px{{!}}link=Dark Forest]]<br>[[Dark Forest{{!}}Dark Forest]]</td> | |||
<td class="field_Difficulty">Expert</td> | |||
<td class="field_Introduced_(Flash)"></td> | |||
<td class="field_Introduced_(Deluxe)"></td> | |||
</tr> | |||
<tr> | |||
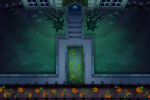
<td class="field_Map">[[File:BTD5F Spooky Castle.png{{!}}x100px{{!}}link=Spooky Castle]]<br>[[Spooky Castle{{!}}Spooky Castle]]</td> | |||
<td class="field_Difficulty">Expert</td> | |||
<td class="field_Introduced_(Flash)"></td> | |||
<td class="field_Introduced_(Deluxe)"></td> | |||
</tr> | |||
<tr> | |||
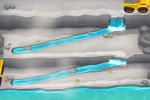
<td class="field_Map">[[File:BTD5F Down The Drain.png{{!}}x100px{{!}}link=Down the Drain]]<br>[[Down the Drain{{!}}Down The Drain]]</td> | |||
<td class="field_Difficulty">Expert</td> | |||
<td class="field_Introduced_(Flash)"></td> | |||
<td class="field_Introduced_(Deluxe)"></td> | |||
</tr> | |||
<tr> | |||
<td class="field_Map">[[File:BTD5F Castle.png{{!}}x100px{{!}}link=Castle]]<br>[[Castle{{!}}Castle]]</td> | |||
<td class="field_Difficulty">Expert</td> | |||
<td class="field_Introduced_(Flash)"></td> | |||
<td class="field_Introduced_(Deluxe)"></td> | |||
</tr> | |||
<tr> | |||
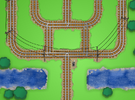
<td class="field_Map">[[File:BTD5D Rail Track.png{{!}}x100px{{!}}link=Rail Track (BTD5 Deluxe)]]<br>[[Rail Track (BTD5 Deluxe){{!}}Rail Track]]</td> | |||
<td class="field_Difficulty">Expert</td> | |||
<td class="field_Introduced_(Flash)"></td> | |||
<td class="field_Introduced_(Deluxe)"></td> | |||
</tr> | |||
<tr> | |||
<td class="field_Map">[[File:BTD5F Main Street.png{{!}}x100px{{!}}link=Main Street]]<br>[[Main Street{{!}}Main Street]]</td> | |||
<td class="field_Difficulty">Extreme</td> | |||
<td class="field_Introduced_(Flash)"></td> | |||
<td class="field_Introduced_(Deluxe)"></td> | |||
</tr> | |||
</tbody></table></div> | |||
===Bloons TD 5 Mobile/Steam=== | ===Bloons TD 5 Mobile/Steam=== | ||
Revision as of 15:58, 14 April 2025
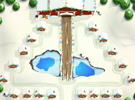
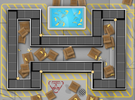
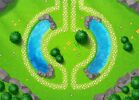
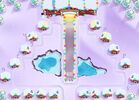
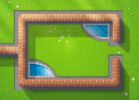
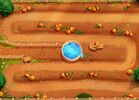
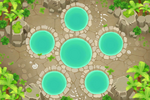
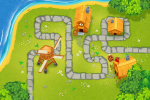
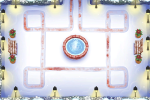
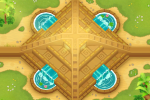
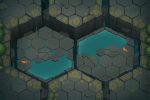
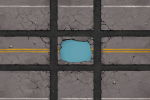
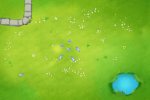
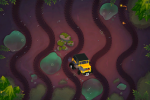
This is a page dedicated to the task of fitting as many Water placeable towers into the maps with water as possible. Want to help? Upload your file, and show it off in the Talk Page
Bloons TD 4
The only water tower is the Buccaneer. If possible, note differences between versions (hitboxes and track layout may be different!) If you are making screenshots on the Flash Version, Do not submit towers using bugged placements using the right click place glitch.
| This section is incomplete. You can help out by expanding it. The editor who added this notice elaborates: cargo is not setup for the btd4 maps yet? |
Bloons TD 5/Bloons Monkey City/Bloons TD Battles
BTD5 Deluxe, BMC Flash, and BTDB Flash only have the Buccaneer, but on all other versions the Monkey Sub is included. Do not use the Mobile/Steam version Chinook glitch to move water towers to land. If possible, note differences between versions (hitboxes and track layout may be different!)
Bloons TD 5 Flash/Deluxe
| Map | Difficulty | Introduced (Flash) | Introduced (Deluxe) |
|---|---|---|---|
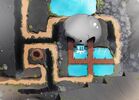
 Brick Wall |
Beginner | ||
 Military Base |
Beginner | ||
 Ocean Road |
Beginner | ||
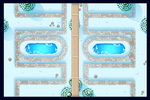
 Alpine Lake |
Beginner | ||
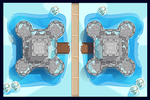
 North Pole |
Beginner | ||
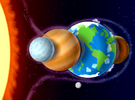 Space Truckin' |
Beginner | ||
 Snowy Backyard |
Beginner | ||
 Skull Peak |
Beginner | ||
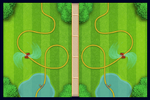
 3 Times Around |
Beginner | ||
 The Rink |
Beginner | ||
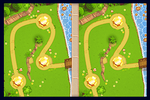
 Pumpkin Patch |
Beginner | ||
 Lobby |
Beginner | ||
 Park Path |
Beginner | ||
 Blooms |
Beginner | ||
 Sprint Track |
Beginner | ||
 MOAB Desert |
Intermediate | ||
 Slalom |
Intermediate | ||
 Banana Factory |
Intermediate | ||
 Haunted Swamp |
Intermediate | ||
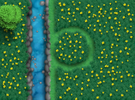
 Country Road |
Intermediate | ||
 Water Hazard |
Intermediate | ||
 Hearthside |
Intermediate | ||
 Dockside |
Intermediate | ||
 Snake River |
Intermediate | ||
 Trick Or Treat |
Intermediate | ||
 Ice Flow |
Intermediate | ||
 Snowflake |
Intermediate | ||
 River Rapids |
Intermediate | ||
 Archipelago |
Intermediate | ||
 Rink Revenge |
Advanced | ||
 Dune Sea |
Advanced | ||
 Downstream |
Advanced | ||
 Crypt Keeper |
Advanced | ||
 Cash Money |
Advanced | ||
 Dark Forest |
Expert | ||
 Spooky Castle |
Expert | ||
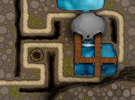
 Down The Drain |
Expert | ||
 Castle |
Expert | ||
 Rail Track |
Expert | ||
 Main Street |
Extreme |
Bloons TD 5 Mobile/Steam
| Map | Difficulty | Introduced |
|---|---|---|
 No Escape |
||
 Park Path |
Beginner | |
 The Rink |
Beginner | |
 Lobby |
Beginner | |
 Skull Peak |
Beginner | |
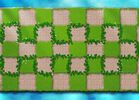 Checkers |
Beginner | |
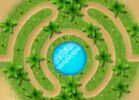 Oasis |
Beginner | |
 Bloom |
Beginner | |
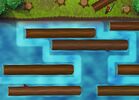 River Logging |
Beginner | |
 Mosaic |
Beginner | |
 Daffodils |
Beginner | |
 Snowy Backyard |
Beginner | |
 Space Truckin |
Beginner | |
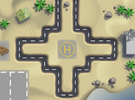
 3 Times Around |
Beginner | |
 Alpine Lake |
Beginner | |
 North Pole |
Beginner | |
 Sprint Track |
Beginner | |
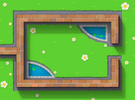
 Brick Wall |
Beginner | |
 Patch |
Beginner | |
 Trick or Treat |
Intermediate | |
 Ice Flow |
Intermediate | |
 River Rapids |
Intermediate | |
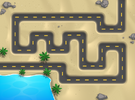
 Snake River |
Intermediate | |
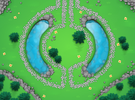
 Lonely Heart |
Intermediate | |
 Haunted Swamp |
Intermediate | |
 Walk in the Park |
Intermediate | |
 Dark Dungeon |
Intermediate | |
 Wattle Trees |
Intermediate | |
 Dockside |
Intermediate | |
 Dune Sea |
Intermediate | |
 Archipelago |
Intermediate | |
 Slalom |
Intermediate | |
 Forgotten Garden |
Intermediate | |
 Flooded Lane |
Intermediate | |
 South Coast |
Intermediate | |
 Country Road |
Intermediate | |
 Hearthside |
Intermediate | |
 Sandstorm |
Intermediate | |
 Village Shore |
Intermediate | |
 Cash Money |
Advanced | |
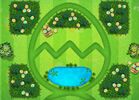 Egg Hunt |
Advanced | |
 Crypt Keeper |
Advanced | |
 Rink Revenge |
Advanced | |
 Land's End |
Advanced | |
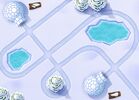 Igloos |
Advanced | |
 Water Hazard |
Advanced | |
 Tidal Pools |
Advanced | |
 Bigfoot |
Advanced | |
 Challenger Deep |
Advanced | |
 Siege |
Advanced | |
 Benguela |
Expert | |
 Castle |
Expert | |
 Forest Path |
Expert | |
 Down the Drain |
Expert | |
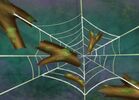 Web |
Expert | |
 Double Double Cross |
Expert | |
 Tar Pits |
Extreme | |
 Toxic Waste |
Extreme | |
 Main Street |
Extreme |
Bloons Monkey City Flash
| Map | Finished |
|---|---|
 Stone Bridge |
Yes |
 Drought |
Yes |
 Loop Knot |
N/A |
 Percent |
N/A |
 Bad Mirror |
N/A |
 Lakeside |
N/A |
 Blade |
N/A |
 Parabola |
N/A |
 Doubleback |
N/A |
 Meander River |
N/A |
 Wavy River |
N/A |
 Loop River |
N/A |
 River Python |
N/A |
 River Crossing |
N/A |
 Shipwreck |
N/A |
 Wattle Trees |
N/A (banned) |
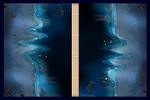
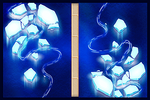
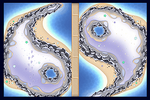
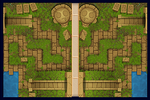
Bloons Monkey City Mobile/Steam
| Map | Finished |
|---|---|
Engineer Rescue |
Yes |
Bulbs |
No |
Necklace |
No |
Weight |
No |
Cubes |
No |
Shelves |
No |
Loop Knot |
N/A |
Percent |
N/A |
Bad Mirror |
N/A |
Lakeside |
N/A |
Blade |
N/A |
Doubleback |
Yes |
Meander River |
N/A |
Wavy River |
N/A |
Loop River |
N/A |
River Python |
N/A |
Shipwreck |
N/A |
Submarine Alliance |
N/A |
Wattle Trees |
N/A (banned) |
Bloons TD Battles Flash
Bloons TD Battles Mobile/Steam


Bloons TD 6
The water towers are Buccaneers, Subs, and Mermonkeys. For Mermonkeys in specific, find all placements that are considered on water (a good way to test is if they have the Carrier Flagship buff, or have the increased range). All platforms are identical, so no need to worry about that. List of maps with water are below:
| Map | Difficulty | Finished |
|---|---|---|
 |
Beginner | No |
 |
Beginner | No |
 |
Beginner | No |
 |
Beginner | No |
 |
Beginner | No |
 |
Beginner | No |
 |
Beginner | No |
 |
Beginner | No |
 |
Beginner | No |
 |
Beginner | No |
 |
Beginner | No |
 |
Beginner | No |
 |
Beginner | No |
 |
Beginner | No |
 |
Beginner | Needs Subs |
 |
Beginner | No |
 |
Beginner | No |
 |
Beginner | No |
 |
Beginner | No |
 |
Intermediate | No |
 |
Intermediate | No |
 |
Intermediate | No |
 |
Intermediate | No |
 |
Intermediate | No |
 |
Intermediate | No |
 |
Intermediate | No |
 |
Intermediate | No |
 |
Intermediate | No |
 |
Intermediate | No |
 |
Intermediate | No |
 |
Intermediate | No |
 |
Intermediate | No |
 |
Intermediate | No |
 |
Intermediate | No |
 |
Intermediate | No |
 |
Intermediate | No |
 |
Intermediate | No |
 |
Intermediate | No |
 |
Intermediate | No |
 |
Intermediate | No |
 |
Intermediate | No |
 |
Advanced | No |
 |
Advanced | No |
 |
Advanced | No |
 |
Advanced | No |
 |
Advanced | No |
 |
Advanced | No |
 |
Advanced | No |
 |
Advanced | No |
 |
Advanced | No |
 |
Advanced | No |
 |
Advanced | No |
 |
Advanced | No |
 |
Advanced | No |
 |
Expert | No |
 |
Expert | No |
 |
Expert | No |
 |
Expert | No |
 |
Expert | Yes |
 |
Expert | No |
 |
Expert | No |
 |
Expert | No |
 |
Expert | No |
 |
Expert | No |
 |
Expert | No |
 |
Expert | No |