Dark Dungeons

|
| Difficulty | Expert | ||
|---|---|---|---|
| Music | Tribes & Tribulations | ||
| Default Co-op division | Free-for-all | ||
| Introduced | Version 35.0 | ||
| Entrances | 4 | Exits | 4 |
| Junctions | 0 | Water? | Yes |
| Removables and gizmos |
|---|
|
| Path lengths (RBS) | ||||
|---|---|---|---|---|
| Path | Easy | Medium | Hard | |
| Right | 13.1 | 11.9 | 10.5 | |
| Left | 14.5 | 13.2 | 11.6 | |
| Middle | 12.5 | 11.4 | 10.0 | |
| Top | 17.0 | 15.5 | 13.6 | |
Dark Dungeons is an Expert map in Bloons TD 6, introduced in version 35.0. It takes place inside a labyrinthine dungeon.
This map's concept was designed by /u/ Lars_Overwick, for the "200k Map Contest Competition" held on /r/btd6, and it was selected as a winner along with Covered Garden and Erosion.[1]
Layout
[edit | edit source]Dark Dungeons is divided into 6 different rooms by walls that create significant line of sight blockage throughout the map. The bottom three sections are also at a lower height than the upper three, preventing most towers from seeing or shooting up the stairs on either side or up the central ledge. The map has 4 lanes: 2 for non-MOAB-Class Bloons, one for MOAB-Class Bloons, and one for both. Non-MOAB-Class Bloons enter from the bottom 3 entrances, and MOAB-Class Bloons enter from the middle-bottom and top-right entrances. The order is somewhat inconsistent, but non-MOAB-Class Bloons generally cycle through the lanes left to right, while MOAB-Classes start with the middle-bottom entrance before alternating with the top-right.
There are two interactable torches, one to the bottom left and one to the bottom right of the Dungeon Statue, that activate spike traps on their respective side of the track. The spikes deal 5 damage with +5 Ceramic damage to Bloons they contact, stunning targets for 1 second. The spikes stay active for 11 seconds and can damage all Bloon types, including Camo. Bloons that have already been hit, or children of bloons that were hit, cannot be hit again. The torches have cooldowns of 60 seconds each, and the Dungeon Statue is purchasable only when both spike traps are active and the statue is clicked.
Dungeon Statue
[edit | edit source]The statue costs $30,000 to initially activate. Upon activation, it summons a blue projectile with unlimited pierce and lifespan that chases Bloons all around the map. It deals 50 Fire damage. It can be upgraded to Level 2 by paying an additional $50,000, turning the projectile purple, and increasing the damage to 100. The player can further upgrade it to Level 3 by further paying another $100,000, turning the projectile pink and further increasing the damage to 150. It deals additional damage to MOAB-Class Bloons that also scales with the Statue's Level.
Once the statue is bought it prevents placement on the ledge below the statue. Towers that were placed on the ledge before the statue is activated will still remain as long as they are not sold, moved or sacrificed.
Strategy
[edit | edit source]Dark Dungeons has a difficult early game, due to there being 3 separate paths with walls separating them that limit the sightlines of the Sniper Monkey. The mid-game is even more difficult, as the top MOAB path increases the number of paths that need defense to 4, with walls and the paths' large separations preventing towers from effectively covering all 4 at once. The late-game is somewhat easier, as almost all Bloons become blimps and only come from 2 lanes. However, the large distance between the two MOAB lanes still creates significant challenges for late game. Dark Dungeons is considered by some to be a True Expert map, being the 5th most difficult map in the game (after Bloody Puddles, Ravine, Quad, and #Ouch).
Recommended towers and upgrades
[edit | edit source]| Name | Portrait | Reasoning |
|---|---|---|
| Sauda | 
|
Both the top and bottom MOAB-containing lanes have good bends for Sauda, making her able to mostly single-handedly deal with half of the map during late game with stuns such as Relentless Glue. The bottom MOAB-containing lane counts as 2 lanes due to both Bloons and MOABs spawning there, making her Sword Charge ability deal double damage on that lane. Sword Charge also dealing extra damage at the intersections between the left and right non-MOAB paths and the top MOAB path further improves her capabilities on this map. |
| Adora | 
|
Adora's ability to shoot over walls and temporarily gain very long range allows her to deal solid damage during the early game. She can be made to reach level 20 from sacrifices during the late game, where her The Long Arm of Light and Ball of Light abilities, especially when used with a sacrifice, wipe out entire rounds with ease. However, the need to time her abilities correctly limits her power for Black Bordering this map, in addition to Ball of Light only being able to target one side at a time. |
| Geraldo | 
|
Geraldo, being a versatile hero, retains his power on this map where most other heroes fall off, making him also a powerful option. His whole shop can come into play throughout the stages of the game. For instance, Shooty Turrets provide permanent popping for cheap, Stack of Old Nails prevents random leaks in all parts of the game (with vigilance), Pet Rabbit deals solid mid-game and late-game damage for its cost, Sharpening Stone and Jar of Pickles greatly aid strategies such as those involving Overdrives and/or Tack Zone, and Genie Bottle deals massive damage during the late-game. |
| Spiked Balls, Spiked Mines |  
|
The path structure of Dark Dungeons makes random leaks easy to occur. Spiked Balls/Mines take care of them, and due to there only being 2 MOAB paths, only 2 Spiked Balls/Mines are needed for the late game. |
| Overdrive, The Tack Zone |  
|
The MOAB paths have several curves that allow for a large portion of Overdrive and Tack Zone's tacks to damage Bloons and blimps at once. They are best placed either right below the 2nd turnaround on the middle MOAB lane or right above the 1st turnaround on the top MOAB lane. Embrittlement, which helps both greatly, can more reliably hit Bloons and blimps, as these bends also give enough time for it to attack them. Pair them with Berserker Brew and Primary Training to further maximize their damage. |
| Arctic Knight | 
|
Arctic Knight takes advantage of the walls to keep rehitting Bloons in an enclosed region. Unlike Ultra-Juggernaut, Arctic Knight can specifically point its aim so it can cover each of the rooms, and multiple can be placed in the middle room. For the top MOAB lane, add Juggernaut so that Zebras won't leak. Bottom crosspath is recommended, as the ability remains mostly unaffected by crosspaths except innate Camo detection, and this also helps the main attack hit the lower MOAB lane during the ability's cooldown. |
| Juggernaut | 
|
Juggernauts in the left and right rooms can provide great stalling and damage against non-MOAB-Class Bloons, particularly reducing issues against rounds 83 and 91 which contain Super Ceramics on the non-MOAB lanes. 4-0-2 is necessary for innate Camo detection and extra range to keep targeting bloons along consistent angles. |
Update history
[edit | edit source]
|
This article or section uses Cargo to generate its content. It will automatically fill up as other articles are completed. To add to this section, create the articles it is looking up. Do not add content to this section manually and do not remove this notice until you are sure this section is complete. |
- Resolved a number of cases in which towers could target the Dark Dungeons statue for buffs even though they would not do anything. (bug fix)
- Dark Dungeons statue can no longer be selected as a Door Gunner target as with the range it has this only served to destroy it (bug fix)
 Dungeon Statue ball v2 projectile speed ― 24 → 30
- Dungeon Statue ball v2 damage ― 50 → 100
 Dungeon Statue ball v2 moab bonus ― 200 → 150
- Dungeon Statue ball v2 cost ― $150,000 → $100,000
- Dungeon Statue ball v3 projectile speed ― 24 → 36
- Dungeon Statue ball v2 damage ― 100 → 150
- Dungeon Statue ball v3 moab bonus ― 400 → 350
- Dungeon Statue ball v3 cost ― $300,000 → $200,000
- Spike Traps stun lifespan reduced ― 6s → 1s
- Level 1 Dungeon Statue: Price decreased ― $50,000 → $30,000
- Level 2 Dungeon Statue: Price decreased ― $100,000 → $50,000
- Level 3 Dungeon Statue: Price decreased ― $200,000 → $100,000
- Resolved an issue with Bloons moving too fast on Dark Dungeons in Reverse mode (bug fix)
- Dungeon Statue: Should no longer block tower placement in the ledge next to it after activation (bug fix)
Gallery
[edit | edit source]-
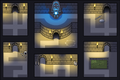 Concept art
 -
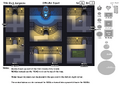 Concept information
 -
 Maximum Monkey Sub placements (6)
 -
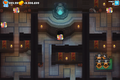 Maximum Monkey Buccaneer placements (4)
 -
 Maximum Mermonkey placements within water (9)
 -
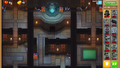
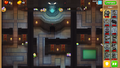 Easter theme
 -
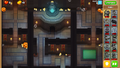
 Fireworks theme
 -
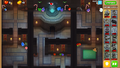
 Halloween theme
 -
 Holiday theme
 -
 Statue active at max Level. The monster Easter egg at the sludge pool is also visible
 -
 Island statue


In other languages
[edit | edit source]| Language | Text | Notes |
|---|---|---|
| Arabic | زنزانات مظلمة | — |
| Danish | Dunkle fangekældre | — |
| German | Düstere Dungeons | — |
| Spanish | Calabozos oscuros | — |
| Spanish (Latin America) | Calabozos oscuros | — |
| Finnish | Synkät tyrmät | — |
| French | Sombres donjons | — |
| Italian | Dungeon bui | — |
| Japanese | 道の真ん中 | — |
| Korean | 어두운 지하감옥 | — |
| Dutch | Duistere kerkers | — |
| Norwegian | Mørke fangetårn | — |
| Polish | Ciemna więzienna | — |
| Portuguese (Brazil) | Masmorras Sombrias | — |
| Russian | Тёмные пещеры | — |
| Swedish | Mörka fängelsehålor | — |
| Thai | ดันเจี้ยนมืดมิด | — |
| Turkish | Karanlık Zindanlar | — |
| Chinese (simplified) | 黑暗地下城 | — |
| Chinese (traditional) | 黑暗地牢 | — |
References
[edit | edit source]- Path lengths sourced from the BTD6 Index