MOAB (BCS): Difference between revisions
Jump to navigation
Jump to search
Qwertyxp2000 (talk | contribs) No edit summary |
Qwertyxp2000 (talk | contribs) |
||
| Line 23: | Line 23: | ||
==Tips== | ==Tips== | ||
*MOABs can pressure the opponent at most stages of the game, while additionally supplying Bloontonium. | *MOABs can pressure the opponent at most stages of the game, while additionally supplying Bloontonium. | ||
**For [[Quincy (BCS)|Quincy]] in particular, it is often more reliable than a [[BFB (BCS)|BFB]] for efficient Bloontonium. The MOAB's Bloontonium is a factor of 3, which allows your Quincy to do a | **For [[Quincy (BCS)|Quincy]] in particular, it is often more reliable than a [[BFB (BCS)|BFB]] for efficient Bloontonium. The MOAB's Bloontonium is a factor of 3, which allows your Quincy to do a Arrow Shot before sending another MOAB to reliably get back to full Bloontonium without overflow, whereas with the BFB its 7 Gold cost is more easy for him to overflow on Bloontonium. | ||
*During early rounds, a single MOAB pressures the opponent to use single-target damage to chip it down. For early rounds, it is often best to send one MOAB first and follow up with another MOAB to pile up the pressure, rather than two at once. | *During early rounds, a single MOAB pressures the opponent to use single-target damage to chip it down. For early rounds, it is often best to send one MOAB first and follow up with another MOAB to pile up the pressure, rather than two at once. | ||
Revision as of 22:51, 1 December 2024
For the MOAB in general, see MOAB.
MOAB

|
| The Mother of All Bloons! |
| Class |  Large Large
| |
|---|---|---|
| Card Pack | ||
| Rarity | Rare | |
| Keywords | — | |
| Introduced | Firstlook test | |
| Stats | |||||||||
|---|---|---|---|---|---|---|---|---|---|
| Cost |  6 6
|
Health | 500 | ||||||
| Charges | 2 | Delay | 4 | ||||||
The MOAB is a Large Bloon card in Bloons Card Storm. It has no special properties.
MOABs can naturally spawn from the Storm, always spawning on Round 9 (Player 2) and Round 10 (Player 1).
Tips
- MOABs can pressure the opponent at most stages of the game, while additionally supplying Bloontonium.
- For Quincy in particular, it is often more reliable than a BFB for efficient Bloontonium. The MOAB's Bloontonium is a factor of 3, which allows your Quincy to do a Arrow Shot before sending another MOAB to reliably get back to full Bloontonium without overflow, whereas with the BFB its 7 Gold cost is more easy for him to overflow on Bloontonium.
- During early rounds, a single MOAB pressures the opponent to use single-target damage to chip it down. For early rounds, it is often best to send one MOAB first and follow up with another MOAB to pile up the pressure, rather than two at once.
Update history
Version 0.8 (build 177)
 Health increased ― 450 → 500
- Charges increased ― 1 → 2
 Now animates when receiving a buff
Gallery

|
This article or section needs more screenshots. See the screenshot guidelines for more information on what screenshots are needed and how to add them. |
-
 Icon
Icon -
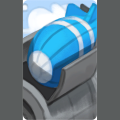 Placeholder art


Trivia
- The placeholder art for the MOAB depicts it emerging from a Blimp Construction Hangar from Bloons Monkey City.
In other languages
Navigation


| MOABs | ||||||||||
|---|---|---|---|---|---|---|---|---|---|---|
| ||||||||||
| Gallery | ||||||||||