Three Mines 'Round: Difference between revisions
EgoTesticle (talk | contribs) →Gallery: Added 4th of July screenshot |
|||
| (2 intermediate revisions by 2 users not shown) | |||
| Line 69: | Line 69: | ||
==Strategy== | ==Strategy== | ||
{{strategy needed|More strategy could be written to optimize crystals. Need a "basic map strategies" section as a new page for common vantage points such as curves, overlaps, intersections, straight lines, and more}} | {{strategy needed|More strategy could be written to optimize crystals. Need a "basic map strategies" section as a new page for common vantage points such as curves, overlaps, intersections, straight lines, and more}} | ||
{{BTD6 last updated| | {{BTD6 last updated|55.1|section=y}} | ||
Three Mines 'Round is among the easiest of the Beginner maps due to the loop being very long and giving most towers 3–4 | Three Mines 'Round is among the easiest of the Beginner maps due to the loop being very long and giving most towers 3–4 opportunities to target Bloons. While the coverage at the middle of the big loop is tempting, this location can be prone to chasing unless the tower has an area-of-effect (such as a range-buffed [[Inferno Ring (BTD6)|Inferno Ring]]). Instead, some of the optimal spots are near the parts of the lane that intersect. | ||
This map can be beaten with general strategies listed here. | |||
{{BTD6 basic map strategies}} | {{BTD6 basic map strategies}} | ||
The cheapest crystal is almost always worth harvesting, as it is more cost-efficient than early {{BTD6|Banana Farm}}s on Medium. Outside of CHIMPS, | The cheapest crystal is almost always worth harvesting, as it is more cost-efficient than early {{BTD6|Banana Farm}}s on Medium. Outside of CHIMPS, Deflation and Half Cash, though, the other crystals are not as efficient as traditional farming methods (even on Impoppable), and generally should only be removed if the space or open sight lines are needed. The last crystal especially is too expensive and leaves the player in a deficit for too long to be worth it outside of CHIMPS challenge runs, and it's the only crystal that does not provide extra land. It is generally better to invest in some crystals during easy rounds and ignore the more expensive crystals. | ||
== Update history == | == Update history == | ||
| Line 117: | Line 119: | ||
{{screenshot needed|Island statue}} | {{screenshot needed|Island statue}} | ||
<gallery> | <gallery> | ||
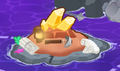
File:BTD6 Three Mines Round 4th of July.png|Fireworks Theme | |||
File:BTD6 Three Mines 'Round halloween.png|Halloween theme | File:BTD6 Three Mines 'Round halloween.png|Halloween theme | ||
File:BTD6 Three Mines Round Holiday.png|Holiday theme | File:BTD6 Three Mines Round Holiday.png|Holiday theme | ||
Latest revision as of 21:05, 2 July 2026

|
| Difficulty | Beginner | ||
|---|---|---|---|
| Music | Tropical Carnival | ||
| Default Co-op division | Free-for-all | ||
| Introduced | Version 51.0 | ||
| Entrances | 1 | Exits | 1 |
| Junctions | 1 | Water? | Yes |
| Removables and gizmos |
|---|
|
| Path lengths (RBS) | ||
|---|---|---|
| Easy | Medium | Hard |
| 52.1 | 47.4 | 41.7 |
Three Mines 'Round is a Beginner map in Bloons TD 6, introduced in version 51.0. It takes place in a desert with a layout based on 3 Times Around from Bloons TD 5.[1] It features removable Bananite[2] crystals that block line of sight and take several rounds to remove, but return more cash than they cost once removed.
Layout
[edit | edit source]The path starts at the top going down, loops three times anticlockwise around the center of the map, and exits at the bottom. The dried river to the left of the path has small puddles of water for water towers and allows land towers to be placed on the dried land and bridges, but not on the riverbanks. The rocks with Bananite crystals and the tent in the top-left block placement and line of sight.
Bananite crystals
[edit | edit source]This map features six rocks with Bananite crystals that take 10 rounds to remove, except the one in the bottom-right corner, which takes 20 rounds. They earn the same amount of cash on all modes and difficulty levels, even in CHIMPS, Half Cash, and Deflation, but not with Double Cash Mode. Visually, a monkey resembling a Bloontonium Miner appears and mines the crystals while it is being removed (three appear for the one in the bottom-right).
| Location | Cost | Returns | Profit | Total Profit |
|---|---|---|---|---|
| Under the loop | $435 | $870 | $435 | $435 |
| Left side | $3,000 | $4,600 | $1,600 | $2,035 |
| Bottom-right inside the loop | $10,000 | $15,000 | $5,000 | $7,035 |
| Above the loop | $25,000 | $37,000 | $12,000 | $19,035 |
| Top-left inside the loop | $50,000 | $72,000 | $22,000 | $41,035 |
| Bottom right corner | $100,000 | $160,000 | $60,000 | $101,035 |
Strategy
[edit | edit source]| This strategy section is empty or incomplete. See the strategy guidelines for more information on how to write strategy sections. The editor who added this notice elaborates: More strategy could be written to optimize crystals. Need a "basic map strategies" section as a new page for common vantage points such as curves, overlaps, intersections, straight lines, and more |
Three Mines 'Round is among the easiest of the Beginner maps due to the loop being very long and giving most towers 3–4 opportunities to target Bloons. While the coverage at the middle of the big loop is tempting, this location can be prone to chasing unless the tower has an area-of-effect (such as a range-buffed Inferno Ring). Instead, some of the optimal spots are near the parts of the lane that intersect.
This map can be beaten with general strategies listed here.
 Basic Deflation strategies
 Basic Apopalypse strategies
 Basic Half Cash strategies
 Basic Alternate Bloons Rounds strategies
 Basic Impoppable strategies
 Basic CHIMPS strategies
The cheapest crystal is almost always worth harvesting, as it is more cost-efficient than early Banana Farms on Medium. Outside of CHIMPS, Deflation and Half Cash, though, the other crystals are not as efficient as traditional farming methods (even on Impoppable), and generally should only be removed if the space or open sight lines are needed. The last crystal especially is too expensive and leaves the player in a deficit for too long to be worth it outside of CHIMPS challenge runs, and it's the only crystal that does not provide extra land. It is generally better to invest in some crystals during easy rounds and ignore the more expensive crystals.
Update history
[edit | edit source]| This article or section uses Cargo to generate its content. It will automatically fill up as other articles are completed. To add to this section, create the articles it is looking up. Do not add content to this section manually and do not remove this notice until you are sure this section is complete. |
 Resolved a bug where the mining state of Bananite Cystals was not saved properly on Boss Challenge / Boss Bloon Event checkpoints (bug fix)
- Bananite Crystal income is no longer affected by Double Cash Mode
Pre-release
[edit | edit source]This map was revealed during the update preview notes of version 51.0:
| “ | New Beginner Freeplay Challenge Map, Three Mines ‘Round!
|
” |

In the early access videos, Ethan Reid received a different build of the game compared to the rest of content creators and, along with an earlier name for the Ballistic Obliteration Missile Bunker, it showcased an earlier version of the map where it takes place at night, leading to darker lighting with brighter spots around the lamps and the campfire, and the costs and returns are assigned to different crystals.
| Location | Cost in Ethan Reid's video | Cost in other videos |
|---|---|---|
| Under the loop | $435 | $435 |
| Left side | $50,000 | $3,000 |
| Bottom-right inside the loop | $25,000 | $10,000 |
| Above the loop | $10,000 | $25,000 |
| Top-left inside the loop | $3,000 | $50,000 |
| Bottom right corner | $100,000 | $100,000 |
Gallery
[edit | edit source]| This article or section needs more screenshots. See the screenshot guidelines for more information on what screenshots are needed and how to add them. The editor that added this notice elaborates: Island statue |
-
 Fireworks Theme
 -
 Halloween theme
 -
 Holiday theme
 -
 Odyssey statue


In other languages
[edit | edit source]| Language | Text | Notes |
|---|---|---|
| Arabic | جولة ثلاثة مناجم | — |
| Danish | Three Mines 'Round | — |
| German | Drei Minen-Runde | — |
| Spanish | Tres Minas 'Ronda | — |
| Spanish (Latin America) | Tres Minas 'Ronda | — |
| Finnish | Kolme miinaa -kierros | — |
| French | Manche des Trois Mines | — |
| Italian | Round delle Tre Mine | — |
| Japanese | 3つの鉱山 | — |
| Korean | 세 개의 광산 | — |
| Dutch | Drie Mijnenronde | — |
| Norwegian | Tre minerunde | — |
| Polish | Trzy kopalnie dookoła | — |
| Portuguese (Brazil) | Rodada de Três Minas | — |
| Russian | Three Mines 'Round | — |
| Swedish | Tre minor-runda | — |
| Thai | สามระเบิด 'รอบ | — |
| Turkish | Üç Mayın Etrafında | — |
| Chinese (simplified) | 三矿回合 | — |
| Chinese (traditional) | 三個礦井 | — |
References
[edit | edit source]- ↑ 1.0 1.1 "Bloons TD 6 v51.0 - Update Preview!". Reddit. Retrieved Fri, 10 Oct 2025.
- ↑ "Discover the value of Bananite on the new Easy map, Three Mines 'Round!" — In-game description of the 51.0 update.
- Path lengths sourced from the BTD6 Index