Diamondback: Difference between revisions
mNo edit summary |
Qwertyxp2000 (talk | contribs) got all bosses, now I need someone to go fix the info (don't rely on me to do this) |
||
| (2 intermediate revisions by one other user not shown) | |||
| Line 32: | Line 32: | ||
=== Skulls === | === Skulls === | ||
Upon reaching a skull, Diamondback fully regenerates the Rattle Tail's shield, spawns more Bloons all over the track from its head and body segments, then loses one of its middle segments. It uses the same mechanics as its normal Bloon spawns, but with different Bloon types, usually including a number of [[Diamond Bloon|Diamond Bloons]]. Diamond Bloons spawned by Diamondback have modified health values based on the boss' current Tier; those spawned by Normal Diamondback additionally have their speed reduced to 20 (0.8× Red Bloon speed). | Upon reaching a skull, Diamondback fully regenerates the Rattle Tail's shield, spawns more Bloons all over the track from its head and body segments, then loses one of its middle segments. It uses the same mechanics as its normal Bloon spawns, but with different Bloon types, usually including a number of [[Diamond Bloon|Diamond Bloons]]. Diamond Bloons spawned by Diamondback have modified health values based on the boss' current Tier and are subject to Boss Health and Boss Speed modifiers; those spawned by Normal Diamondback additionally have their speed reduced to 20 (0.8× Red Bloon speed). | ||
Diamondback becomes invulnerable for 3 seconds after reaching a skull. A single attack cannot damage past a skull; for example if an attack normally deals 4,500 damage and Diamondback has only 1,000 health remaining to the next skull, that attack deals only 1,000 damage. | Diamondback becomes invulnerable for 3 seconds after reaching a skull. A single attack cannot damage past a skull; for example if an attack normally deals 4,500 damage and Diamondback has only 1,000 health remaining to the next skull, that attack deals only 1,000 damage. | ||
===[[Boss Rush]]=== | ===[[Boss Rush]]=== | ||
{{ | {{#lst:Boss Rush|Diamondback}} | ||
== Stats == | == Stats == | ||
| Line 49: | Line 49: | ||
=== Normal === | === Normal === | ||
{{BTD6 boss bloon health|20000|95000|444000|900000|3800000}}{{BTD6 boss bloon health| | {{BTD6 boss bloon health|20000|95000|444000|900000|3800000}}{{BTD6 boss bloon health|2000|9500|44400|90000|380000|label=Rattle Tail shield health}} | ||
{|class="wikitable stat" | {|class="wikitable stat" | ||
|+Bloons spawned | |+Bloons spawned | ||
| Line 84: | Line 84: | ||
=== Elite === | === Elite === | ||
{{BTD6 boss bloon health|95000|550000|4000000|15000000|65000000}}{{BTD6 boss bloon health| | {{BTD6 boss bloon health|95000|550000|4000000|15000000|65000000}}{{BTD6 boss bloon health|9500|55000|400000|150000|650000|label=Rattle Tail shield health}} | ||
{|class="wikitable stat" | {|class="wikitable stat" | ||
|+Bloons spawned | |+Bloons spawned | ||
| Line 123: | Line 123: | ||
== Strategy == | == Strategy == | ||
{{outdated|v55.0 Fortified shield reduction makes the shield easier to break outside of Boss Rush}} | |||
{{Main strategy}} | {{Main strategy}} | ||
{{BTD6 last updated|54.0|section=y}} | {{BTD6 last updated|54.0|section=y}} | ||
Latest revision as of 11:29, 6 June 2026
| Diamondback The Village Devourer | ||||||||||||||
|---|---|---|---|---|---|---|---|---|---|---|---|---|---|---|
| ||||||||||||||
| ||||||||||||||


Diamondback, titled The Village Devourer, is a Boss Bloon in Bloons TD 6. It was introduced in version 52.0 as an exclusive Boss to the Frontier Legends DLC, before becoming available in Boss Bloon Events, Boss Challenge, and Boss Rush in version 54.0. It is the third original boss in BTD6 after Lych and Phayze.[1] In Frontier Legends, Diamondback serves as the main antagonist to the story, where it destroyed the Sheriff's home and now threatens the entire Frontier.[2]
This boss is composed of multiple segments, with a head that blocks all piercing attacks and a shielded tail that, if it takes enough damage, can stun and debuff the Boss. It is able to spawn large numbers of supplementary Bloons as it loses health. Every time it reaches a skull threshold, Diamondback will shed one body segment in order to spawn an especially large wave of more powerful Bloons, and regrow the shield protecting its tail.
Mechanics
[edit | edit source]Segments
[edit | edit source]Diamondback consists of multiple segments in a row: a head segment, a tail segment, and 5 body segments (7 body segments for Elite Diamondback). Each segment behaves as a separate Bloon and can take damage, but they all share a single health bar. Projectiles have their pierce reduced by 10000 if they hit Diamondback's head segment, or reduced by 2 if they hit a body segment.
Rattle Tail
[edit | edit source]Diamondback's tail segment is protected by a shield with Fortified properties, represented by a secondary brown bar beneath its health bar. The health of the shield is always equal to 10% of Diamondback's maximum health for the current tier, including the extra health from co-op. When the Rattle Tail shield is destroyed, Diamondback becomes stunned for 12 seconds, the tail segment becomes susceptible to attack, and all segments take doubled damage from all sources until the shield regenerates. While the Rattle Tail shield is disabled, the zig-zagging lines on Diamondback's health bar will turn dull, its segments will visually crack, and the tail's health bar will turn bright blue and display "Vulnerable" text. The shield will regenerate after 60 seconds when destroyed.
Scattered Bloons
[edit | edit source]Each time Diamondback loses 1% of its health, its head segment and all of its body segments spawn a certain number of Bloons all over the track. The number and types of Bloons they spawn depends on Diamondback's tier and whether it is in Normal or Elite mode. These Bloons are briefly immune to damage upon spawning. Since each segment spawns its own Bloons, the number of Bloons spawned diminishes as Diamondback loses its segments.
Skulls
[edit | edit source]Upon reaching a skull, Diamondback fully regenerates the Rattle Tail's shield, spawns more Bloons all over the track from its head and body segments, then loses one of its middle segments. It uses the same mechanics as its normal Bloon spawns, but with different Bloon types, usually including a number of Diamond Bloons. Diamond Bloons spawned by Diamondback have modified health values based on the boss' current Tier and are subject to Boss Health and Boss Speed modifiers; those spawned by Normal Diamondback additionally have their speed reduced to 20 (0.8× Red Bloon speed).
Diamondback becomes invulnerable for 3 seconds after reaching a skull. A single attack cannot damage past a skull; for example if an attack normally deals 4,500 damage and Diamondback has only 1,000 health remaining to the next skull, that attack deals only 1,000 damage.
Diamondback always begins with 7 segments, and has similar Rattle Tail mechanics. Its segments break off when those parts get damaged enough, breaking one segment, starting from the 4th pop. Every time Diamondback pops, it produces spawns of Bloons. Every 10 pops, Diamondback regenerates all of its Rattle Tail and produces stronger spawns, including Diamond Bloons after a certain pop amount.
Stats
[edit | edit source]| Base speed | Red Bloon speed |
|---|---|
| 2 | 0.08× |
Normal
[edit | edit source]| Tier | 1-player | 2-player | 3-player | 4-player |
|---|---|---|---|---|
| 1 | 20,000 | 24,000 | 28,000 | 32,000 |
| 2 | 95,000 | 114,000 | 133,000 | 152,000 |
| 3 | 444,000 | 532,800 | 621,600 | 710,400 |
| 4 | 900,000 | 1,080,000 | 1,260,000 | 1,440,000 |
| 5 | 3,800,000 | 4,560,000 | 5,320,000 | 6,080,000 |
| Tier | 1-player | 2-player | 3-player | 4-player |
|---|---|---|---|---|
| 1 | 2,000 | 2,400 | 2,800 | 3,200 |
| 2 | 9,500 | 11,400 | 13,300 | 15,200 |
| 3 | 44,400 | 53,280 | 62,160 | 71,040 |
| 4 | 90,000 | 108,000 | 126,000 | 144,000 |
| 5 | 380,000 | 456,000 | 532,000 | 608,000 |
| Tier | Scattered per 1% health lost | Scattered at each skull | Diamond Bloon health |
|---|---|---|---|
| 1 | Zebra Bloon x1, Yellow Bloon x3, Blue Bloon x9 | Zebra Bloon x1, Fortified Ceramic Bloon x1 | —[fn 1] |
| 2 | Fortified Ceramic Bloon x1, Yellow Bloon x6, Blue Bloon x12 | Diamond Bloon x1, Fortified Ceramic Bloon x4 | 30 |
| 3 | Fortified Ceramic Bloon x3, Yellow Bloon x9, Blue Bloon x24 | Diamond Bloon x2, Fortified Ceramic Bloon x15 | 40 |
| 4 | Fortified Ceramic Bloon x10, Yellow Bloon x12, Blue Bloon x30 | Diamond Bloon x3, Fortified MOAB x12 | 50 |
| 5 | Fortified Ceramic Bloon x30, Yellow Bloon x15, Blue Bloon x36 | Diamond Bloon x5, Fortified BFB x6 | 80 |
Elite
[edit | edit source]| Tier | 1-player | 2-player | 3-player | 4-player |
|---|---|---|---|---|
| 1 | 95,000 | 114,000 | 133,000 | 152,000 |
| 2 | 550,000 | 660,000 | 770,000 | 880,000 |
| 3 | 4,000,000 | 4,800,000 | 5,600,000 | 6,400,000 |
| 4 | 15,000,000 | 18,000,000 | 21,000,000 | 24,000,000 |
| 5 | 65,000,000 | 78,000,000 | 91,000,000 | 104,000,000 |
| Tier | 1-player | 2-player | 3-player | 4-player |
|---|---|---|---|---|
| 1 | 9,500 | 11,400 | 13,300 | 15,200 |
| 2 | 55,000 | 66,000 | 77,000 | 88,000 |
| 3 | 400,000 | 480,000 | 560,000 | 640,000 |
| 4 | 150,000 | 180,000 | 210,000 | 240,000 |
| 5 | 650,000 | 780,000 | 910,000 | 1,040,000 |
| Tier | Scattered per 1% health lost | Scattered at each skull | Diamond Bloon health |
|---|---|---|---|
| 1 | Rainbow Bloon x1, Yellow Bloon x3, Blue Bloon x9 | Diamond Bloon x2, Fortified Ceramic Bloon x8 | 50 |
| 2 | Fortified Ceramic Bloon x1, Yellow Bloon x6, Blue Bloon x12 | Diamond Bloon x4, Fortified MOAB x4 | 60 |
| 3 | Fortified MOAB x1, Fortified Ceramic Bloon x3, Yellow Bloon x9 | Diamond Bloon x6, Fortified MOAB x8 | 70 |
| 4 | Fortified MOAB x3, Fortified Ceramic Bloon x12, Yellow Bloon x12 | Diamond Bloon x10, Fortified BFB x6 | 80 |
| 5 | Fortified MOAB x9, Fortified Ceramic Bloon x24, Yellow Bloon x15 | Diamond Bloon x15, Fortified BFB x12 | 100 |
- ↑ Internally, this tier is coded to spawn Diamond Bloons with 20 health, but this is impossible to see during normal gameplay.
Round changes
[edit | edit source]When facing Diamondback, some rounds are modified from the standard roundset. These rounds are identical to the ones used by Bloonarius, Phayze, and Blastapopoulos.
| № | Default | Modified | ||||||
|---|---|---|---|---|---|---|---|---|
| Bloon groups | Dur. | Base RBE | Base cash | Bloon groups | Dur. | Base RBE | Base cash | |
| 40 | MOAB×1 | 1.00s | 616 | $381 | Ceramic×6 | 18.00s | 624 | $570 |
| 60 | BFB×1 | 1.00s | 3,164 | $762.5 | MOAB×6 | 30.00s | 3,696 | $1,143 |
| 80 | ZOMG×1 | 2.00s | 16,656 | $1,220.2 | BFB×6 | 30.00s | 18,984 | $1,830 |
| 100 | BAD×1 | 0.10s | 56,584 | $1,334.6 | ZOMG×2 DDT×3 ZOMG×2 DDT×3 |
15.10s | 72,368 | $2,669 |
Strategy
[edit | edit source]| This article or section is outdated and needs to be updated to reflect recent updates or newly available information. You can help out by editing this article. The editor who added this notice elaborates: v55.0 Fortified shield reduction makes the shield easier to break outside of Boss Rush |
Diamondback is a boss that rewards planned positioning of towers with high pierce to take the greatest advantage of its body segments each independently taking damage. While damaging multiple segments at once allows towers to do major damage to the boss in spite of its imposing health pool, the head deletes all projectiles that touch it, rendering head-on attacks less effective, while its body also reduces incoming pierce to reduce the effectiveness of low-pierce attacks and quickly depleting terrain hazards such as Spike Factory piles. Towers are best positioned in locations where they can attack from the sides or back of the boss, or at parts of the map where Diamondback's segments will tightly bunch up or coil, maximizing the amount of segments a single projectile can hit at once. Because of the boss' multiple segments, damaging effects normally limited to one per Bloon also have increased effectiveness, with Master Bomber in particular being able to attach multiple simultaneous bombs to the boss and deal major damage.
Ironically, the best way to approach the Rattle Tail is simply to not engage with it at all, as its high health and full regeneration at each skull makes it hard to destroy without dealing enough collateral damage to other segments to reach the next skull threshold. In addition, the debuff will usually lead to the next skull being reached near-instantly because of the massive damage amplification, immediately regrowing the tail and causing the debuff to wear off, making the benefits short-lived and usually unnecessary compared to attacking the normal segments with piercing attacks. In addition, especially on Elite, the tail will only appear on screen when Diamondback has traversed a large amount of distance, further minimizing the time the player has to target it. The main benefit of going for the tail is it immobilizing Diamondback if broken, which can be beneficial depending on the map and boss modifiers.
A major threat, particularly in early tiers and/or Elite, are the Diamond Bloons scattered by Diamondback at skull thresholds. As they require a specific number of hits to destroy instead of raw damage, are immune to all impairing effects, absorb massive amounts of pierce in groups, incur massive life loss when leaking, and release a Fortified Ceramic even when popped, very few early defenses are capable of handling them. Recommended towers for Diamond Bloon cleanup are towers capable of fast attacks or rapid DoT, such as top-path Glue Gunner, Destroyer with Grape Shot, Dragon's Breath, and Overdrive/The Tack Zone. While Diamond Bloons are less of a threat in the later tiers when more defensive options are available, one must still keep a backup defense if the defense chosen to handle Diamondback relies on damage per hit, such as the M.A.D, Ballistic Obliteration Missile Bunker, or Goliath Doomship.
Update history
[edit | edit source]| This article or section uses Cargo to generate its content. It will automatically fill up as other articles are completed. To add to this section, create the articles it is looking up. Do not add content to this section manually and do not remove this notice until you are sure this section is complete. |
- Added to the main game in the following game modes: Boss Challenge, Boss Bloon Event, Boss Rush, Contested Territory and Rogue Legends
 Debuff while vulnerable increased ― +1 damage taken → x2 damage taken
| Tier | Changes |
|---|---|
| All |
|
| Normal tier 1 |
|
| Normal tiers 2–5 |
|
| Normal tier 5 |
|
| Elite tiers 1–5 |
|
 Rattle Tail: Can no longer be destroyed instantly under certain circumstances (bug fix)
- "Resolved a visual error where you could see 2 Diamondbacks"
- Now uses its Normal mode spawns in Elite mode in Rogue Legends
- Rattle Tail: Health reduced ― 12.5% → 10% of the tier's health
- Head: Projectile pierce penalty reduced ― -1,000,000,000 → -10,000
- Note: Attacks with "infinite" pierce usually have 9,999,999 pierce internally. If these projectiles hit the head, their pierce will no longer be reduced to 0
- Boss Rush: Rattle Tail base health reduced ― 125 → 150
Gallery
[edit | edit source]Screenshots
[edit | edit source]| This section needs more screenshots. See the screenshot guidelines for more information on what screenshots are needed and how to add them. |

Assets
[edit | edit source]-
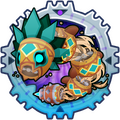
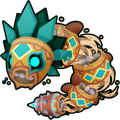 Diamondback
 -
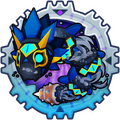
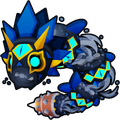 Elite Diamondback
 -
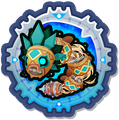
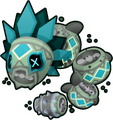 Diamondback (defeated)
 -
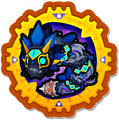
 Elite Diamondback (defeated)
 -
 Event icon
 -
 Diamondback menu icon
 -
 Elite Diamondback menu icon
 -
 Diamondback medal
 -
 Elite Diamondback medal
 -
 Logo
Logo


Trivia
[edit | edit source]- Diamondback's name is a reference to diamondback rattlesnakes and is visually inspired by the feathered serpent deities from Mesoamerican religions, with its head resembling the stone carved heads located at the Temple of the Feathered Serpent in the archeological site of Teotihuacan in Mexico.
- Ninja Kiwi has stated that the boss is inspired by an enemy from Bloons Supermonkey 2.[1] Although not officially stated, this enemy is highly likely to be the Worm.
References
[edit | edit source]- ↑ 1.0 1.1 "Diamondback, the new and terrifying multi-segment Boss Bloon
* This boss will be exclusive to Frontier at launch, but we will be adapting it for inclusion in the base game next year
* We’re sure players will work out all there is to know but we will share that it is a conglomerate boss inspired by Bloons Super Monkey 2
* Core mechanics revolve around Pierce and deliberate attacks that cause the boss to debuff itself" – Ninja Kiwi (Fri, 28 Nov 2025). "Bloons TD 6 v52.0 - Update Preview!". Reddit. Retrieved Fri, 28 Nov 2025. - ↑ Ninja Kiwi (Fri, 28 Nov 2025). "Ice Paragon & Frontier Legends | Coming Soon to Bloons TD 6!". YouTube. Retrieved Fri, 28 Nov 2025.
Navigation
[edit | edit source]| Bloons in Bloons TD 6 | ||||||||||||
|---|---|---|---|---|---|---|---|---|---|---|---|---|
|