Resort: Difference between revisions
mNo edit summary |
Pymonkibot (talk | contribs) m Text replacement - "[[Bloons TD 6 v" to "[[Update history:Bloons TD 6/Version " |
||
| (7 intermediate revisions by 5 users not shown) | |||
| Line 22: | Line 22: | ||
|coop division=4 | |coop division=4 | ||
}} | }} | ||
'''Resort''' is a [[Beginner]] [[map]] in ''[[Bloons TD 6]]'', introduced in [[Bloons TD 6 | '''Resort''' is a [[Beginner]] [[map]] in ''[[Bloons TD 6]]'', introduced in [[Update history:Bloons TD 6/Version 25.0|version 25.0]]. It takes place on a beach-like landscape. | ||
==Layout== | ==Layout== | ||
Resort is the | Resort is the 4th longest map in BTD6, only after [[Scrapyard]], [[Logs]], and [[Spa Pits]]. Bloons come in from the top-left, then loop clockwise once around the smallest rectangle, then the second smallest rectangle, and finally the largest rectangle before exiting at the top-right. The pool between the smallest and 2nd-smallest rectangular loops has good coverage and allows water-based strategies to function well. There are 9 line segments on Bloons' path adjacent to the space to the pool's top-right, making that space especially useful. Towers can be placed on the middle-left chairs, but not on the table. The 2 umbrellas and bottom-left palm tree block line-of-sight slightly. | ||
==Strategy== | ==Strategy== | ||
| Line 40: | Line 40: | ||
|[[Sauda (BTD6)|Sauda]] | |[[Sauda (BTD6)|Sauda]] | ||
|[[File:BTD6 SaudaPortrait.png|x50px]] | |[[File:BTD6 SaudaPortrait.png|x50px]] | ||
|Sauda, when placed in the top-right enclosed space, is extremely powerful. Put her (or any tower placed there) at a corner to leave space for other towers. In fact, on release, Sauda can solo all of CHIMPS, making her one of the only two towers/heroes to have a non-Coop 1 Tower CHIMPS completion, along with [[Geraldo (BTD6)|Geraldo]]. Although her solo power has since been nerfed, stuns such as [[Ice Monkey (BTD6)|Ice Monkeys]] and [[Relentless Glue (BTD6)|Relentless Glue]] grant her even more power than she had on release. | |Sauda, when placed in the top-right enclosed space, is extremely powerful. Put her (or any tower placed there) at a corner to leave space for other towers. In fact, on release, Sauda can solo all of CHIMPS on this map, making her one of the only two towers/heroes to have a non-Coop 1 Tower CHIMPS completion, along with [[Geraldo (BTD6)|Geraldo]]. Although her solo power has since been nerfed, stuns such as [[Ice Monkey (BTD6)|Ice Monkeys]] and [[Relentless Glue (BTD6)|Relentless Glue]] grant her even more power than she had on release. | ||
|- | |- | ||
|[[Overdrive (BTD6)|Overdrive]], [[The Tack Zone (BTD6)|The Tack Zone]] | |[[Overdrive (BTD6)|Overdrive]], [[The Tack Zone (BTD6)|The Tack Zone]] | ||
| Line 52: | Line 52: | ||
|[[Artillery Battery (BTD6)|Artillery Battery]], [[Pop and Awe (BTD6)|Pop and Awe]] | |[[Artillery Battery (BTD6)|Artillery Battery]], [[Pop and Awe (BTD6)|Pop and Awe]] | ||
|[[File:BTD6 040-MortarMonkey.png|x50px]] [[File:BTD6 050-MortarMonkey.png|x50px]] | |[[File:BTD6 040-MortarMonkey.png|x50px]] [[File:BTD6 050-MortarMonkey.png|x50px]] | ||
|When targeting the top-right loop, Artillery Battery sweeps through the mid-game with ease and saves up to Pop and Awe. If likewise targeted at the top-right loop, Pop and Awe trivializes the late-game, especially when given stun bonuses | |When targeting the top-right loop, Artillery Battery sweeps through the mid-game with ease and saves up to Pop and Awe. If likewise targeted at the top-right loop, Pop and Awe trivializes the late-game, especially when given stun bonuses from towers like [[Relentless Glue (BTD6)|Relentless Glue]]. Use [[First Strike Capability (BTD6)|First Strike]] or [[Spike Storm (BTD6)|Spike Storm]] to cover Pop and Awe's weakness against the BAD. [[Striker Jones (BTD6)|Striker Jones]] is optimal for both towers. | ||
|} | |} | ||
| Line 58: | Line 58: | ||
*Interacting with one of the umbrellas closes it, and interacting with it again reopens it. | *Interacting with one of the umbrellas closes it, and interacting with it again reopens it. | ||
*Interacting with the palm tree on the bottom-left corner makes a rustling sound and reveals a crab. | *Interacting with the palm tree on the bottom-left corner makes a rustling sound and reveals a crab. | ||
== Update history == | |||
{{BTD6 change list by name|Resort}} | |||
==Gallery== | ==Gallery== | ||
<gallery> | |||
BTD6 Resort easter.png|Easter theme | |||
BTD6 Resort fireworks.png|Fireworks theme | |||
BTD6 Resort halloween.png|Halloween theme | |||
BTD6 Resort holiday.png|Holiday theme | |||
BTD6 Resort island statue.png|Island statue | |||
</gallery> | |||
==In other languages== | ==In other languages== | ||
{{BTD6 | {{BTD6 last updated|48.1|section=y}} | ||
|ar | {{langlist | ||
|da | |key=Resort | ||
|de | |ar =منتجع | ||
|es | |da =Kursted | ||
|es-la | |de =Resort | ||
|fi | |es =Complejo turístico | ||
|fr | |es-la=Complejo turístico | ||
|it | |fi =Lomakohde | ||
|ja | |fr =Complexe touristique | ||
|ko | |it =Resort | ||
|nl | |ja =リゾート | ||
|no | |ko =리조트 | ||
|pl | |nl =Resort | ||
|pt-br | |no =Resort | ||
|ru | |pl =Kurort | ||
|sv | |pt-br=Resort | ||
|th | |ru =Курорт | ||
|tr | |sv =Semesteranläggning | ||
|zh-cn | |th =รีสอร์ท | ||
|zh-tw | |tr =Resort | ||
|zh-cn=度假胜地 | |||
|zh-tw=度假勝地 | |||
}} | |||
==See also== | |||
*[[Last Resort]] | |||
==References== | ==References== | ||
Latest revision as of 00:59, 24 April 2026

|
| Difficulty | Beginner | ||
|---|---|---|---|
| Music | Sunshine Serenade | ||
| Default Co-op division | Diagonal (top-right to bottom-left) | ||
| Introduced | Version 25.0 | ||
| Entrances | 1 | Exits | 1 |
| Junctions | 0 | Water? | Yes |
| Path lengths (RBS) | ||
|---|---|---|
| Easy | Medium | Hard |
| 59.8 | 54.3 | 47.8 |
Resort is a Beginner map in Bloons TD 6, introduced in version 25.0. It takes place on a beach-like landscape.
Layout
[edit | edit source]Resort is the 4th longest map in BTD6, only after Scrapyard, Logs, and Spa Pits. Bloons come in from the top-left, then loop clockwise once around the smallest rectangle, then the second smallest rectangle, and finally the largest rectangle before exiting at the top-right. The pool between the smallest and 2nd-smallest rectangular loops has good coverage and allows water-based strategies to function well. There are 9 line segments on Bloons' path adjacent to the space to the pool's top-right, making that space especially useful. Towers can be placed on the middle-left chairs, but not on the table. The 2 umbrellas and bottom-left palm tree block line-of-sight slightly.
Strategy
[edit | edit source]By consensus, Resort is the 2nd easiest map in BTD6, only after Logs. The many loops, straight lines, and repeated passings of Bloons/blimps over the top lane allow towers to maximize their pierce and make Resort extremely simple to defeat. The enclosed space to the top-right of the pool is especially optimal for towers that perform well in loops, such as Tack Shooters and Ice Monkeys. In fact, towers that take good advantage of the top straight line or loops around the top-right often perform even better than on Logs. Using general guidelines, Resort could be beaten with ease.
 Basic Deflation strategies
 Basic Apopalypse strategies
 Basic Half Cash strategies
 Basic Alternate Bloons Rounds strategies
 Basic Impoppable strategies
 Basic CHIMPS strategies
The top-right loop makes towers listed below excel.
Recommended towers and upgrades
[edit | edit source]| Name | Portrait | Reasoning |
|---|---|---|
| Sauda | 
|
Sauda, when placed in the top-right enclosed space, is extremely powerful. Put her (or any tower placed there) at a corner to leave space for other towers. In fact, on release, Sauda can solo all of CHIMPS on this map, making her one of the only two towers/heroes to have a non-Coop 1 Tower CHIMPS completion, along with Geraldo. Although her solo power has since been nerfed, stuns such as Ice Monkeys and Relentless Glue grant her even more power than she had on release. |
| Overdrive, The Tack Zone |  
|
The top-right enclosed space is optimal for both towers, with all tacks being able to hit Bloons for an extended period of time. The top of the enclosed space is optimal for both due to the Bloons at the top being within the kill-zone (with all tacks hitting), but the bottom can work as well if space runs out. Pair both with Berserker Brew, which grants them vastly increased damage, and Geraldo, whose Sharpening Stone and Jar of Pickles pairs well with both. |
| Embrittlement | 
|
When placed in the space within the top-right loop, Embrittlement decamos reliably, does decent damage with its shards, and debuffs all Bloons & blimps that it hits to take +1 damage, which is especially useful with towers that deal 1 base damage, such as Overdrive. |
| Artillery Battery, Pop and Awe |  
|
When targeting the top-right loop, Artillery Battery sweeps through the mid-game with ease and saves up to Pop and Awe. If likewise targeted at the top-right loop, Pop and Awe trivializes the late-game, especially when given stun bonuses from towers like Relentless Glue. Use First Strike or Spike Storm to cover Pop and Awe's weakness against the BAD. Striker Jones is optimal for both towers. |
Easter eggs
[edit | edit source]- Interacting with one of the umbrellas closes it, and interacting with it again reopens it.
- Interacting with the palm tree on the bottom-left corner makes a rustling sound and reveals a crab.
Update history
[edit | edit source]
|
This article or section uses Cargo to generate its content. It will automatically fill up as other articles are completed. To add to this section, create the articles it is looking up. Do not add content to this section manually and do not remove this notice until you are sure this section is complete. |
 Stairs in the top corners on Resort are now placement blockers
Gallery
[edit | edit source]-
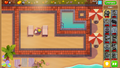 Easter theme
 -
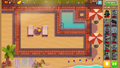 Fireworks theme
 -
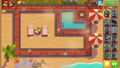 Halloween theme
 -
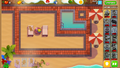 Holiday theme
 -
 Island statue


In other languages
[edit | edit source]| Language | Text | Notes |
|---|---|---|
| Arabic | منتجع | — |
| Danish | Kursted | — |
| German | Resort | — |
| Spanish | Complejo turístico | — |
| Spanish (Latin America) | Complejo turístico | — |
| Finnish | Lomakohde | — |
| French | Complexe touristique | — |
| Italian | Resort | — |
| Japanese | リゾート | — |
| Korean | 리조트 | — |
| Dutch | Resort | — |
| Norwegian | Resort | — |
| Polish | Kurort | — |
| Portuguese (Brazil) | Resort | — |
| Russian | Курорт | — |
| Swedish | Semesteranläggning | — |
| Thai | รีสอร์ท | — |
| Turkish | Resort | — |
| Chinese (simplified) | 度假胜地 | — |
| Chinese (traditional) | 度假勝地 | — |
See also
[edit | edit source]References
[edit | edit source]- Path lengths sourced from the BTD6 Index