Cubism: Difference between revisions
mNo edit summary |
Pymonkibot (talk | contribs) m Text replacement - "BTD6 (.*) easter\.png\|Easter theme" to "BTD6 $1 easter.png|Easter theme BTD6 $1 fireworks.png|Fireworks theme" |
||
| (2 intermediate revisions by 2 users not shown) | |||
| Line 28: | Line 28: | ||
==Strategy== | ==Strategy== | ||
Cubism is widely seen as the 4th easiest map in BTD6, after Logs, Resort, and [[Spa Pits]] | Cubism is widely seen as the 4th easiest map in BTD6, after Logs, Resort, and [[Spa Pits]]. This is due to the many intersections, the very long track length, the ability to place down water towers, and the center and its immediate left having very optimal tower spots. It is easily beatable using recommended strategies found below. | ||
{{BTD6 basic map strategies}} | {{BTD6 basic map strategies}} | ||
Some towers excel on Cubism in particular, and they are listed below. | Some towers excel on Cubism in particular, and they are listed below. | ||
| Line 43: | Line 43: | ||
==Gallery== | ==Gallery== | ||
<gallery> | |||
BTD6 Cubism easter.png|Easter theme | |||
BTD6 Cubism fireworks.png|Fireworks theme | |||
BTD6 Cubism halloween.png|Halloween theme | |||
BTD6 Cubism holiday.png|Holiday theme | |||
BTD6 Cubism island statue.png|Island statue | |||
</gallery> | </gallery> | ||
==In other languages== | ==In other languages== | ||
{{BTD6 | {{BTD6 last updated|48.1|section=y}} | ||
|ar | {{langlist | ||
|da | |key=Cubism | ||
|de | |ar =التكعيبية | ||
|es | |da =Kubisme | ||
|es-la | |de =Kubismus | ||
|fi | |es =Cubismo | ||
|fr | |es-la=Cubismo | ||
|it | |fi =Kubismi | ||
|ja | |fr =Cubisme | ||
|ko | |it =Cubismo | ||
|nl | |ja =キュービズム | ||
|no | |ko =입체파 | ||
|pl | |nl =Kubisme | ||
|pt-br | |no =Kubisme | ||
|ru | |pl =Kubizm | ||
|sv | |pt-br=Cubismo | ||
|th | |ru =Кубизм | ||
|tr | |sv =Kubism | ||
|zh-cn | |th =ศิลปะแบบเหลี่ยม | ||
|zh-tw | |tr =Kübizm | ||
|zh-cn=立体主义 | |||
|zh-tw=立體主義 | |||
}} | }} | ||
Latest revision as of 20:10, 6 July 2025

|
| Difficulty | Beginner | ||
|---|---|---|---|
| Music | Sunshine Serenade | ||
| Default Co-op division | Free-for-all | ||
| Introduced | Launch | ||
| Entrances | 1 | Exits | 1 |
| Junctions | 0 | Water? | Yes |
| Path lengths (RBS) | ||
|---|---|---|
| Easy | Medium | Hard |
| 54.1 | 49.2 | 43.3 |
Cubism is a Beginner map in Bloons TD 6. It takes place on a concrete surface decorated with abstract art. It is named after a 20th century art movement characterized by abstract geometric shapes.
Layout
[edit | edit source]Cubism's track envelops many geometric shapes, mostly triangles, with 5 triangles on this map. In addition, one quadrilateral and one hexagon are enveloped by the track. There are many intersections toward the left of the map's center, making this section of the map optimal for tower placements. Cubism is the 5th longest map in BTD6, after Scrapyard, Logs, Spa Pits, and Resort.
Strategy
[edit | edit source]Cubism is widely seen as the 4th easiest map in BTD6, after Logs, Resort, and Spa Pits. This is due to the many intersections, the very long track length, the ability to place down water towers, and the center and its immediate left having very optimal tower spots. It is easily beatable using recommended strategies found below.
 Basic Deflation strategies
 Basic Apopalypse strategies
 Basic Half Cash strategies
 Basic Alternate Bloons Rounds strategies
 Basic Impoppable strategies
 Basic CHIMPS strategies
Some towers excel on Cubism in particular, and they are listed below.
Recommended towers and upgrades
[edit | edit source]| Name | Portrait | Reasoning |
|---|---|---|
| Overdrive | 
|
The small shapes in the middle are very optimal spots for Overdrive. Place it as close to the top of a shape as possible, as the kill zone, where all tacks hit the Bloon, is right above where the tower is placed. Use a Berserker Brew and Geraldo to maximize its power. |
Gallery
[edit | edit source]-
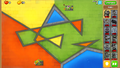 Easter theme
 -
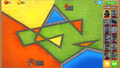 Fireworks theme
 -
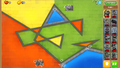 Halloween theme
 -
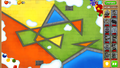 Holiday theme
 -
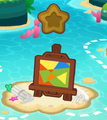 Island statue


In other languages
[edit | edit source]| Language | Text | Notes |
|---|---|---|
| Arabic | التكعيبية | — |
| Danish | Kubisme | — |
| German | Kubismus | — |
| Spanish | Cubismo | — |
| Spanish (Latin America) | Cubismo | — |
| Finnish | Kubismi | — |
| French | Cubisme | — |
| Italian | Cubismo | — |
| Japanese | キュービズム | — |
| Korean | 입체파 | — |
| Dutch | Kubisme | — |
| Norwegian | Kubisme | — |
| Polish | Kubizm | — |
| Portuguese (Brazil) | Cubismo | — |
| Russian | Кубизм | — |
| Swedish | Kubism | — |
| Thai | ศิลปะแบบเหลี่ยม | — |
| Turkish | Kübizm | — |
| Chinese (simplified) | 立体主义 | — |
| Chinese (traditional) | 立體主義 | — |
References
[edit | edit source]- Path lengths sourced from the BTD6 Index