Geared: Difference between revisions
Kumquatbagel (talk | contribs) mNo edit summary |
Qwertyxp2000 (talk | contribs) →Strategy: strategy section sounds good imo |
||
| (6 intermediate revisions by 5 users not shown) | |||
| Line 1: | Line 1: | ||
{{BTD6 map info | {{About|the map in BTD6|the area in [[Frontier Legends]] inspired by this map|Geared (Frontier Legends)}}{{BTD6 map info | ||
|id=Geared | |id=Geared | ||
| Line 22: | Line 22: | ||
|coop division=0 | |coop division=0 | ||
}} | }} | ||
'''Geared''' is an [[Advanced]] [[map]] in ''[[Bloons TD 6]]'', introduced in [[Bloons TD 6 | '''Geared''' is an [[Advanced]] [[map]] in ''[[Bloons TD 6]]'', introduced in [[Update history:Bloons TD 6/Version 16.0|version 16.0]]. It takes place on a large, rotating clockwork mechanism. It is one of only two maps with moving and rotating platforms, the other being [[Sanctuary]]. | ||
Geared was designed by /u/Clawz114 as part of a contest to celebrate 50k subscribers to the r/BTD6 subreddit, where fans could make their own map designs. It and [[Bazaar]] ended up winning.<ref>https://www.reddit.com/r/btd6/comments/eptr7o/map_competiton_part_2_the_final_vote/</ref> | Geared was designed by /u/Clawz114 as part of a contest to celebrate 50k subscribers to the r/BTD6 subreddit, where fans could make their own map designs. It and [[Bazaar]] ended up winning.<ref>https://www.reddit.com/r/btd6/comments/eptr7o/map_competiton_part_2_the_final_vote/</ref> | ||
==Layout== | ==Layout== | ||
Geared has a single lane, with Bloons entering from the left, making a half-circle around the upper half of the large gear, and exiting on the right. This map features two rotating platforms: a large gear that rotates 45° clockwise each round, and a smaller gear that rotates 108° clockwise each round. When the platforms rotate, towers placed on them also move and rotate. Towers on the outer gear return to their initial positions and rotations every 8 rounds, while towers on the middle gear return to their initial positions and rotations every 10 rounds. | Geared has a single lane, with Bloons entering from the left, making a half-circle around the upper half of the large gear, and exiting on the right. This map features two rotating platforms: a large gear that rotates 45° clockwise at the end each round, and a smaller gear that rotates 108° clockwise at the end each round. When the platforms rotate, towers placed on them also move and rotate. Towers on the outer gear return to their initial positions and rotations every 8 rounds, while towers on the middle gear return to their initial positions and rotations every 10 rounds. | ||
Geared only has two placeable areas: the large outer gear and the small gear in the middle. The large gear's placeable area is actually a circle that extends over all the teeth, allowing towers to be placed in the air between the teeth. | Geared only has two placeable areas: the large outer gear and the small gear in the middle. The large gear's placeable area is actually a circle that extends over all the teeth, allowing towers to be placed in the air between the teeth. | ||
==Strategy== | ==Strategy== | ||
The hardest part of Geared is the early game, particularly in [[CHIMPS]] and [[Half Cash]]. The rotating mechanic of this map often puts early game towers out of action, and with [[Monkey Ace (BTD6)|Monkey Aces]] and [[Heli Pilot (BTD6)|Heli Pilots]] being unaffordable, [[Sniper Monkey (BTD6)|Sniper Monkeys]] are usually the only option to get past the early game. The sheer difficulty of the early game makes Geared one of the hardest Advanced maps in BTD6. After the early game, however, the gameplay becomes much easier with the affording of high-damage, global-range towers such as [[Comanche Defense (BTD6)|Comanche Defense]] and [[Spectre (BTD6)|Spectre]], making the latter part of Geared's gameplay much more closely resemble an average Advanced map. | {{BTD6 last updated|55.2|section=y}} | ||
The hardest part of Geared is the early game, particularly in [[CHIMPS]] and [[Half Cash]]. The rotating mechanic of this map often puts early game towers out of action, and with [[Monkey Ace (BTD6)|Monkey Aces]] and [[Heli Pilot (BTD6)|Heli Pilots]] being unaffordable, [[Sniper Monkey (BTD6)|Sniper Monkeys]] are usually the only option to get past the early game. The sheer difficulty of the early game makes Geared one of the hardest Advanced maps in ''BTD6''. After the early game, however, the gameplay becomes much easier with the affording of high-damage, global-range towers such as [[Comanche Defense (BTD6)|Comanche Defense]] and [[Spectre (BTD6)|Spectre]], making the latter part of Geared's gameplay much more closely resemble an average Advanced map. | |||
===Recommended towers and upgrades=== | ===Recommended towers and upgrades=== | ||
| Line 43: | Line 44: | ||
|[[File:BTD6 CorvusPortrait.png|x50px]] | |[[File:BTD6 CorvusPortrait.png|x50px]] | ||
|His Spirit and his Spear spell are not inhibited by the map's rotation, allowing him to trivialize the difficult early game. In the midgame, his level 7 Spirit Walk ability allows him to constantly farm mana and his spells can save up tens of thousands. Active micromanagement of his spells, especially Ancestral Might and Overload, maintain his power into the late game. | |His Spirit and his Spear spell are not inhibited by the map's rotation, allowing him to trivialize the difficult early game. In the midgame, his level 7 Spirit Walk ability allows him to constantly farm mana and his spells can save up tens of thousands. Active micromanagement of his spells, especially Ancestral Might and Overload, maintain his power into the late game. | ||
|- | |||
|[[Rosalia (BTD6)|Rosalia]] | |||
|[[File:BTD6 RosaliaPortrait.png|x50px]] | |||
|Rosalia can only reposition around her workshop initially, but once she reaches level 7, she will hover in place uninhibited by the map's rotation, the only caveat being if she needs to reposition she needs to return within range of her workshop. Her Monkey Ace and Heli Pilot discounts are also desirable due to their strength on this map. | |||
|- | |- | ||
|[[Sniper Monkey (BTD6)|Sniper Monkey]] | |[[Sniper Monkey (BTD6)|Sniper Monkey]] | ||
| Line 52: | Line 57: | ||
|Because the Heli Pilot has global range, the top and bottom path tier 5 of the tower can work as a wincon and the lower tiers can also make the earlygame/midgame way easier. | |Because the Heli Pilot has global range, the top and bottom path tier 5 of the tower can work as a wincon and the lower tiers can also make the earlygame/midgame way easier. | ||
|} | |} | ||
===CHIMPS Starts=== | |||
{{#ev:youtube|Ds70D818rQE|dimensions=320x240px}} | |||
==Gallery== | ==Gallery== | ||
| Line 58: | Line 66: | ||
BTD6 geared WIP.png|Work-in-progress version | BTD6 geared WIP.png|Work-in-progress version | ||
BTD6 Geared easter.png|Easter theme | BTD6 Geared easter.png|Easter theme | ||
BTD6 Geared fireworks.png|Fireworks theme | |||
BTD6 Geared halloween.png|Halloween theme | BTD6 Geared halloween.png|Halloween theme | ||
BTD6 Geared holiday.png|Holiday theme | BTD6 Geared holiday.png|Holiday theme | ||
Latest revision as of 11:01, 14 June 2026

|
| Difficulty | Advanced | ||
|---|---|---|---|
| Music | Sunset Samba | ||
| Default Co-op division | Free-for-all | ||
| Introduced | Version 16.0 | ||
| Entrances | 1 | Exits | 1 |
| Junctions | 0 | Water? | No |
| Path lengths (RBS) | ||
|---|---|---|
| Easy | Medium | Hard |
| 17.4 | 15.8 | 13.9 |
Geared is an Advanced map in Bloons TD 6, introduced in version 16.0. It takes place on a large, rotating clockwork mechanism. It is one of only two maps with moving and rotating platforms, the other being Sanctuary.
Geared was designed by /u/Clawz114 as part of a contest to celebrate 50k subscribers to the r/BTD6 subreddit, where fans could make their own map designs. It and Bazaar ended up winning.[1]
Layout
[edit | edit source]Geared has a single lane, with Bloons entering from the left, making a half-circle around the upper half of the large gear, and exiting on the right. This map features two rotating platforms: a large gear that rotates 45° clockwise at the end each round, and a smaller gear that rotates 108° clockwise at the end each round. When the platforms rotate, towers placed on them also move and rotate. Towers on the outer gear return to their initial positions and rotations every 8 rounds, while towers on the middle gear return to their initial positions and rotations every 10 rounds.
Geared only has two placeable areas: the large outer gear and the small gear in the middle. The large gear's placeable area is actually a circle that extends over all the teeth, allowing towers to be placed in the air between the teeth.
Strategy
[edit | edit source]The hardest part of Geared is the early game, particularly in CHIMPS and Half Cash. The rotating mechanic of this map often puts early game towers out of action, and with Monkey Aces and Heli Pilots being unaffordable, Sniper Monkeys are usually the only option to get past the early game. The sheer difficulty of the early game makes Geared one of the hardest Advanced maps in BTD6. After the early game, however, the gameplay becomes much easier with the affording of high-damage, global-range towers such as Comanche Defense and Spectre, making the latter part of Geared's gameplay much more closely resemble an average Advanced map.
Recommended towers and upgrades
[edit | edit source]| Name | Portrait | Reasoning |
|---|---|---|
| Corvus | 
|
His Spirit and his Spear spell are not inhibited by the map's rotation, allowing him to trivialize the difficult early game. In the midgame, his level 7 Spirit Walk ability allows him to constantly farm mana and his spells can save up tens of thousands. Active micromanagement of his spells, especially Ancestral Might and Overload, maintain his power into the late game. |
| Rosalia | 
|
Rosalia can only reposition around her workshop initially, but once she reaches level 7, she will hover in place uninhibited by the map's rotation, the only caveat being if she needs to reposition she needs to return within range of her workshop. Her Monkey Ace and Heli Pilot discounts are also desirable due to their strength on this map. |
| Sniper Monkey | 
|
They are largely unaffected by the map's rotation and are crucial to the early game and saving up to Corvus in the early game in Half Cash and CHIMPS. The lack of line-of-sight blockers solidifies their capability further. |
| Heli Pilot | 
|
Because the Heli Pilot has global range, the top and bottom path tier 5 of the tower can work as a wincon and the lower tiers can also make the earlygame/midgame way easier. |
CHIMPS Starts
[edit | edit source]Gallery
[edit | edit source]-
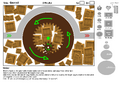 Concept art
 -
 Work-in-progress version
 -
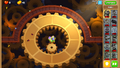 Easter theme
 -
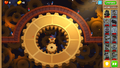 Fireworks theme
 -
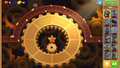 Halloween theme
 -
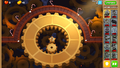 Holiday theme
 -
 Island statue


In other languages
[edit | edit source]| Language | Text | Notes |
|---|---|---|
| Arabic | موجه | — |
| Danish | Gearet | — |
| German | Vorbereitet | — |
| Spanish | Mecanizado | — |
| Spanish (Latin America) | Mecanizado | — |
| Finnish | Ratas | — |
| French | Mécanismes | — |
| Italian | Ingranaggi | — |
| Japanese | ギアアップ | — |
| Korean | 톱니바퀴 | — |
| Dutch | Tandwielen | — |
| Norwegian | Tannjuling | — |
| Polish | Zębatka | — |
| Portuguese (Brazil) | Engrenado | — |
| Russian | Шестерни | — |
| Swedish | Kugghjul | — |
| Thai | ฟันเฟือง | — |
| Turkish | Dişli | — |
| Chinese (simplified) | 齿轮传动 | — |
| Chinese (traditional) | 準備就緒 | — |
References
[edit | edit source]- Path lengths sourced from the BTD6 Index