Dreadbloon (BCS): Difference between revisions
Hubianzhen (talk | contribs) |
Hubianzhen (talk | contribs) |
||
| Line 312: | Line 312: | ||
==="Highest score"=== | ==="Highest score"=== | ||
For purposes of scoring as high as possible and reaching the top positions on the leaderboards, it is recommended to run a [[Zee Jay (BCS)|Zee Jay]] deck that buffs a single monkey, usually one that attacks twice like [[Robo Monkey (BCS)|Robo Monkey]], for taking out entire boss phases with massive amounts of damage in one to few turns. Commonly used buffing options include Rad Enhancements, Berserker Brew, [[Stylish Finish]], and [[Quick Reload]]. [[Barrel of Monkeys]] may be used to pop Rock Bloons that get in the way of the main damage dealer or replace [[Quincy Action Figure]] for extra Gold while performing combos. [[Supply Drop (BCS)|Supply Drop]] is desired for acquiring more cards to combo with while the player has surplus Gold in later turns. However, this deck is very RNG dependent, as multiple | For purposes of scoring as high as possible and reaching the top positions on the leaderboards, it is recommended to run a [[Zee Jay (BCS)|Zee Jay]] deck that buffs a single monkey, usually one that attacks twice like [[Robo Monkey (BCS)|Robo Monkey]], for taking out entire boss phases with massive amounts of damage in one to few turns. Commonly used buffing options include Rad Enhancements, Berserker Brew, [[Stylish Finish]], and [[Quick Reload]]. [[Barrel of Monkeys]] may be used to pop Rock Bloons that get in the way of the main damage dealer or replace [[Quincy Action Figure]] for extra Gold while performing combos. [[Supply Drop (BCS)|Supply Drop]] is desired for acquiring more cards to combo with while the player has surplus Gold in later turns. However, this deck is very RNG dependent, as multiple attempts may be needed to mulligan for an optimal early setup and find the necessary cards to get enough damage to finish off the boss, while avoiding having the damage dealer be removed due to skull effects with Monkey removal. | ||
==="Any damage"=== | ==="Any damage"=== | ||
Revision as of 02:47, 5 November 2025

Dreadbloon is a Boss Bloon in Bloons Card Storm, introduced in version 4.0. It primarily focuses on the Armor mechanic, spawning Rock Bloons, and destroying and disrupting the player's side in other ways. It has three different versions, each with a different deck and set of Hero Abilities. Its decks mainly contain Bloons with Armor, and it has several exclusive cards. It is accessed only in Boss Battle, with additional rules and skull effects when triggered (e.g. dropping Rock Piles that block the player's playable spaces). All games against Dreadbloon are played on Dread Depths and use Primal One as the theme song.
Stage 1
| Dreadbloon | |||||||||||||||||
|---|---|---|---|---|---|---|---|---|---|---|---|---|---|---|---|---|---|
| |||||||||||||||||


Stage 1 Dreadbloon focuses the most on the Armor mechanic, and has cards and abilities that increase Health or Armor to its Bloons.
- Let's Rock! − Passively spawns a Rock Bloon at the start of each turn and grants it Armor equal to 5 times the current Phase number.
- Armor Up − Grants a target Bloon Armor equal to 10 times the current Phase number.
- Crushing Time — Grants 40 Health to all of Dreadbloon's Bloons that have Armor.
Deck
|


Stage 2
| Dreadbloon (Deck Manipulation) | |||||||||||||||||
|---|---|---|---|---|---|---|---|---|---|---|---|---|---|---|---|---|---|
| |||||||||||||||||


Stage 2 Dreadbloon focuses on sabotaging the player's deck with Avalanche cards, which deal damage while held in the hand until the player spends Gold to remove them, and includes cards that sabotage the player's Monkeys. Despite being named Stage 2, it's the third stage since the first few events.
- Bring it Down − Passively spawns a Rock Bloon at the start of each turn, then inserts an Avalanche card into the player's deck.
- More Cards Now! − Causes both the player and Dreadbloon to draw cards equal to the current Phase number.
- Shields Up — Grants Dreadbloon 100 Shield and adds an extra Avalanche card each turn.
Deck
|


Stage 3
| Dreadbloon (Board Destruction) | |||||||||||||||||
|---|---|---|---|---|---|---|---|---|---|---|---|---|---|---|---|---|---|
| |||||||||||||||||


Stage 3 Dreadbloon focuses on removing the opponent's Monkeys and Bloons and punishing the player for playing cards. Despite being named Stage 3, it's the second stage since the first few events.
- Rock, Pop and Awe − Spawns a Rock Bloon, then triggers an additional effect depending on the turn number. On even-numbered turns, it causes Dreadbloon to deal 20 damage per phase to the first enemy Bloon. On odd-numbered turns, it permanently reduces the ATK of the enemy Monkey with the highest ATK by 5 per phase. If no target exists for the second effect, it does not trigger.
- Bloon Removal Time − Removes the first enemy Bloon. If there's no enemy Bloons, the opponent instead loses 2 Gold per phase.
- Monkey Removal Time — Removes the enemy Monkey with the highest cost. If there's a tiebreaker, the oldest is removed. If no enemy Monkeys are present, it summons a Lead Zeppelin instead.
Deck
|


Exclusive cards
Template:BCS card list by exclusive
Strategy

|
This strategy section is empty or incomplete. See the strategy guidelines for more information on how to write strategy sections. |
Overall, Dreadbloon focuses on self-protection, summoning of Rock Bloons every round, and swarming Bloons, and occasionally sabotaging the player's Bloons and Monkeys. Depending on its stage, change your deck to focus on countering Dreadbloon's decks.
Aim to build a control deck to sustain across many rounds and Dreadbloon phases, but if the budget doesn't allow due to crafting costs, a midrange or basic aggro deck can be used to ensure at least some score against Dreadbloon. Choose a Hero that is reliably defensive, such as Gwendolin or Adora. High damage board clears and relatively cheap Monkeys are recommended to bring for decks.
Do retry the battle occasionally if RNG doesn't favor you. Sometimes, the cards draw at the wrong time. Dreadbloon may sometimes be more lucky enough to obtain cards that easily dispatch your cards.
All Stages

|
This section is incomplete. You can help out by expanding it. The editor who added this notice elaborates: Add cards that are recommended, and try to rewrite the section in terms of preferred playstyles to use |
The following cards are recommended for all stages, to certain extents:
- Missile Launcher: Very synergetic with buffs to ammo and ATK. Berserker Brew, reload cards (e.g. Orders Received), and Striker Jones' Ammo Stores are recommended synergies.
- The Eternal: As Dreadbloon's playstyle de-incentivizes Bloon-focused decks (especially due to Wrath of Dread and Immunity), The Eternal's endless scaling and near-unlimited draw (unless deck is full) is a powerful asset to beating all tiers.
- Bloonsday Device: If all goes poorly, Bloonsday Device can reset the entire Bloon queues.
- Long Range Rang: Consistent high damage to a small amount of Bloons with 75 or more HP.
- Jungle's Bounty Druid: A renewable source of life healing that no other card can do. It's preferred for Stages 2 and 3, less so Stage 1.
- Super Monkey Storm: At least one of them should be equipped to deal with large swarms of rushes.
Stage 1
Armor Piercing is very important on this stage. Cards such as Bomb Bloon are important for chipping in Dreadbloon's HP while also providing ways to counter Dreadbloon's habits of bricking your deck by building Armor on ARBITR and/or Target Practice Blimp. Lead to Gold Monkey is efficient at making Gold and dealing with Rocks.
Dreadbloon doesn't have many removal cards on this stage, except Bed Time (3x), Bombs Away (3x), Pre-emptive Strike (3x), and Shrink (x2). Therefore, a Monkey-focused control deck is recommended.
With enough luck, the player can use an ARBITR to brick Dreadbloon's deck, and continue building up The Eternal. Bloonsday Device is also helpful to lure Dreadbloon into overrushing, and then destroying its board completely.
Stage 2
Stage 2 is more difficult, due to the inevitable Avalanches, greater amounts of Monkey removals, and the variety of Bloons. Draw is less important, as the main strategy to avoid Avalanches is to not draw anything.
Life healing is important versus Stage 2. Quick Break, Strike Bloon, and Jungle's Bounty Druid are helpful on this stage.
Stage 3
Stage 3 has an aggressive deck with many Monkey removals and various ways to lose lives. It's the hardest of the stages for most players, if not for Stage 2's constant Avalanches.
Generally, the way to beat Stage 3 is to use a deck that uses few inexpensive Monkeys.
"Highest score"
For purposes of scoring as high as possible and reaching the top positions on the leaderboards, it is recommended to run a Zee Jay deck that buffs a single monkey, usually one that attacks twice like Robo Monkey, for taking out entire boss phases with massive amounts of damage in one to few turns. Commonly used buffing options include Rad Enhancements, Berserker Brew, Stylish Finish, and Quick Reload. Barrel of Monkeys may be used to pop Rock Bloons that get in the way of the main damage dealer or replace Quincy Action Figure for extra Gold while performing combos. Supply Drop is desired for acquiring more cards to combo with while the player has surplus Gold in later turns. However, this deck is very RNG dependent, as multiple attempts may be needed to mulligan for an optimal early setup and find the necessary cards to get enough damage to finish off the boss, while avoiding having the damage dealer be removed due to skull effects with Monkey removal.
"Any damage"
For purposes of reaching the leaderboards or gaining the daily reward, players seeking to do any point of damage to Dreadbloon should use an aggro deck consisting of many cheap cards such as Bloontonium Miner and Bomb Bloon.
Cards to watch out
The following cards should be noted for each stage:
- Wrath of Dread: 4, 5, 3
- Immunity: all 3
- Echoes of Avalanche (stages 2&3 only): 6, 3
- Repercussions (stage 3 only): 5
- Fearful Aura: all 3
- Shrink (stages 1&2 only): all 2
- Bed Time (stages 1&3 only): all 3
Update history
 Solved a crash caused by Dreadbloon’s minor ability popping a Bloon that the AI would attempt to target.
- Replaced some of Dreadbloon’s missing art effects. Removed Monkeys will now vanish with a *poof*.
- Fixed a crash that could occur related to Dreadbloon's rocks (bug fix)
Nomenclature
The different versions of Dreadbloon do not have their own names displayed in-game. Each version of Dreadbloon has multiple different names internally.
| Internal ID | Internal deck name | Hero Card asset name | Hero Ability asset names | Icon asset name |
|---|---|---|---|---|
DreadBloonArmouredCore
|
Armoured Might
|
Dreadbloon
|
DreadbloonExtremeArmour
|
DreadbloonStage1
|
DreadBloonDeckManipulation
|
Deck Shenanagins[sic]
|
DreadbloonDeckManipulation
|
DreadbloonDeckManipulation
|
DreadbloonStage2
|
DreadBloonBoardDestruction
|
Bye Bye Board
|
DreadbloonBoardDestruction
|
DreadbloonBoardDestruction
|
DreadbloonStage3
|
Gallery
Screenshots

|
This article or section needs more screenshots. See the screenshot guidelines for more information on what screenshots are needed and how to add them. The editor that added this notice elaborates: Images of each phase of each version of the boss |
-
![Teaser screenshot[1]](/images/thumb/f/fe/BCS_dev_diary_dreadbloon_screenshot.png/120px-BCS_dev_diary_dreadbloon_screenshot.png) Teaser screenshot[1]
Teaser screenshot[1] -
 Dreadbloon Stage 1 Phase 1 gaining Bloontonium
 -
 Super Monkey damaging Dreadbloon Stage 2
 -
 Dreadbloon's Boss Battle menu
 -
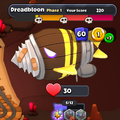 Critically damaged Stage 1 Phase 1 Dreadbloon
![Teaser screenshot[1]](/File:BCS_dev_diary_dreadbloon_screenshot.png)


Assets
-
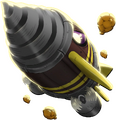 Solo portrait
 -
 Avatar used by Dreadbloon
 -
 Title
Title -
 Stage 1 small icon
 -
 Stage 2 small icon
 -
 Stage 3 small icon
 -
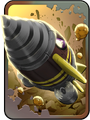 Stage 1 card portrait
 -
 Stage 2 card portrait
 -
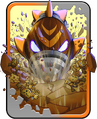 Stage 3 card portrait
 -
 Stage 1 event button
 -
 Stage 2 event button
 -
 Stage 3 event button
 -
 Stage 1 icon
 -
 Stage 2 icon
 -
 Stage 3 icon
 -
 Stage 1 background
 -
 Stage 2 background
 -
 Stage 3 background


In other languages
| Language | Text | Notes |
|---|---|---|
| Danish | Rædsels-bloon | — |
| German | Terrorbloon | — |
| Spanish (Latin America) | Bloon acorazado | — |
| French | Dreadbloon | — |
| Italian | Orribloon | — |
| Japanese | ドレッドブルーン | — |
| Korean | 드레드 풍선 | — |
| Norwegian | Fryktbloon | — |
| Polish | Dreadblon | — |
| Portuguese (Brazil) | Dreadbloon | — |
| Russian | Жуть-шар | — |
| Swedish | Skräckbloon | — |
| Chinese (traditional) | 恐怖氣球 | — |
References
- ↑ "Dev Diary - May 16th 2025". Reddit. Retrieved Fri, 16 May 2025.
Navigation
| Heroes in Bloons Card Storm | ||||||
|---|---|---|---|---|---|---|
|
| Dreadbloon | ||||||
|---|---|---|---|---|---|---|
| ||||||
| Gallery |