Bloonarius (BTD6)
The Inflator

|

|
| Skulls | 3 (normal) 7 (elite) | ||
|---|---|---|---|
| Theme | Primal One | ||
| Introduced | Version 27.0 | ||
| Description |
|---|
| • Sludge-dwelling Bloonarius spews Bloons as it takes damage. • When each skull on its health bar is reached, Bloonarius disgorges massive Bloon clusters onto the track. • Bloonarius' sludge infused husk makes it slow but extremely tough. |
Bloonarius, titled The Inflator, is a Boss Bloon in Bloons TD 6, introduced in version 27.0. It is the first boss introduced to the game, and has the simplest mechanics relative to other bosses.
Bloonarius has a high amount of health and it spawns Bloons across the track as it takes damage. It spawns especially large waves of Bloons right in front of it when a skull on its health bar is reached.
Mechanics
Scattered Bloons
Each time Bloonarius loses 1% of its health, it spawns a certain number of Bloons all over the track. The number and types of Bloons it spawns depends on Bloonarius's tier and whether it is in Normal or Elite mode. These Bloons are distinguished from normally spawning Bloons by being covered by a dark green sludge. These Bloons are briefly immune to damage upon spawning and provide no cash when popped, but they do still add to towers' damage counters.
Skull ability
Upon reaching a skull, Bloonarius stops moving for 0.5s, scatters a lot of Bloons across the map (using the same mechanic as its usual scattering), and additionally spawns a dense pack of Bloons directly in front of it. Like scattered Bloons, the number and types of Bloons it spawns depends on Bloonarius's tier and whether it is in Normal or Elite mode. These Bloons are also briefly immune to damage upon spawning and do not generate cash, but they do still add to towers' damage counters.
Damaging Bloonarius is meant to send a wave of 2 Scattered Bloons every time it loses 15% of its current health, but as version 54.0 this behavior is bugged and only sends them every 10 pops (10, 20, 30, etc.). Popping Bloonarius makes it send a stronger wave of 4 to 12 Scattered Bloons. Every 10 pops, it triggers its skull ability, sending a stronger wave of 8 Bloons.
Stats
Normal
| Tier | 1-player | 2-player | 3-player | 4-player |
|---|---|---|---|---|
| 1 | 20,000 | 24,000 | 28,000 | 32,000 |
| 2 | 75,000 | 90,000 | 105,000 | 120,000 |
| 3 | 350,000 | 420,000 | 490,000 | 560,000 |
| 4 | 750,000 | 900,000 | 1,050,000 | 1,200,000 |
| 5 | 3,000,000 | 3,600,000 | 4,200,000 | 4,800,000 |
| Tier | Base speed | Red Bloon speed |
|---|---|---|
| 1 | 1.25 | 0.05× |
| 2 | 1.25 | 0.05× |
| 3 | 1.25 | 0.05× |
| 4 | 1.5 | 0.06× |
| 5 | 1.5 | 0.06× |
| Tier | Scattered per 1% health lost | Scattered at each skull | Spawned at each skull |
|---|---|---|---|
| 1 | Green Bloon ×8 | Green Bloon ×30 | Ceramic Bloon ×30 |
| 2 | Yellow Bloon ×15 | Yellow Bloon ×60 | Ceramic Bloon ×60 |
| 3 | Pink Bloon ×25 | Pink Bloon ×100 | MOAB ×6 |
| 4 | Zebra Bloon ×15 | Zebra Bloon ×60 | ZOMG ×10 |
| 5 | Rainbow Bloon ×25 | Rainbow Bloon ×100 | BAD ×1 |
Elite
| Tier | 1-player | 2-player | 3-player | 4-player |
|---|---|---|---|---|
| 1 | 50,000 | 60,000 | 70,000 | 80,000 |
| 2 | 300,000 | 360,000 | 420,000 | 480,000 |
| 3 | 2,000,000 | 2,400,000 | 2,800,000 | 3,200,000 |
| 4 | 8,000,000 | 9,600,000 | 11,200,000 | 12,800,000 |
| 5 | 40,000,000 | 48,000,000 | 56,000,000 | 64,000,000 |
| Tier | Base speed | Red Bloon speed |
|---|---|---|
| 1 | 1.25 | 0.05× |
| 2 | 1.25 | 0.05× |
| 3 | 1.25 | 0.05× |
| 4 | 1.5 | 0.06× |
| 5 | 1.5 | 0.06× |
| Tier | Scattered per 1% health lost | Scattered at each skull | Spawned at each skull |
|---|---|---|---|
| 1 | Pink Bloon ×10 | Pink Bloon ×40 | Ceramic Bloon ×70 |
| 2 | Rainbow Bloon ×10 | Rainbow Bloon ×40 | BFB ×16 |
| 3 | Ceramic Bloon ×13 | Ceramic Bloon ×50 | BAD ×1, DDT ×9 |
| 4 | MOAB ×8, BFB ×2 | Fortified Ceramic Bloon ×100 | Fortified BAD ×2, Fortified DDT ×20 |
| 5 | DDT ×8, Fortified ZOMG ×2 | MOAB ×30 | Fortified BAD ×4 |
Boss Rush
| Tiers | Scattered per 15% health lost (2 Bloons) |
Scattered at each tier (4-12 Bloons) |
Spawned at the 10 tier milestone (8 Bloons) |
|---|---|---|---|
| 0–9 | Blue Bloon | Yellow Bloon | Rainbow Bloon |
| 10-19 | Green Bloon | Purple Bloon | Ceramic Bloon |
| 20–29 | Yellow Bloon | Zebra Bloon | Fortified Ceramic Bloon |
| 30–39 | Pink Bloon | Rainbow Bloon | MOAB |
| 40–49 | Purple Bloon | Ceramic Bloon | Fortified MOAB |
| 50–59 | Zebra Bloon | Fortified Ceramic Bloon | BFB |
| 60–69 | Rainbow Bloon | MOAB | Fortified DDT |
| 70–79 | Ceramic Bloon | DDT | ZOMG |
| 80–89 | Fortified Ceramic Bloon | BFB | BAD |
| 90–99 | MOAB | ZOMG | Fortified ZOMG |
| 100–109 | Fortified MOAB | Fortified BFB | Yellow Bloon |
| 110+ | Fortified MOAB | ZOMG | Yellow Bloon |
Round changes
When facing Bloonarius, some rounds are different from the standard roundset.
| № | Default | Modified | ||||||
|---|---|---|---|---|---|---|---|---|
| Bloon groups | Dur. | Base RBE | Base cash | Bloon groups | Dur. | Base RBE | Base cash | |
| 40 | MOAB×1 | 1.00s | 616 | $381 | Ceramic×6 | 18.00s | 624 | $570 |
| 60 | BFB×1 | 1.00s | 3,164 | $762.5 | MOAB×6 | 30.00s | 3,696 | $1,143 |
| 80 | ZOMG×1 | 2.00s | 16,656 | $1,220.2 | BFB×6 | 30.00s | 18,984 | $1,830 |
| 100 | BAD×1 | 0.10s | 56,584 | $1,334.6 | ZOMG×2 DDT×3 ZOMG×2 DDT×3 |
15.10s | 72,368 | $2,669 |
Strategy
Compared to other bosses, Bloonarius is the most simple in terms of its mechanics, but should not be underestimated, specially in the lower tiers, as the Bloons it spawns when damaged and after reaching a skull can easily overrun unprepared defenses.
Tier 1 and 2 defenses are usually split on towers that can reliably damage the boss and towers with very high pierce that can handle the spawns.
In the first category Elite Defender is always a reliable option on Tier 1. A combination of Embrittlement / Super Brittle with Overdrive / The Tack Zone or Poplust / Avatar of Wrath shine due Bloonarius low speed, meaning it can stay on the range of those towers for longer. Spike Storm / Carpet of Spikes and Sticky Bomb / Master Bomber are only effective also on longer maps due Bloonarius high HP. M.A.D can also be used with caution on its placement as the pierce on its rockets can be consumed by the spawns before it reaches the boss. Towers that are used for damaging the boss should have their targeting set to Strong if possible to avoid getting them distracted with the spawns or to First if their help is needed to deal with the spawns.
For defending the spawns in the lower tiers, specially after a skull, towers with very high pierce are needed, common examples are multiple M.O.A.R Glaives / Glaive Lord, The Big One, Bloon Liquefier / The Bloon Solver, Jungle's Bounty / Spirit of the Forest, the abilities of the Blade Maelstrom and Geraldo's Blade Trap.
Tiers 3 and higher can be handled with expensive towers and Paragons, the defenses used for the boss itself are also usually enough to handle the spawns with the only limiting factor being range.
In Boss Rush, Bloonarius can be handled using towers like Sauda, MOAB SHREDR, Overdrive, Embrittlement, Destroyer or Poplust during the early game with Glaive Ricochet, Druid of the Jungle or Recursive Cluster handling the spawns. During the mid-game the defense transitions into the upgrades of the mentioned towers and finish with Super Mines and Apex Plasma Master or a Glaive Dominus.
Update history
| This article or section uses Cargo to generate its content. It will automatically fill up as other articles are completed. To add to this section, create the articles it is looking up. Do not add content to this section manually and do not remove this notice until you are sure this section is complete. |
— Update notes
 Elite tier 4: Bleed Bloons changed ― 25 ceramics → 12 MOABs
- Elite tier 5: Bleed Bloons changed ― 8 MOABs → 8 decamoed DDTs
- Bosses on spawn will now clear the map of all existing projectiles
 Resolved an issue with Bloonarius spawning too many bloons when health drops too far below 0 in a single frame (bug fix)
- Damage counters should count again for attacks against Bloonarius spawns & Lych Zombie Bloons (bug fix)
— Update notes
- Elite tier 4: Bleed Bloons changed ― 12 MOABs → 8 MOABs + 2 BFBs
- Elite tier 5: Bleed Bloons changed ― 8 DDTs → 6 DDTs + 2 Fortified ZOMGs
- Elite tier 5: Bleed DDTs now have Camo property
Gallery
Screenshots
| This article or section needs more screenshots. See the screenshot guidelines for more information on what screenshots are needed and how to add them. |
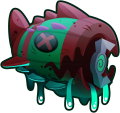
-
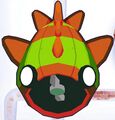
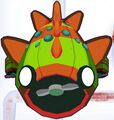
 Normal Bloonarius in the boss menu
 -
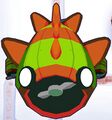
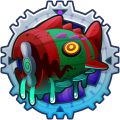
 Elite Bloonarius in the boss menu
 -
 Normal Bloonarius T1
 -
 Normal Bloonarius T2
 -
 Normal Bloonarius T3
 -
 Normal Bloonarius T4 & T5


Assets
-
 Bloonarius
 -
 Elite Bloonarius
 -
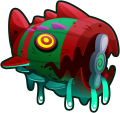
 Bloonarius (defeated)
 -
 Elite Bloonarius (defeated)
 -
 Event icon
 -
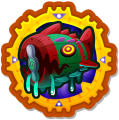
 Bloonarius menu icon
 -
 Elite Bloonarius menu icon
 -
 Bloonarius medal
 -
 Elite Bloonarius medal
 -
 Logo
Logo -
 Banner


Navigation
| Bloons in Bloons TD 6 | ||||||||||||
|---|---|---|---|---|---|---|---|---|---|---|---|---|
|