Phayze
The Reality Warper

|

|
| Skulls | 3 (normal) 5 (elite) | ||
|---|---|---|---|
| Theme | The Reality Warper | ||
| Introduced | Version 38.0 | ||
| Description |
|---|
| • Phayze has the Camo property and a Reality Shield that increases its speed while the Shield is active. • When each skull is reached, Phayze rebuilds the Reality Shield and warps forward, opening a tear in the fabric of reality allowing Bloons to spawn further along the track. • Skulls also trigger a slow aura around Phayze, reducing the attack speed of all Monkey Towers. • Phayze triggers Radar Jam every 24 seconds, disabling Camo-seeing buffs as well as restoring its Camo property if it has been stripped. • Radar Jam also pulls Bloons to Phayze's location and grants them the Camo property. |
Phayze, titled The Reality Warper, is a Boss Bloon in Bloons TD 6, introduced in version 38.0. It is the fifth Boss Bloon added to BTD6 and the second new boss following Lych.
Phayze's boss battle focuses on Camo detection and moving Bloons closer to the exit. It has the properties of a Camo Bloon and periodically uses its Radar Jam ability to restore its Camo property if it is lost, temporarily disable tower buffs that grant Camo detection, move nearby Bloons ahead, and give those Bloons the Camo property. Its Reality Shield gives it additional health and increases its speed until it is destroyed. Each time it loses a skull, it restores its Reality Shield, gains a brief speed boost, and spawns a portal that moves the spawning position for other Bloons. After the first skull, it also starts emitting an aura that slows all towers on-screen, which gets stronger with each skull. At higher tiers, it has more health, its shield has more health, and it moves faster while shielded. Elite Phayze has even more health, moves even faster while shielded, slows nearby towers more, and its slow aura gets more powerful at higher tiers.
Mechanics
Reality Shield
Phayze starts each encounter with a Reality Shield. The health of the shield is equal to 25% of its maximum health for the current tier, including the extra health from Co-op (meaning it also gains 20% more health per additional player). While the shield is active, Phayze moves significantly faster. The shield regenerates at each skull.
Radar Jam
Every 24 seconds, Phayze triggers its Radar Jam ability, which has the following effects:
- All tower buffs that grant Camo detection (Radar Scanner, UAV, See Invisibility Potion, etc) are disabled for 12 seconds, indicated by a glitching Camo Bloon icon above affected towers.
- Phayze regains its Camo property if it has been removed, and it cannot be removed for 12 seconds afterwards.
- Phayze pulls nearby Bloons that are behind it up to its position, and gives them the Camo property.
Warp
At each skull, Phayze gains a brief burst of speed that covers 8% of the length of the path and opens a portal at its previous position (removing the previous portal if one exists). While active, all natural Bloons spawn from the portal instead of the entrances. Phayze is immune to damage while moving.
Slow aura
Upon reaching the first skull, Phayze gains a slow aura that reduces the attack speed of all towers on-screen, including Paragons. This aura lasts for the rest of the current encounter and becomes stronger at each subsequent skull reached.
Stats
| Base speed | Red Bloon speed |
|---|---|
| 0.9 | 0.036× |
Normal
| Tier | Base speed | Red Bloon speed |
|---|---|---|
| 1 | 1.17 | 0.0468× |
| 2 | 1.215 | 0.0486× |
| 3 | 1.26 | 0.0504× |
| 4 | 1.305 | 0.0522× |
| 5 | 1.35 | 0.054× |
| Tier | 1-player | 2-player | 3-player | 4-player |
|---|---|---|---|---|
| 1 | 10,000 | 12,000 | 14,000 | 16,000 |
| 2 | 37,500 | 45,000 | 52,500 | 60,000 |
| 3 | 175,000 | 210,000 | 245,000 | 280,000 |
| 4 | 375,000 | 450,000 | 525,000 | 600,000 |
| 5 | 1,500,000 | 1,800,000 | 2,100,000 | 2,400,000 |
| Tier | 1-player | 2-player | 3-player | 4-player |
|---|---|---|---|---|
| 1 | 2,500 | 3,000 | 3,500 | 4,000 |
| 2 | 9,375 | 11,250 | 13,125 | 15,000 |
| 3 | 43,750 | 52,500 | 61,250 | 70,000 |
| 4 | 93,750 | 112,500 | 131,250 | 150,000 |
| 5 | 375,000 | 450,000 | 525,000 | 600,000 |
| Skull | Modifier |
|---|---|
| 1st | 1.1× (90.91%) |
| 2nd | 1.15× (86.96%) |
| 3rd | 1.2× (83.33%) |
| Values are listed by their cooldown modifier. Their equivalent in attack speed is in parentheses. | |
Elite
| Tier | Base speed | Red Bloon speed |
|---|---|---|
| 1 | 1.305 | 0.0522× |
| 2 | 1.35 | 0.054× |
| 3 | 1.395 | 0.0558× |
| 4 | 1.44 | 0.0576× |
| 5 | 1.485 | 0.0594× |
| Tier | 1-player | 2-player | 3-player | 4-player |
|---|---|---|---|---|
| 1 | 20,000 | 24,000 | 28,000 | 32,000 |
| 2 | 120,000 | 144,000 | 168,000 | 192,000 |
| 3 | 800,000 | 960,000 | 1,120,000 | 1,280,000 |
| 4 | 3,200,000 | 3,840,000 | 4,480,000 | 5,120,000 |
| 5 | 16,000,000 | 19,200,000 | 22,400,000 | 25,600,000 |
| Tier | 1-player | 2-player | 3-player | 4-player |
|---|---|---|---|---|
| 1 | 5,000 | 6,000 | 7,000 | 8,000 |
| 2 | 30,000 | 36,000 | 42,000 | 48,000 |
| 3 | 200,000 | 240,000 | 280,000 | 320,000 |
| 4 | 800,000 | 960,000 | 1,120,000 | 1,280,000 |
| 5 | 4,000,000 | 4,800,000 | 5,600,000 | 6,400,000 |
| Tier | Skull | ||||
|---|---|---|---|---|---|
| 1st | 2nd | 3rd | 4th | 5th | |
| 1 & 2 | 1.1× (90.91%) | 1.15× (86.96%) | 1.2× (83.33%) | 1.25× (80%) | 1.3× (76.92%) |
| 3 | 1.2× (80%) | 1.3× (76.92%) | 1.4× (71.43%) | 1.5× (66.67%) | 1.6× (62.5%) |
| 4 | 1.3× (76.92%) | 1.45× (68.97%) | 1.6× (62.5%) | 1.75× (57.14%) | 1.9× (52.63%) |
| 5 | 1.4× (71.43%) | 1.6× (62.5%) | 1.8× (55.56%) | 2.0× (50%) | 2.2× (45.45%) |
| Values are listed by their cooldown modifier. Their equivalent in attack speed is in parentheses. | |||||
Round changes
When facing Phayze, several rounds are changed from the standard roundset.
| Round | Change |
|---|---|
| 40 | MOAB replaced by 6 ceramic bloons |
| 60 | BFB replaced by 6 MOABs |
| 80 | ZOMG replaced by 6 BFBs |
| 100 | BAD replaced by 10 ZOMGs and 15 DDTs |
Strategy
Phayze is a trickster boss that will challenge concentrated defenses by its Warp ability and of course the camo detection will play an important part on the strategies used to defeat this boss.
The most important piece of advice before facing Phayze is to not rely on granting other towers camo decection (ex. Radar Scanner, Level 8+ Etienne) or stripping the camo property from Phayze (ex. Cleansing Foam, Submerge and Support) as the radar jam will make them useless preventing your towers from attacking Phayze half of the time. Instead opt for paths/crosspaths which will grant the tower itself camo detection, even if they don't are most common for Bosses (ex. using a 5-2-0 Cripple MOAB instead of 5-0-2).
Common options to defend Tier 1 and 2 Phayze are towers with camo detection that can follow Phayze around the map after it warps or have infinite range like 0-2-5 Elite Defender, 0-5-2 Carrier Flagship, Sticky Bomb / Master Bomber, M.A.D and Carpet of Spikes.
In maps where the boss will stay or pass several times over the same spot (ex. In The Loop, Four Circles), Tiers 1-3 can be defended by using several Bloonjitsu / Grandmaster Ninja or 3-0-2 Sun Avatars with usual buff/debuff towers (Berserker Brew, Call to Arms, Jungle Drums, Embrittlement, Glue Strike, Cripple MOAB and Shinobi Tactics if using ninjas).
Tier 3 and higher can be defended with Paragons, all of them have camo detection and Nautic Siege Core, Navarch of the Seas, Ascended Shadow and Goliath Doomship are capable of following Phayze around. Ascended Shadow deserves a honorific mention as it deals extra damage to Phayze as long the player doesn't remove its camo properties. On certain maps, a Degree 80+ Ninja Paragon is capable of defeating Tier 5 Elite Phayze alone.
During the last skull of Tier 5, if the player has not yet defeated Phayze while going into Round 128 or higher, they must pay attention to the regular Bloon spawns, as the late spawning point plus the pulls from Radar Jam will put Bloons very close to the exit making leaks a constant threat. Fortified ZOMGs (or their children) and Fortified DDTs can easily make their way to the exit form this position. Dangerous rounds presenting Fortified ZOMGs are 129, 131, 132, 133 and 135, and Fortified DDTs will appear in 128, 130, 135 and 138. So additional defenses or clever ability timing might be needed from such positions.
In Boss Rush, the first pops of Phayze can be achieved by using Sauda, x-2-0 Monkey Aces and x-3-x or x-x-2 Spike Factories, constant buying and selling of towers is needed to keep damaging Phayze and defending the rest of the bloons, Druid of the Jungle can be used to handle regular Bloon spawns moving further and further into the track. Towards the mid-game, getting a M.A.D and spamming 3-0-2 Sun Avatars are good options and so are Merchantman / Favored Trades with the intention of going into a Paragon for the endgame with Apex Plasma Master and Glaive Dominus being common options.
Update history

|
This article or section uses Cargo to generate its content. It will automatically fill up as other articles are completed. To add to this section, create the articles it is looking up. Do not add content to this section manually and do not remove this notice until you are sure this section is complete. |
 Resolved an issue where Phayze could trigger additional skull events on loading a save (bug fix)
- Resolved an issue where subtowers did not correctly track damage done to Dreadbloon/Phayze shields (bug fix)
— Update notes
- Elite tier 1: Speed bonus while shielded reduced ― 50% → 45%
- Elite tier 2: Speed bonus while shielded reduced ― 55% → 50%
- Elite tier 3: Speed bonus while shielded reduced ― 60% → 55%
- Elite tier 4: Speed bonus while shielded reduced ― 65% → 60%
- Elite tier 5: Speed bonus while shielded reduced ― 70% → 65%
- Radar Jam: Children of Bloons that are being pulled no longer "zoom" into the track early (bug fix)
 Phayze should not teleport backwards after every 10 pops in Boss Rush mode (bug fix)
— Update notes
- Unshielded speed decreased ― 0.9 units/s (0.036× Red Bloon Speed) → 0.8 units/s (0.032× Red Bloon Speed)
- Radar Jam: Bloon pull distance decreased ― 5 − 40 units → 1 − 10 units
- Health reduced:
- Tier 1 Normal ― 10,000 → 9,500
- Tier 2 Normal ― 37,500 → 35,000
- Tier 3 Normal ― 175,000 → 160,000
- Tier 4 Normal ― 375,000 → 350,000
- Tier 5 Normal ― 1,500,000 → 1,450,000
- Tier 1 Elite ― 20,000 → 19,000
- Tier 2 Elite ― 120,000 → 110,000
- Tier 3 Elite ― 800,000 → 770,000
- Tier 4 Elite ― 3,200,000 → 3,100,000
- Tier 5 Elite ― 16,000,000 → 15,000,000
- Shield health reduced (values presented here are per skull):
- Tier 1 Normal ― 2,500 → 2,375
- Tier 2 Normal ― 9,375 → 8,750
- Tier 3 Normal ― 43,750 → 40,000
- Tier 4 Normal ― 93,750 → 87,500
- Tier 5 Normal ― 375,000 → 362,500
- Tier 1 Elite ― 5,000 → 4,750
- Tier 2 Elite ― 30,000 → 27,500
- Tier 3 Elite ― 200,000 → 192,500
- Tier 4 Elite ― 800,000 → 775,000
- Tier 5 Elite ― 4,000,000 → 3,875,000
Gallery
Screenshots

|
This article or section needs more screenshots. See the screenshot guidelines for more information on what screenshots are needed and how to add them. |
Artwork and icons
-
 Phayze
 -
 Elite Phayze
 -
 Phayze (defeated)
 -
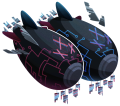 Elite Phayze (defeated)
 -
 Event icon
 -
 Phayze menu icon
 -
 Elite Phayze menu icon
 -
 Phayze medal
 -
 Elite Phayze medal
 -
 Logo
Logo -
 Banner


Navigation
| Bloons in Bloons TD 6 | ||||||||||||
|---|---|---|---|---|---|---|---|---|---|---|---|---|
|