Tack Shooter (BTD6): Difference between revisions
m technical fixes |
Qwertyxp2000 (talk | contribs) oops forgot refs |
||
| (20 intermediate revisions by 4 users not shown) | |||
| Line 1: | Line 1: | ||
{{ | {{tack shooter hat}} | ||
{{BTD6 tower info | {{BTD6 tower info | ||
|id=TackShooter | |id=TackShooter | ||
| Line 9: | Line 9: | ||
|description C=Shoots a short-range volley of sharp tacks in 8 directions. | |description C=Shoots a short-range volley of sharp tacks in 8 directions. | ||
|unlock =Choose at [[level]]s 2–6 | |||
|category =Primary | |category =Primary | ||
|paragon =[[Crucible of Steel and Flame]] | |||
|cost =260 | |cost =260 | ||
|cost C = | |cost C = | ||
| Line 16: | Line 18: | ||
|introduced C= | |introduced C= | ||
}} | }} | ||
The '''Tack Shooter''' is a [[Primary]] [[tower]] in ''[[Bloons TD 6]]''. It | The '''Tack Shooter''' is a [[Primary]] [[tower]] in ''[[Bloons TD 6]]''. It [[attack]]s by firing a volley of 8 tacks at a very short range, with each tack aimed at a fixed 45 degrees apart. Each tack pops one Bloon (allowing for up to eight pops per shot) and cannot pop [[frozen]] Bloons or [[Lead Bloon (BTD6)|Lead Bloons]]. It attacks every 1.12 seconds. | ||
It | |||
It can be upgraded to attack with fire, blades, or many more tacks. It has upgrades for attack speed, range and pierce, and projectile count. | |||
{{TOC}} | |||
{{clear|right}} | |||
==Upgrades== | ==Upgrades== | ||
{{BTD6 upgrade list by tower|Tack Shooter|paragon=y}} | {{BTD6 upgrade list by tower/new|Tack Shooter|paragon=y}} | ||
==Stats== | ==Stats== | ||
| Line 29: | Line 30: | ||
==Related Monkey Knowledge== | ==Related Monkey Knowledge== | ||
{{hat|This list does not include Monkey Knowledge that affects all Primary towers.}} | |||
{{BTD6 mk list | {{BTD6 mk list|exclude others=y|include=Fast Tack Attacks;Increased Lifespan;Hard Tacks;Poppy Blades;Big Inferno;}} | ||
==''Rogue Legends''== | |||
===Starter parties with Tack Shooters=== | |||
{{BTD6 hero list by insta|Tack Shooter}} | |||
===Related Artifacts=== | |||
{{hat|This list does not include Artifacts that affect all Primary towers.}} | |||
{{BTD6 artifact list by name|Follow Me;Homing Projectiles;Trick Shot A-Tacks|columns=1}} | |||
==Costs and sell values== | ==Costs and sell values== | ||
| Line 37: | Line 46: | ||
==Strategy== | ==Strategy== | ||
{{main strategy}} | {{main strategy}} | ||
{{ | {{BTD6 last updated|55.2|section=y}} | ||
Tack Shooters generally have poor range but compensate significantly by its high projectile count and reasonably good attack speed. This makes them very receptive to flat damage and pierce buffs. It is preferred to place them around corners and tight curves to maximize use of its projectiles, even if the Tack Shooter gains high range. Its early-game is decent, and has a solid mid-game and late-game when supported by buffs. | |||
The first path focuses on attack speed and eventually adds high raw damage. [[Ring of Fire (BTD6)|Ring of Fire]] and [[Inferno Ring (BTD6)|Inferno Ring]] trade off tacks for single flame rings that have high pierce and damage and benefit much better with extra range; maximize their track coverage, still preferrably around tight regions. | |||
The second path is primarily focused on range and pierce, with [[Super Range Tacks (BTD6)|Super Range Tacks]] providing a significant boost to those stat bonuses for any Tack Shooter. Its activated abilities in particular have significantly high pierce, making them powerful in [[Race (BTD6)|Race]] scenarios. | |||
The third path focuses on making many projectiles per second. This path's main strength is ripping [[MOAB-Class Bloon]]s by spawning tacks on top of them, and works very well with flat damage buffs (e.g. [[Berserker Brew (BTD6)|Berserker Brew]]) and Bloon damage debuffs (e.g. [[Embrittlement (BTD6)|Embrittlement]]) due to the high projectile count of these Tack Shooters. All of these upgrades usually prefer the attack speed crosspath to maximize shots. | |||
==Update history== | ==Update history== | ||
| Line 51: | Line 64: | ||
{{main gallery|Tack Shooter}} | {{main gallery|Tack Shooter}} | ||
===Screenshots=== | ===Screenshots=== | ||
{{screenshot needed}} | {{screenshot needed|section=y}} | ||
<gallery> | |||
BTD6 tack shooter crosspaths.png|All upgrade combinations | |||
</gallery> | |||
===Assets=== | ===Assets=== | ||
| Line 62: | Line 78: | ||
{{BTD6 last updated|49.2|section=y}} | {{BTD6 last updated|49.2|section=y}} | ||
{{langlist | {{langlist | ||
|label= | |label=Name | ||
|key=TackShooter | |key=TackShooter | ||
|ar =قاذف المسامير | |ar =قاذف المسامير | ||
| Line 86: | Line 102: | ||
}} | }} | ||
{{langlist | {{langlist | ||
|label= | |label=Description | ||
|key=TackShooter Description | |key=TackShooter Description | ||
|ar =يقوم بإطلاق سهم من المسامير الحادة قصيرة المدى في ثماني اتجاهات. | |ar =يقوم بإطلاق سهم من المسامير الحادة قصيرة المدى في ثماني اتجاهات. | ||
| Line 109: | Line 125: | ||
|zh-tw=向8個方向齊射出短射程尖銳釘子。 | |zh-tw=向8個方向齊射出短射程尖銳釘子。 | ||
}} | }} | ||
==Footnotes== | |||
{{footnotes}} | |||
==References== | |||
{{references}} | |||
==Navigation== | ==Navigation== | ||
Latest revision as of 06:48, 15 September 2026

|
| Shoots a short-range volley of sharp tacks in 8 directions. |
| Unlock method(s) | Choose at levels 2–6 | ||
|---|---|---|---|
| Category | Primary | ||
| Cost | $220 — Easy $260 — Medium $280 — Hard $310 — Impoppable | ||
| Hotkey | R | ||
| Introduced | Launch | ||
The Tack Shooter is a Primary tower in Bloons TD 6. It attacks by firing a volley of 8 tacks at a very short range, with each tack aimed at a fixed 45 degrees apart. Each tack pops one Bloon (allowing for up to eight pops per shot) and cannot pop frozen Bloons or Lead Bloons. It attacks every 1.12 seconds.
It can be upgraded to attack with fire, blades, or many more tacks. It has upgrades for attack speed, range and pierce, and projectile count.
Upgrades
[edit | edit source]Path 1


 Hard Tacks.

Each shot does much more damage overall, but deals less damage to MOAB-Class Bloons in general since it only shoots one projectile at a time instead of multiple. Ring of Fire and other tier 4 and above Tack Shooters also have slightly elevated lines of sight compared to tier 3 and below Tack Shooters.
Its attack speed and area of effect radius (but not range) are buffed by Gwendolin starting at level 5, which improves at level 18.

Path 2


Crosspaths further increase with certain upgrades:
- Ring of Fire or Inferno Ring: the pierce increase is +15
- The Tack Zone: the pierce increase is +8 and the range bonus is +20 units instead.

 Poppy Blades), increases range from 31 to 46 units (around a 2.2× increase from base tier), projectile radius increases from 0 to 4,[fn 1] and changes its damage type from Sharp to Shatter, allowing it to pop frozen Bloons (if Hard Tacks is active, there is no change).


Path 3

Crosspathing with upgrades improves the Tack Shooter's other attacks:
- Ring of Fire and Inferno Ring increases its main attack's damage by 1.
- Blade Maelstrom gain increased ability duration by 0.5 seconds, and Super Maelstrom's duration is increased by 1.5 seconds. Additionally, the ability spin direction is reversed (from clockwise to counter-clockwise).

Crosspathing further improves the effects of other Tack Shooter upgrades:
- Ring of Fire and Inferno Ring increases its damage by 1 on top of the +1 damage from More Tacks, and Inferno Ring's fireball attack additionally deals 300 more damage to the target.
- Blade Maelstrom ability lasts a further 0.5 seconds for a total of 1 extra second, and the duration of Super Maelstrom ability is increased by 1.5 seconds for a total of 3 extra seconds.


If crosspathed with Super Range Tacks, its total range bonus increases to +20, and each tack gains +8 pierce.
Paragon

It has two Activated Abilities:
- The Maelstrom ability temporarily increases its projectile lifespan, allowing both its blades and tacks to travel much further and cover a much larger area overall, and grants it a second attack that blasts jets of flame in a ring around itself, dealing damage in an area similarly to Ring of Fire and Inferno Ring. It lasts for 9 seconds and has a 20-second cooldown.
- The Meteor Impact ability targets a Bloon and strikes it with a meteor, dealing enormous damage in a large area around the target and spawning a circle of 32 high damage homing fireballs around the point of impact. It has a 60-second cooldown.
Stats
[edit | edit source]| Tower | ||||||
|---|---|---|---|---|---|---|
| ||||||
| Attack | |||||||||||||||||||||
|---|---|---|---|---|---|---|---|---|---|---|---|---|---|---|---|---|---|---|---|---|---|
| |||||||||||||||||||||
|
Related Monkey Knowledge
[edit | edit source]| Monkey Knowledge | Cost | Prerequisites | Introduced |
|---|---|---|---|
 Fast Tack Attacks Tack Shooter attack speed increased by 8%. |
Free | — | Launch |
 Increased Lifespan Longer projectile lifespan for Dart Monkey, Bomb Shooter, Tack Shooter and Glue Gunner. |
Free | — | Launch |
 Hard Tacks Tack Shooter tacks can pop Frozen Bloons. |
Free | Fast Tack Attacks | Launch |
 Poppy Blades Blade Shooter upgrade gets +2 pierce. |
Free | Hard Tacks | Launch |
 Big Inferno Inferno Ring upgrade gets +3 burst radius. |
Free |  5 invested 5 investedPoppy Blades |
Launch |
Rogue Legends
[edit | edit source]Starter parties with Tack Shooters
[edit | edit source]| Hero | Insta Monkey 1 | Insta Monkey 2 | Artifact |
|---|---|---|---|
 1-1-0 Tack Shooter 1-1-0 Tack Shooter |
 0-2-0 Wizard Monkey 0-2-0 Wizard Monkey |
 Flaming Hot Punch-A-Rang Legendary (adds Flaming Hot Punch-A-Rang Legendary (adds  0-0-2 Boomerang Monkey) 0-0-2 Boomerang Monkey) |
|
 0-2-0 Tack Shooter 0-2-0 Tack Shooter |
 2-0-0 Spike Factory 2-0-0 Spike Factory |
 Heightened Perception Legendary Heightened Perception Legendary |
|
 0-1-0 Beast Handler 0-1-0 Beast Handler |
 0-1-2 Tack Shooter 0-1-2 Tack Shooter |
 Bargaining Chip Legendary Bargaining Chip Legendary |
|
 2-0-0 Bomb Shooter 2-0-0 Bomb Shooter |
 0-3-0 Tack Shooter 0-3-0 Tack Shooter |
 Ceramic Chunker Legendary Ceramic Chunker Legendary |
|
 2-0-0 Tack Shooter 2-0-0 Tack Shooter |
 0-0-2 Mortar Monkey 0-0-2 Mortar Monkey |
 Quantum Leap Common Quantum Leap Common |
|
| 0-3-0 Tack Shooter |
0-2-0 Wizard Monkey |
 Innate Ability Legendary Innate Ability Legendary |


Related Artifacts
[edit | edit source]| Artifact | Common effect | Rare effect | Legendary effect |
|---|---|---|---|
 Follow Me |
Dart Monkeys, Boomerang Monkeys, Bomb Shooters, Tack Shooters, Super Monkeys, Druids, and Mermonkeys follow cursor like a Dartling Gunner with a turn rate of 180, and constantly fire as long as Bloons are on screen. Attack speed reduced by 17% | Dart Monkeys, Boomerang Monkeys, Bomb Shooters, Tack Shooters, Super Monkeys, Druids, and Mermonkeys follow cursor like a Dartling Gunner with a turn rate of 300, and constantly fire as long as Bloons are on screen. Attack speed reduced by 9% | Dart Monkeys, Boomerang Monkeys, Bomb Shooters, Tack Shooters, Super Monkeys, Druids, and Mermonkeys follow cursor like a Dartling Gunner with a turn rate of 500, and constantly fire as long as Bloons are on screen. Attack speed reduced by 5% |
 Homing Projectiles |
— | — | Grants homing projectiles for Dart Monkey, Bomb Shooter, Tack Shooter, Super Monkey, Druid, Engineer, Dartling Gunner and all Heroes |
 Trick Shot A-Tacks |
Tack Shooter projectiles rebound off obstacles. Range and projectile lifespan increased 50%. Adds a 1-1-0 Tack Shooter to your Party | Tack Shooter projectiles rebound off obstacles. Range and projectile lifespan increased 100%. Adds a 1-2-0 Tack Shooter to your Party | Tack Shooter projectiles rebound off obstacles. Range and projectile lifespan increased 200%. Adds a 0-2-0 Tack Shooter to your Party |
Costs and sell values
[edit | edit source]| Tiers | Total cost | Sell value | ||||||
|---|---|---|---|---|---|---|---|---|
| Easy | Medium | Hard | Impoppable | Easy | Medium | Hard | Impoppable | |
| 0-0-0 | $220 | $260 | $280 | $310 | $154 | $182 | $196 | $217 |
| 1-0-0 | $350 | $410 | $440 | $490 | $245 | $287 | $308 | $343 |
| 1-1-0 | $435 | $510 | $550 | $610 | $305 | $357 | $385 | $427 |
| 1-0-1 | $480 | $560 | $600 | $670 | $336 | $392 | $420 | $469 |
| 0-1-0 | $305 | $360 | $390 | $430 | $214 | $252 | $273 | $301 |
| 0-1-1 | $435 | $510 | $550 | $610 | $305 | $357 | $385 | $427 |
| 0-0-1 | $350 | $410 | $440 | $490 | $245 | $287 | $308 | $343 |
| 2-0-0 | $535 | $630 | $680 | $755 | $375 | $441 | $476 | $529 |
| 2-1-0 | $620 | $730 | $790 | $875 | $434 | $511 | $553 | $613 |
| 2-2-0 | $810 | $955 | $1,035 | $1,145 | $567 | $669 | $725 | $802 |
| 2-0-1 | $665 | $780 | $840 | $935 | $466 | $546 | $588 | $655 |
| 2-0-2 | $795 | $930 | $1,000 | $1,115 | $557 | $651 | $700 | $781 |
| 0-2-0 | $495 | $585 | $635 | $700 | $347 | $410 | $445 | $490 |
| 1-2-0 | $625 | $735 | $795 | $880 | $438 | $515 | $557 | $616 |
| 0-2-1 | $625 | $735 | $795 | $880 | $438 | $515 | $557 | $616 |
| 0-2-2 | $755 | $885 | $955 | $1,060 | $529 | $620 | $669 | $742 |
| 0-0-2 | $480 | $560 | $600 | $670 | $336 | $392 | $420 | $469 |
| 1-0-2 | $610 | $710 | $760 | $850 | $427 | $497 | $532 | $595 |
| 0-1-2 | $565 | $660 | $710 | $790 | $396 | $462 | $497 | $553 |
| 3-0-0 | $1,045 | $1,230 | $1,330 | $1,475 | $732 | $861 | $931 | $1,033 |
| 3-1-0 | $1,130 | $1,330 | $1,440 | $1,595 | $791 | $931 | $1,008 | $1,117 |
| 3-2-0 | $1,320 | $1,555 | $1,685 | $1,865 | $924 | $1,089 | $1,180 | $1,306 |
| 3-0-1 | $1,175 | $1,380 | $1,490 | $1,655 | $823 | $966 | $1,043 | $1,159 |
| 3-0-2 | $1,305 | $1,530 | $1,650 | $1,835 | $914 | $1,071 | $1,155 | $1,285 |
| 0-3-0 | $965 | $1,135 | $1,230 | $1,360 | $676 | $795 | $861 | $952 |
| 1-3-0 | $1,095 | $1,285 | $1,390 | $1,540 | $767 | $900 | $973 | $1,078 |
| 2-3-0 | $1,280 | $1,505 | $1,630 | $1,805 | $896 | $1,054 | $1,141 | $1,264 |
| 0-3-1 | $1,095 | $1,285 | $1,390 | $1,540 | $767 | $900 | $973 | $1,078 |
| 0-3-2 | $1,225 | $1,435 | $1,550 | $1,720 | $858 | $1,005 | $1,085 | $1,204 |
| 0-0-3 | $865 | $1,010 | $1,085 | $1,210 | $606 | $707 | $760 | $847 |
| 1-0-3 | $995 | $1,160 | $1,245 | $1,390 | $697 | $812 | $872 | $973 |
| 2-0-3 | $1,180 | $1,380 | $1,485 | $1,655 | $826 | $966 | $1,040 | $1,159 |
| 0-1-3 | $950 | $1,110 | $1,195 | $1,330 | $665 | $777 | $837 | $931 |
| 0-2-3 | $1,140 | $1,335 | $1,440 | $1,600 | $798 | $935 | $1,008 | $1,120 |
| 4-0-0 | $4,020 | $4,730 | $5,110 | $5,675 | $2,814 | $3,311 | $3,577 | $3,973 |
| 4-1-0 | $4,105 | $4,830 | $5,220 | $5,795 | $2,874 | $3,381 | $3,654 | $4,057 |
| 4-2-0 | $4,295 | $5,055 | $5,465 | $6,065 | $3,007 | $3,539 | $3,826 | $4,246 |
| 4-0-1 | $4,150 | $4,880 | $5,270 | $5,855 | $2,905 | $3,416 | $3,689 | $4,099 |
| 4-0-2 | $4,280 | $5,030 | $5,430 | $6,035 | $2,996 | $3,521 | $3,801 | $4,225 |
| 0-4-0 | $3,260 | $3,835 | $4,145 | $4,600 | $2,282 | $2,685 | $2,902 | $3,220 |
| 1-4-0 | $3,390 | $3,985 | $4,305 | $4,780 | $2,373 | $2,790 | $3,014 | $3,346 |
| 2-4-0 | $3,575 | $4,205 | $4,545 | $5,045 | $2,503 | $2,944 | $3,182 | $3,532 |
| 0-4-1 | $3,390 | $3,985 | $4,305 | $4,780 | $2,373 | $2,790 | $3,014 | $3,346 |
| 0-4-2 | $3,520 | $4,135 | $4,465 | $4,960 | $2,464 | $2,895 | $3,126 | $3,472 |
| 0-0-4 | $3,585 | $4,210 | $4,540 | $5,050 | $2,510 | $2,947 | $3,178 | $3,535 |
| 1-0-4 | $3,715 | $4,360 | $4,700 | $5,230 | $2,601 | $3,052 | $3,290 | $3,661 |
| 2-0-4 | $3,900 | $4,580 | $4,940 | $5,495 | $2,730 | $3,206 | $3,458 | $3,847 |
| 0-1-4 | $3,670 | $4,310 | $4,650 | $5,170 | $2,569 | $3,017 | $3,255 | $3,619 |
| 0-2-4 | $3,860 | $4,535 | $4,895 | $5,440 | $2,702 | $3,175 | $3,427 | $3,808 |
| 5-0-0 | $42,695 | $50,230 | $54,250 | $60,275 | $29,887 | $35,161 | $37,975 | $42,193 |
| 5-1-0 | $42,780 | $50,330 | $54,360 | $60,395 | $29,946 | $35,231 | $38,052 | $42,277 |
| 5-2-0 | $42,970 | $50,555 | $54,605 | $60,665 | $30,079 | $35,389 | $38,224 | $42,466 |
| 5-0-1 | $42,825 | $50,380 | $54,410 | $60,455 | $29,978 | $35,266 | $38,087 | $42,319 |
| 5-0-2 | $42,955 | $50,530 | $54,570 | $60,635 | $30,069 | $35,371 | $38,199 | $42,445 |
| 0-5-0 | $16,010 | $18,835 | $20,345 | $22,600 | $11,207 | $13,185 | $14,242 | $15,820 |
| 1-5-0 | $16,140 | $18,985 | $20,505 | $22,780 | $11,298 | $13,290 | $14,354 | $15,946 |
| 2-5-0 | $16,325 | $19,205 | $20,745 | $23,045 | $11,428 | $13,444 | $14,522 | $16,132 |
| 0-5-1 | $16,140 | $18,985 | $20,505 | $22,780 | $11,298 | $13,290 | $14,354 | $15,946 |
| 0-5-2 | $16,270 | $19,135 | $20,665 | $22,960 | $11,389 | $13,395 | $14,466 | $16,072 |
| 0-0-5 | $20,585 | $24,210 | $26,140 | $29,050 | $14,410 | $16,947 | $18,298 | $20,335 |
| 1-0-5 | $20,715 | $24,360 | $26,300 | $29,230 | $14,501 | $17,052 | $18,410 | $20,461 |
| 2-0-5 | $20,900 | $24,580 | $26,540 | $29,495 | $14,630 | $17,206 | $18,578 | $20,647 |
| 0-1-5 | $20,670 | $24,310 | $26,250 | $29,170 | $14,469 | $17,017 | $18,375 | $20,419 |
| 0-2-5 | $20,860 | $24,535 | $26,495 | $29,440 | $14,602 | $17,175 | $18,547 | $20,608 |
Strategy
[edit | edit source]Tack Shooters generally have poor range but compensate significantly by its high projectile count and reasonably good attack speed. This makes them very receptive to flat damage and pierce buffs. It is preferred to place them around corners and tight curves to maximize use of its projectiles, even if the Tack Shooter gains high range. Its early-game is decent, and has a solid mid-game and late-game when supported by buffs.
The first path focuses on attack speed and eventually adds high raw damage. Ring of Fire and Inferno Ring trade off tacks for single flame rings that have high pierce and damage and benefit much better with extra range; maximize their track coverage, still preferrably around tight regions.
The second path is primarily focused on range and pierce, with Super Range Tacks providing a significant boost to those stat bonuses for any Tack Shooter. Its activated abilities in particular have significantly high pierce, making them powerful in Race scenarios.
The third path focuses on making many projectiles per second. This path's main strength is ripping MOAB-Class Bloons by spawning tacks on top of them, and works very well with flat damage buffs (e.g. Berserker Brew) and Bloon damage debuffs (e.g. Embrittlement) due to the high projectile count of these Tack Shooters. All of these upgrades usually prefer the attack speed crosspath to maximize shots.
Update history
[edit | edit source]
|
This article or section uses Cargo to generate its content. It will automatically fill up as other articles are completed. To add to this section, create the articles it is looking up. Do not add content to this section manually and do not remove this notice until you are sure this section is complete. |
— Update notes
 Cost reduced ― $280 → $260
— Update notes
- Reload rate reduced ― 1.4s → 1.12s
Cosmetic items
[edit | edit source]| Item | Category | Unlock method(s) | Introduced |
|---|---|---|---|
 Tack Shooter Icicles and Snowflakes Projectile Tack Shooter Icicles and Snowflakes Projectile |
Monkeys — Projectiles | Trophy Store —  50 50 |
Version 34.0 |
 Tack Shooter Hedgehog Pet Tack Shooter Hedgehog Pet |
Monkeys — Pets | Trophy Store — 120 |
Version 36.0 |
Gallery
[edit | edit source]Screenshots
[edit | edit source]
|
This section needs more screenshots. See the screenshot guidelines for more information on what screenshots are needed and how to add them. |
-
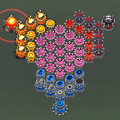 All upgrade combinations

Assets
[edit | edit source]-
 Portrait
 -
 Insta Monkey icon

In other languages
[edit | edit source]| Language | Text | Notes |
|---|---|---|
| Arabic | قاذف المسامير | — |
| Danish | Stift-skyder | — |
| German | Reißnagelwerfer | — |
| Spanish | Tiratachuelas | — |
| Spanish (Latin America) | Tiratachuelas | — |
| Finnish | Nasta-ampuja | — |
| French | Tireur de punaises | — |
| Italian | Spara puntine | — |
| Japanese | びょうシューター | — |
| Korean | 압정 슈터 | — |
| Dutch | Punaisetoren | — |
| Norwegian | Stiftskyter | — |
| Polish | Działo gwoździowe | — |
| Portuguese (Brazil) | Cospe Tachinha | — |
| Russian | Шпилькомет | — |
| Swedish | Stiftskjutare | — |
| Thai | เครื่องยิงตะปู | — |
| Turkish | Çivi Atıcı | — |
| Chinese (simplified) | 图钉塔 | — |
| Chinese (traditional) | 釘子槍手 | — |
| Language | Text | Notes |
|---|---|---|
| Arabic | يقوم بإطلاق سهم من المسامير الحادة قصيرة المدى في ثماني اتجاهات. | — |
| Danish | Affyrer en kortrækkende byge af skarpe stifter i 8 retninger. | — |
| German | Schießt auf kurze Reichweite eine Salve scharfer Reißnägel in 8 Richtungen. | — |
| Spanish | Dispara una volea de corto alcance de afilados clavos en 8 direcciones. | — |
| Spanish (Latin America) | Dispara una volea de corto alcance de afilados clavos en 8 direcciones. | — |
| Finnish | Ampuu lyhyen kantaman terävien nastojen ryppään 8 suuntaan. | — |
| French | Tire une salve de punaises pointues à courte portée dans 8 directions. | — |
| Italian | Spara una scarica a corto raggio di puntine in 8 direzioni. | — |
| Japanese | 八方向に尖ったびょうの近距離射撃を一斉発射する。 | — |
| Korean | 뾰족한 압정을 8방향 단거리로 일제히 발사합니다. | — |
| Dutch | Schiet een salvo van scherpe punaises af in 8 richtingen over korte afstand. | — |
| Norwegian | Skyter en skuddsalve med stifter med kort rekkevidde i 8 retninger. | — |
| Polish | Strzela serią ostrych gwoździ krótkiego zasięgu w ośmiu kierunkach. | — |
| Portuguese (Brazil) | Dispara uma rajada curta de tachinhas em oito direções. | — |
| Russian | Выстреливает в разные стороны по 8 шпилек на короткое расстояние. | — |
| Swedish | Skjuter en salva med kort räckvidd med vassa nubb i 8 riktningar. | — |
| Thai | ยิงตะปูแหลมคมจำนวนมากโจมตีระยะใกล้ 8 ทิศทาง | — |
| Turkish | 8 yönde kısa menzilli bir keskin çivi yağmuruna tutar. | — |
| Chinese (simplified) | 向8个方向齐射短程锋利刺钉。 | — |
| Chinese (traditional) | 向8個方向齊射出短射程尖銳釘子。 | — |
Footnotes
[edit | edit source]- ↑ Tacks from most upgrades have 0 radius, meaning a tack can only hit Bloons by colliding its central hitbox onto the hitbox of a Bloon.
References
[edit | edit source]- ↑ "rohan_spibo comments on Bloons TD 6 v46.0 - Update Preview!". Reddit. Retrieved Sat, 5 Oct 2024.
Navigation
[edit | edit source]| Tack Shooter in Bloons TD 6 | ||||||||
|---|---|---|---|---|---|---|---|---|
| ||||||||
| Stats • Strategies • Update history |
| Towers in Bloons TD 6 | ||||||||||||
|---|---|---|---|---|---|---|---|---|---|---|---|---|
|
| Tack Shooters | ||||||||||
|---|---|---|---|---|---|---|---|---|---|---|
| ||||||||||
| Gallery | ||||||||||