Targeting option: Difference between revisions
Planterror (talk | contribs) →Bloons TD Battles 2: obyn and ocean obyn differences |
Qwertyxp2000 (talk | contribs) more stuff |
||
| Line 138: | Line 138: | ||
|[[Dart Monkey (BTD6)|Dart Monkey]] | |[[Dart Monkey (BTD6)|Dart Monkey]] | ||
|Standard targeting options | |Standard targeting options | ||
[[Super Monkey Fan Club (BTD6)|Super Monkey Fan Club]] and [[Plasma Monkey Fan Club (BTD6)|Plasma Monkey Fan Club]] transforms the closest Dart Monkeys | [[Super Monkey Fan Club (BTD6)|Super Monkey Fan Club]] and [[Plasma Monkey Fan Club (BTD6)|Plasma Monkey Fan Club]] transforms the closest Dart Monkeys that are not already transformed. | ||
[[Enhanced Eyesight (BTD6)|Enhanced Eyesight]] upgrade allows them to target Camo Bloons grants Camo prioritization. | [[Enhanced Eyesight (BTD6)|Enhanced Eyesight]] upgrade allows them to target Camo Bloons grants Camo prioritization. | ||
| Line 158: | Line 158: | ||
|[[Ice Monkey (BTD6)|Ice Monkey]] | |[[Ice Monkey (BTD6)|Ice Monkey]] | ||
|No targeting options. Cannot attack [[MOAB-Class Bloon|MOAB-Class Bloons]] with its regular attack until having the [[Embrittlement (BTD6)|Embrittlement]], [[Absolute Zero (BTD6)|Absolute Zero]] or [[Cryo Cannon (BTD6)|Cryo Cannon]] upgrades. | |No targeting options. Cannot attack [[MOAB-Class Bloon|MOAB-Class Bloons]] with its regular attack until having the [[Embrittlement (BTD6)|Embrittlement]], [[Absolute Zero (BTD6)|Absolute Zero]] or [[Cryo Cannon (BTD6)|Cryo Cannon]] upgrades. | ||
[[Cold Snap (BTD6)|Cold Snap]] upgrade allows them to | [[Cold Snap (BTD6)|Cold Snap]] upgrade allows them to target and affect Camo Bloons. | ||
Gains standard targeting options after being upgraded to [[Cryo Cannon (BTD6)|Cryo Cannon]]. It also gains Camo prioritization if crosspathed with [[Cold Snap (BTD6)|Cold Snap]]. | Gains standard targeting options after being upgraded to [[Cryo Cannon (BTD6)|Cryo Cannon]]. It also gains Camo prioritization if crosspathed with [[Cold Snap (BTD6)|Cold Snap]]. | ||
|- | |- | ||
|[[Glue Gunner (BTD6)|Glue Gunner]] | |[[Glue Gunner (BTD6)|Glue Gunner]] | ||
|Standard targeting options. They ignore Bloons | |Standard targeting options. They ignore Bloons that are already affected by the same type of [[Glue Level|Glue]] it is shooting. | ||
[[Glue Strike (BTD6)|Glue Strike]] and [[Glue Storm (BTD6)|Glue Storm]] ability have map-wide effects and can affect Camo Bloons. | [[Glue Strike (BTD6)|Glue Strike]] and [[Glue Storm (BTD6)|Glue Storm]] ability have map-wide effects and can affect Camo Bloons. | ||
|- | |- | ||
| Line 173: | Line 173: | ||
The Marking attacks of [[Bounty Hunter]] and [[Golden Justice]] (either regular or from the Marked to Pop ability) follow the Desperado's targeting. If either tower is on the map, all Desperados gain Marked prioritization. | The Marking attacks of [[Bounty Hunter]] and [[Golden Justice]] (either regular or from the Marked to Pop ability) follow the Desperado's targeting. If either tower is on the map, all Desperados gain Marked prioritization. | ||
<!--wanderer is more of a detect towers in range than a "target"--> | |||
|- | |- | ||
|[[Sniper Monkey (BTD6)|Sniper Monkey]] | |[[Sniper Monkey (BTD6)|Sniper Monkey]] | ||
|Standard targeting options. | |Standard targeting options. | ||
[[Night Vision Goggles (BTD6)|Night Vision Goggles]] upgrade allows them to target Camo Bloons grants Camo prioritization. | [[Night Vision Goggles (BTD6)|Night Vision Goggles]] upgrade allows them to target Camo Bloons grants Camo prioritization. | ||
Elite Sniper's buffs target all Sniper Monkeys. | |||
When a Sniper gets upgraded to [[Elite Sniper (BTD6)|Elite Sniper]], all Sniper Monkeys in the map gain a new targeting option called ''[[Elite Sniper (BTD6)#Elite targeting|Elite]]'', which, in a simplified way to explain it, keeps the Sniper in ''Strong'' targeting until a Bloon reaches 75% of the track length or more, at that point the targeting is switched automatically to ''First'' and returns to ''Strong'' after there are no more Bloons at the end of the track. | When a Sniper gets upgraded to [[Elite Sniper (BTD6)|Elite Sniper]], all Sniper Monkeys in the map gain a new targeting option called ''[[Elite Sniper (BTD6)#Elite targeting|Elite]]'', which, in a simplified way to explain it, keeps the Sniper in ''Strong'' targeting until a Bloon reaches 75% of the track length or more, at that point the targeting is switched automatically to ''First'' and returns to ''Strong'' after there are no more Bloons at the end of the track. | ||
|- | |- | ||
|[[Monkey Sub (BTD6)|Monkey Sub]] | |[[Monkey Sub (BTD6)|Monkey Sub]] | ||
|Standard targeting options. No effect on [[Submerge and Support (BTD6)|submerged]] towers. | |Standard targeting options. No effect on [[Submerge and Support (BTD6)|submerged]] towers; Submerge and Support gains a button that toggles submersion. | ||
[[Advanced Intel (BTD6)|Advanced Intel]] Subs and [[Nautic Siege Core]] Rocket Attack will take into account all Bloons on other tower's range to determine their target, they can target Camo Bloons if the tower that is sharing vision with has Camo detection. | [[Advanced Intel (BTD6)|Advanced Intel]] Subs and [[Nautic Siege Core]] Rocket Attack will take into account all Bloons on other tower's range to determine their target, they can target Camo Bloons if the tower that is sharing vision with has Camo detection. | ||
[[ | [[Bloontonium Reactor (BTD6)|Bloontonium Reactor]]'s local-ranged buff targets only water-placed towers, and [[Energizer (BTD6)|Energizer]]'s global buff targets all towers on screen. | ||
[[Nautic Siege Core]] pre-emptive attack can target Camo Bloons and ignores line of sight blockers. Each of the three | [[Ballistic Missile (BTD6)|Ballistic Missile]] ignores line-of sight blockers for its missile attacks, [[First Strike Capability (BTD6)|First Strike Capability]] ability always target ''Strong'', and [[Pre-emptive Strike (BTD6)|Pre-emptive Strike]] passive ability targets any MOAB-Class Bloon that enters the screen, however it will ignore its children or Bloons spawned by Bosses. | ||
[[Nautic Siege Core]] pre-emptive attack can target Camo Bloons and ignores line of sight blockers. Each of the three missiles of the Final Strike ability always target ''First'', ''Close'' and ''Strong'', respectively. | |||
|- | |- | ||
|[[Monkey Buccaneer (BTD6)|Monkey Buccaneer]] | |[[Monkey Buccaneer (BTD6)|Monkey Buccaneer]] | ||
| Line 206: | Line 211: | ||
[[Spy Plane (BTD6)|Spy Plane]] upgrade allows them to target Camo Bloons. | [[Spy Plane (BTD6)|Spy Plane]] upgrade allows them to target Camo Bloons. | ||
[[Ground Zero (BTD6)|Ground Zero]] and [[Tsar Bomba (BTD6)|Tsar Bomba]] abilities have map-wide effects. | [[Ground Zero (BTD6)|Ground Zero]] and [[Tsar Bomba (BTD6)|Tsar Bomba]] abilities have map-wide effects, but for pierce calculations it defaults on ''Close'' relative to the landing pad.<!--there's an image to demo it, trust me: https://bloons.fandom.com/wiki/File:GZNoInfinite.png--> | ||
[[Neva-Miss Targeting (BTD6)|Neva-Miss Targeting]] projectiles and [[Spectre (BTD6)|Spectre's]] barrages always target ''First'', and [[Flying Fortress (BTD6)|Flying Fortress]]'s barrages always target ''First'', ''Last'', and ''Close'', respectively. | [[Neva-Miss Targeting (BTD6)|Neva-Miss Targeting]] projectiles and [[Spectre (BTD6)|Spectre's]] barrages always target ''First'', and [[Flying Fortress (BTD6)|Flying Fortress]]'s barrages always target ''First'', ''Last'', and ''Close'', respectively. | ||
| Line 218: | Line 223: | ||
* ''Follow Touch'': The helicopter flies towards the last point in the map touched by the player. Available in Android and iOS platforms. Available if the device has a touch screen. | * ''Follow Touch'': The helicopter flies towards the last point in the map touched by the player. Available in Android and iOS platforms. Available if the device has a touch screen. | ||
* ''Lock in place'': The helicopter flies and stops at a specific point of the map chosen by the player, defaults to the center of the map. | * ''Lock in place'': The helicopter flies and stops at a specific point of the map chosen by the player, defaults to the center of the map. | ||
* ''Patrol points''. The helicopter flies back and forth in a straight line drawn by the player, defaults to a horizontal line in the center of the map. | * ''Patrol points''. The helicopter flies back and forth in a straight line drawn by the player, defaults to a horizontal line in the center of the map. Pursuit upgrade modifies ''Patrol Points'' to trigger ''Pursuit''-like targeting if Bloons are within range of the straight line. | ||
* ''Pursuit:'' The helicopter flies to place itself in front of the ''First'' Bloon. Requires the [[Pursuit (BTD6)|Pursuit]] upgrade. | * ''Pursuit:'' The helicopter flies to place itself in front of the ''First'' Bloon. Requires the [[Pursuit (BTD6)|Pursuit]] upgrade. | ||
Heli | Heli Pilots default to Follow Mouse / Touch. All of the helicopter's projectiles always target ''First''. | ||
[[IFR (BTD6)|IFR]] upgrade allows them to target Camo Bloons. | [[IFR (BTD6)|IFR]] upgrade allows them to target Camo Bloons. | ||
[[Special Poperations (BTD6)|Monkey Marine]] has standard targeting options and starts at ''First'' when spawned. | [[Special Poperations (BTD6)|Monkey Marine]] has standard targeting options and starts at ''First'' when spawned. | ||
[[Support Chinook (BTD6)|Support Chinook]]'s Reposition can target any "non-heavy" tower at the choice of the player. | |||
|- | |- | ||
|[[Mortar Monkey (BTD6)|Mortar Monkey]] | |[[Mortar Monkey (BTD6)|Mortar Monkey]] | ||
| Line 243: | Line 250: | ||
|[[Wizard Monkey (BTD6)|Wizard Monkey]] | |[[Wizard Monkey (BTD6)|Wizard Monkey]] | ||
|Standard targeting options. The [[Guided Magic (BTD6)|Guided Magic]] upgrade allows it to ignore line of sight blockers. | |Standard targeting options. The [[Guided Magic (BTD6)|Guided Magic]] upgrade allows it to ignore line of sight blockers. | ||
[[Monkey Sense (BTD6)|Monkey Sense]] upgrade allows them to target Camo Bloons grants Camo prioritization. | [[Monkey Sense (BTD6)|Monkey Sense]] upgrade allows them to target Camo Bloons and grants Camo prioritization. | ||
The targeting of the phoenixes from [[Summon Phoenix (BTD6)|Summon Phoenix]] and [[Wizard Lord Phoenix (BTD6)|Wizard Lord Phoenix]], and the Lava Phoenix from the latter, are linked to their parent tower. Phoenixes always move anticlockwise on ''Circle''. | The targeting of the phoenixes from [[Summon Phoenix (BTD6)|Summon Phoenix]] and [[Wizard Lord Phoenix (BTD6)|Wizard Lord Phoenix]], and the Lava Phoenix from the latter, are linked to their parent tower. Phoenixes always move anticlockwise on ''Circle''. | ||
| Line 258: | Line 265: | ||
For the sub-towers of [[Sun Temple (BTD6)|Sun Temples]] and the [[True Sun God (BTD6)|True Sun God]] (including [[VTSG]]), the Mini-Spectres inherit the targeting of its parent tower, and Mini-Sun Avatars have standard targeting options and start with the targeting of its parent tower when spawned. | For the sub-towers of [[Sun Temple (BTD6)|Sun Temples]] and the [[True Sun God (BTD6)|True Sun God]] (including [[VTSG]]), the Mini-Spectres inherit the targeting of its parent tower, and Mini-Sun Avatars have standard targeting options and start with the targeting of its parent tower when spawned. | ||
Sun Temple and True Sun God buff target all towers in range. | |||
|- | |- | ||
|[[Ninja Monkey (BTD6)|Ninja Monkey]] | |[[Ninja Monkey (BTD6)|Ninja Monkey]] | ||
|Standard targeting options. It can target Camo Bloons and have Camo | |Standard targeting options. It can target Camo Bloons and have Camo prioritization by default. | ||
The sticky bombs from [[Sticky Bomb (BTD6)|Sticky Bomb]], [[Master Bomber (BTD6)|Master Bomber]] and [[Ascended Shadow]] follow the Ninja's targeting, and they have map-wide range for the latter two. | The sticky bombs from [[Sticky Bomb (BTD6)|Sticky Bomb]], [[Master Bomber (BTD6)|Master Bomber]] and [[Ascended Shadow]] follow the Ninja's targeting, and they have map-wide range for the latter two. | ||
[[Shinobi Tactics (BTD6)|Shinobi Tactics]] buff targets all x-3+-x Ninjas in range including the Ninja itself. | |||
|- | |- | ||
|[[Alchemist (BTD6)|Alchemist]] | |[[Alchemist (BTD6)|Alchemist]] | ||
| Line 267: | Line 278: | ||
[[Acidic Mixture Dip (BTD6)|Acidic Mixture Dip]] buff always targets randomly onto towers, and the brew from [[Berserker Brew (BTD6)|Berserker Brew]] and higher upgrades always target the closest tower (assuming it isn't brewed already or under downtime). | [[Acidic Mixture Dip (BTD6)|Acidic Mixture Dip]] buff always targets randomly onto towers, and the brew from [[Berserker Brew (BTD6)|Berserker Brew]] and higher upgrades always target the closest tower (assuming it isn't brewed already or under downtime). | ||
[[Total Transformation (BTD6)|Total Transformation]] affects the | [[Total Transformation (BTD6)|Total Transformation]] affects the closest eligible monkeys. | ||
|- | |- | ||
|[[Mermonkey (BTD6)|Mermonkey]] | |[[Mermonkey (BTD6)|Mermonkey]] | ||
| Line 276: | Line 287: | ||
The Trance attack from [[Alluring Melody]], [[Symphonic Resonance]] and [[The Final Harmonic]] always target ''First''. The Trance Totem can be put at any point for Symphonic Resonance and anywhere in the map for The Final Harmonic. | The Trance attack from [[Alluring Melody]], [[Symphonic Resonance]] and [[The Final Harmonic]] always target ''First''. The Trance Totem can be put at any point for Symphonic Resonance and anywhere in the map for The Final Harmonic. | ||
[[Abyss Dweller]] and above buffs target all towers in range, and [[The Final Harmonic]]'s buffs separately target Magic Monkeys and Heroes depending where the trance radius is placed. | |||
|- | |- | ||
|[[Druid (BTD6)|Druid]] | |[[Druid (BTD6)|Druid]] | ||
| Line 311: | Line 324: | ||
[[Cleansing Foam (BTD6)|Cleansing Foam]] can target a specific point of the map on the Engineer's range chosen by the player. | [[Cleansing Foam (BTD6)|Cleansing Foam]] can target a specific point of the map on the Engineer's range chosen by the player. | ||
[[Overclock (BTD6)|Overclock]], [[Ultraboost (BTD6)|Ultraboost]] and Power Glove abilities target a specific Monkey, chosen by the player. | [[Overclock (BTD6)|Overclock]], [[Ultraboost (BTD6)|Ultraboost]] and Power Glove abilities target a specific Monkey, chosen by the player, and filter certain targets. | ||
[[Bloon Trap (BTD6)|Bloon Trap]] targets to the closest point of the track in the Engineer's range, but if crosspathed with [[Larger Service Area (BTD6)|Larger Service Area]], it can be targeted to any point in range. | [[Bloon Trap (BTD6)|Bloon Trap]] targets to the closest point of the track in the Engineer's range, but if crosspathed with [[Larger Service Area (BTD6)|Larger Service Area]], it can be targeted to any point in range. | ||
| Line 332: | Line 345: | ||
Cocktail of Fire can target a specific point of the map on the Gwen's range chosen by the player, defaults to the closest point of the track. | Cocktail of Fire can target a specific point of the map on the Gwen's range chosen by the player, defaults to the closest point of the track. | ||
Firestorm has map-wide effect. | Level 5+ Pyrotechnic Expert buff targets towers with at least [[Dragon's Breath (BTD6)|Dragon's Breath]] (x-3-x [[Wizard Monkey (BTD6)|Wizard Monkey]]), [[Ring of Fire (BTD6)|Ring of Fire]] (4-x-x [[Tack Shooter (BTD6)|Tack Shooter]]), or [[Signal Flare (BTD6)|Signal Flare]] (x-x-2 [[Mortar Monkey (BTD6)|Mortar Monkey]]) | ||
Firestorm has a map-wide effect. | |||
|- | |- | ||
|[[Striker Jones (BTD6)|Striker Jones]] | |[[Striker Jones (BTD6)|Striker Jones]] | ||
| Line 381: | Line 396: | ||
*''Zone Defense'': One drone each on ''First'', ''Last'', ''Close'' and ''Strong''. | *''Zone Defense'': One drone each on ''First'', ''Last'', ''Close'' and ''Strong''. | ||
All attacks ignore line of sight blockers and he requires Level 5+ to target Camo Bloons. | All attacks ignore line of sight blockers and he requires Level 5+ to target Camo Bloons. | ||
The drones from Drone Swarm target one ''First'', one ''Last'', and two ''Strong''. Requires Level 5+ to target Camos. | The drones from Drone Swarm target one ''First'', one ''Last'', and two ''Strong''. Requires Level 5+ to target Camos. | ||
Level 8's Camo buff targets all Monkeys on screen. | |||
UCAV (either from ability or upon reaching Level 20) always moves anticlockwise on ''Circle'' and their missiles alway targets ''First''. | |||
UCAV (either from ability or upon reaching Level 20) always moves anticlockwise on ''Circle'' and their missiles | |||
|- | |- | ||
|[[Sauda (BTD6)|Sauda]] | |[[Sauda (BTD6)|Sauda]] | ||
| Line 406: | Line 419: | ||
Creepy Idol targets every 4th Bloon that comes in range. | Creepy Idol targets every 4th Bloon that comes in range. | ||
Gerry's Fire always target ''First'' and ignores line of sight blockers. | Gerry's Fire always target ''First'' and ignores line of sight blockers. It inherits Camo targeting from its parent. | ||
Killer Rabbit ignores line of sight blockers and can target Camo Bloons. It follows Geraldo's targeting. | Killer Rabbit ignores line of sight blockers and can target Camo Bloons. It follows Geraldo's targeting. | ||
Genie | Genie flies in ''Figure Eight'' pattern at the map's centre<!--or was it around the bottle?--> and follows Geraldo's targeting. | ||
|- | |- | ||
|[[Corvus (BTD6)|Corvus]] | |[[Corvus (BTD6)|Corvus]] | ||
| Line 419: | Line 432: | ||
|- | |- | ||
|[[Rosalia (BTD6)|Rosalia]] | |[[Rosalia (BTD6)|Rosalia]] | ||
|Standard targeting options, ignores line of sight blockers at Level 7+. | |Standard targeting options, ignores line of sight blockers at Level 7+. She has a reposition button that moves her to a new location within her workshop's range. | ||
Scatter Missile and Kinetic Charge follow Rosalia's targeting with map-wide range. | Scatter Missile and Kinetic Charge follow Rosalia's targeting with map-wide range. | ||
While Flight Boost is active, her flight pattern is set on ''Pursuit'' and follows a Bloon based on her targeting option. | While Flight Boost is active, her flight pattern is set on ''Pursuit'' and follows a Bloon based on her targeting option. | ||
| Line 427: | Line 440: | ||
|- | |- | ||
|[[Banana Farmer (BTD6)|Banana Farmer]] | |[[Banana Farmer (BTD6)|Banana Farmer]] | ||
|No targeting options, as it cannot attack. | |No targeting options, as it cannot attack. Prioritizes picking up the oldest collectibles. | ||
|- | |- | ||
|[[Tech Bot (BTD6)|Tech Bot]] | |[[Tech Bot (BTD6)|Tech Bot]] | ||
| Line 497: | Line 510: | ||
|- | |- | ||
|[[Scientist Gwendolin (Battles 2)|Scientist Gwendolin]]<!--"targeting" is the same except her lvl5 buff, the hiu effect differs but can target the same towers--> | |[[Scientist Gwendolin (Battles 2)|Scientist Gwendolin]]<!--"targeting" is the same except her lvl5 buff, the hiu effect differs but can target the same towers--> | ||
|Same as normal Gwendolin, except her Level 5+ buffs target [[Glue Splatter (Battles 2)|Glue Splatter]] (x-2-x) and [[Unstable Concoction (Battles 2)|Unstable Concoction]] (x-3-x) instead. | |Same as normal Gwendolin, except her Level 5+ buffs target [[Glue Splatter (Battles 2)|Glue Splatter]] (x-2-x [[Glue Gunner (Battles 2)|Glue Gunner]]) and [[Unstable Concoction (Battles 2)|Unstable Concoction]] (x-3-x [[Alchemist (Battles 2)|Alchemist]]) instead. | ||
|- | |- | ||
|[[Biker Bones (Battles 2)|Biker Bones]] | |[[Biker Bones (Battles 2)|Biker Bones]] | ||
| Line 533: | Line 546: | ||
|- | |- | ||
|[[Beetienne (Battles 2)|Beetienne]] | |[[Beetienne (Battles 2)|Beetienne]] | ||
| | |Only has ''First'' when placed. Starting from level 2, he gains ''Making Honey''. Activating Bee Swarm ability always switches to ''First'', and will revert back to ''Making Honey'' if he was set to it before the ability. Also gains more targeting options as he levels up.<!--what about more of the bee targetings? and bee swarm--> | ||
|} | |} | ||
| Line 544: | Line 557: | ||
*[[Tack Shooter (Battles 2)|Tack Shooter]] | *[[Tack Shooter (Battles 2)|Tack Shooter]] | ||
**[[Inferno Ring (Battles 2)|Inferno Ring]] starts on ''Strong'' but still gains standard target options. | **[[Inferno Ring (Battles 2)|Inferno Ring]] starts on ''Strong'' but still gains standard target options. | ||
*[[Ice Monkey (Battles 2)|Ice Monkey]] | |||
**[[Cold Snap (Battles 2)|Cold Snap]] and above gains Camo prioritization no matter its crosspath. | |||
*[[Glue Gunner (Battles 2)|Glue Gunner]] | |||
**[[Relentless Glue (Battles 2)|Relentless Glue]] can target and affect Camo, and gains Camo prioritization. | |||
*[[Monkey Sub (Battles 2)|Monkey Sub]] | |||
**[[Submerge and Support (Battles 2)|Submerge and Support]]'s ''Submerge'' is a targeting priority instead of a button, positioned after ''Strong''. | |||
*[[Monkey Buccaneer (Battles 2)|Monkey Buccaneer]] | |||
**[[Monkey Pirates (Battles 2)|Monkey Pirates]] ability can target and affect DDTs, regardless of having innate camo detection or camo-granting sources. | |||
*[[Monkey Ace (Battles 2)|Monkey Ace]] | |||
**[[Spy Plane (Battles 2)|Spy Plane]] gains camo prioritization with only certain crosspaths.<!--is it nevamiss or spectre? also fighter plane--> | |||
*[[Heli Pilot (Battles 2)|Heli Pilot]] | |||
**Targeting options are the same as in ''BTD6'' except ''Follow Touch / Mouse'' only registers a new location while clicking. | |||
**[[IFR (Battles 2)|IFR]] gains camo prioritization. | |||
*[[Mortar Monkey (Battles 2)|Mortar Monkey]] | |||
**Starts with two targeting priorities: Set Target, Follow Touch / Mouse. Also gains ''Dense'' and ''Strong'' with [[Dynamic Targeting (Battles 2)|Dynamic Targeting]]. | |||
**''Set Target'': Same as in ''BTD6''. | |||
**''Follow Touch / Mouse'': Follows where the cursor has last tapped. Follow Mouse only registers a new location while clicking. | |||
**''Dense'': | |||
**''Strong'': | |||
*[[Dartling Gunner (Battles 2)|Dartling Gunner]] | |||
**Targeting priorities are the same as in ''BTD6'', but only registers a new location while clicking. | |||
<!--more to come--> | |||
*[[Spike Factory (Battles 2)|Spike Factory]]: | *[[Spike Factory (Battles 2)|Spike Factory]]: | ||
**[[Smart Spikes (Battles 2)|Smart Spikes]] | **[[Smart Spikes (Battles 2)|Smart Spikes]] gains Normal, Close, Far, and Smart. | ||
***''Far'': | ***''Far'': Targets at the farthest location(s) of the track. | ||
*[[Obyn Greenfoot (Battles 2)|Obyn Greenfoot]] | *[[Obyn Greenfoot (Battles 2)|Obyn Greenfoot]] | ||
**Both the Brambles and Wall of Trees abilities can be targeted to a specific point, and share the same reticle. | **Both the Brambles and Wall of Trees abilities can be targeted to a specific point, and share the same reticle. | ||
Revision as of 13:56, 8 August 2025

Targeting option, or simply targeting is a game mechanic in the Bloons TD series introduced in Bloons Tower Defense 3 which towers use to determine which Bloon to attack in the case there is more than one within its range. This is a setting that the player can set individually for every tower in the map, and is shown in the same sub-menu in than its upgrades.
Mechanics
In the Bloons TD series, towers can choose between different targeting options to suit the player's strategy, for most towers, the standard options are:
- First: The tower will attack the Bloon that is the closest to the exit (in terms of track length remaining). If there are more than one track in range with Bloons on them, the Bloons position is addressed individually for each track. This is the default option for new towers.
- Last: The tower will attack the Bloon that is the closest to the entrance (in terms of track length).
- Close: The tower will attack the Bloon that is the closest to the tower.
- Far: The tower will attack the Bloon that is the furthest to the tower.
- Strong: The tower will attack the Bloon with the highest amount of layers. In the case of a tie, it will prioritize First among those Bloons.
- Weak: The tower will attack the Bloon with the least amount of layers.
The targeting option does not guarantee that the tower's projectile will hit the targeted Bloon, only that the tower will shoot in the target's general direction but the projectile can hit other Bloons if they collide with the projectile during its travel.
Towers with non-standard options will be noted on their respective game section.
Availability of standard targeting options in Bloons TD games
| Game | First | Last | Close | Far | Strong | Weak |
|---|---|---|---|---|---|---|
| BTD1 | ||||||
| BTD2 | ||||||
| BTD3 | ||||||
| Bloons TD (iOS / PSP / DSi) | ||||||
| BTD4 | ||||||
| BTD5 | ||||||
| BTD6 | ||||||
| Battles | ||||||
| Battles 2 | ||||||
| BMC | ||||||
| BATTD |
Bloons Tower Defense / Bloons Tower Defense 2
In the first games of the series towers did not have targeting options available so towers that can change direction always target First.
Bloons Tower Defense 3
All towers can now select between First and Last targeting option, allowing Dart Monkey, Boomerang, Spike-o-pult, Cannon and Super Monkey to shoot in different direction. Although present on the menu, it does not have any effect on Tack Shooter, Ice Ball and Monkey Beacon.
Bloons TD 4
| This section is empty. You can help out by adding to it. The editor who added this notice elaborates: List which towers have standard targeting options and elaborate on the ones that doesn't, if any, e.g. Monkey Ace |
Bloons TD 5 / Bloons Monkey City / Bloons TD Battles
| This section is empty. You can help out by adding to it. The editor who added this notice elaborates: List which towers have standard targeting options and elaborate on the ones that doesn't, if any. Check for any difference between versions and BMC / Battles, if there are enough differences between the spinoffs, move them to their own section. |
Bloons TD 6
| This article is in need of research. You can help out by editing this article or discussing your findings on the talk page. The editor who added this notice elaborates: targeting for Cave Monkey, Dungeon Statue, and Myrkul |
In Bloons TD 6 the targeting of the tower takes into account the line of sight mechanics, ignoring any Bloon that the tower is not able to see. When placed, all towers with standard targeting options default to First and are unable to target Camo Bloons.
| Tower | Details |
|---|---|
| Dart Monkey | Standard targeting options
Super Monkey Fan Club and Plasma Monkey Fan Club transforms the closest Dart Monkeys that are not already transformed. Enhanced Eyesight upgrade allows them to target Camo Bloons grants Camo prioritization. |
| Boomerang Monkey | Standard targeting options.
With the |
| Bomb Shooter | Standard targeting options.
MOAB Assassin ability follows the Bomb Shooter's targeting. Bomb Blitz passive ability has map-wide effects. |
| Tack Shooter | No targeting options.
Gains standard targeting options after being upgraded to Inferno Ring or Crucible of Steel and Flame which only control the behavior of the Meteor attack / Meteor Impact ability, respectively. |
| Ice Monkey | No targeting options. Cannot attack MOAB-Class Bloons with its regular attack until having the Embrittlement, Absolute Zero or Cryo Cannon upgrades.
Cold Snap upgrade allows them to target and affect Camo Bloons. Gains standard targeting options after being upgraded to Cryo Cannon. It also gains Camo prioritization if crosspathed with Cold Snap. |
| Glue Gunner | Standard targeting options. They ignore Bloons that are already affected by the same type of Glue it is shooting.
Glue Strike and Glue Storm ability have map-wide effects and can affect Camo Bloons. |
| Desperado | Standard targeting options.
Eagle Eye upgrade allows them to target Camo Bloons and grants Camo prioritization. Take Aim ability targets a specific Monkey, chosen by the player. The Marking attacks of Bounty Hunter and Golden Justice (either regular or from the Marked to Pop ability) follow the Desperado's targeting. If either tower is on the map, all Desperados gain Marked prioritization. |
| Sniper Monkey | Standard targeting options.
Night Vision Goggles upgrade allows them to target Camo Bloons grants Camo prioritization. Elite Sniper's buffs target all Sniper Monkeys. When a Sniper gets upgraded to Elite Sniper, all Sniper Monkeys in the map gain a new targeting option called Elite, which, in a simplified way to explain it, keeps the Sniper in Strong targeting until a Bloon reaches 75% of the track length or more, at that point the targeting is switched automatically to First and returns to Strong after there are no more Bloons at the end of the track. |
| Monkey Sub | Standard targeting options. No effect on submerged towers; Submerge and Support gains a button that toggles submersion.
Advanced Intel Subs and Nautic Siege Core Rocket Attack will take into account all Bloons on other tower's range to determine their target, they can target Camo Bloons if the tower that is sharing vision with has Camo detection. Bloontonium Reactor's local-ranged buff targets only water-placed towers, and Energizer's global buff targets all towers on screen. Ballistic Missile ignores line-of sight blockers for its missile attacks, First Strike Capability ability always target Strong, and Pre-emptive Strike passive ability targets any MOAB-Class Bloon that enters the screen, however it will ignore its children or Bloons spawned by Bosses. Nautic Siege Core pre-emptive attack can target Camo Bloons and ignores line of sight blockers. Each of the three missiles of the Final Strike ability always target First, Close and Strong, respectively. |
| Monkey Buccaneer | Standard targeting options.
The targeting of the planes from Aircraft Carrier, Carrier Flagship, and Navarch of the Seas is linked to their parent tower. Crow's Nest upgrade allows them to target Camo Bloons grants Camo prioritization. The hooks form the Takedown ability always target Strong. The passive and ability hooks from Navarch of the Seas Takedown ability always target Strong. |
| Monkey Ace | No standard targeting options, they determine its flight pattern instead:
Spy Plane upgrade allows them to target Camo Bloons. Ground Zero and Tsar Bomba abilities have map-wide effects, but for pierce calculations it defaults on Close relative to the landing pad. Neva-Miss Targeting projectiles and Spectre's barrages always target First, and Flying Fortress's barrages always target First, Last, and Close, respectively. The Carpet Bomb ability from Goliath Doomship follows a straight line determined by the player, it defaults to the main diagonal from top left to bottom right. This line must be at least a certain distance long. |
| Heli Pilot | No standard targeting options, they determine its flight pattern instead:
Heli Pilots default to Follow Mouse / Touch. All of the helicopter's projectiles always target First. IFR upgrade allows them to target Camo Bloons. Monkey Marine has standard targeting options and starts at First when spawned. Support Chinook's Reposition can target any "non-heavy" tower at the choice of the player. |
| Mortar Monkey | No standard targeting options, it only has the Set Target option, which makes it shoot towards a specific point of the map defined by the player.
Pop and Awe ability has map-wide effects. If Striker Jones's Target Focus ability is active, the tower switches to Follow Mouse / Follow Touch behavior. |
| Dartling Gunner | No standard targeting options, they determine the direction it is attacking:
If the player uses the |
| Wizard Monkey | Standard targeting options. The Guided Magic upgrade allows it to ignore line of sight blockers.
Monkey Sense upgrade allows them to target Camo Bloons and grants Camo prioritization. The targeting of the phoenixes from Summon Phoenix and Wizard Lord Phoenix, and the Lava Phoenix from the latter, are linked to their parent tower. Phoenixes always move anticlockwise on Circle. The spawn point of Zombie Bloons from Necromancer or Prince of Darkness can be set to a specific point of the track selected by the player, if not set, it defaults to roughly the point of the track in range closest to the exit. The phoenix from Magus Perfectus always targets First and if it uses the Phoenix Explosion ability, it will be centered around the point where phoenix was flying. |
| Super Monkey | Standard targeting options.
Ultravision upgrade grants them Camo prioritization and when combined with the Robo Monkey, Tech Terror and The Anti-Bloon gain an independent targeting option for the second gun, but they cannot be both set to the same option at the same time. For the sub-towers of Sun Temples and the True Sun God (including VTSG), the Mini-Spectres inherit the targeting of its parent tower, and Mini-Sun Avatars have standard targeting options and start with the targeting of its parent tower when spawned. Sun Temple and True Sun God buff target all towers in range. |
| Ninja Monkey | Standard targeting options. It can target Camo Bloons and have Camo prioritization by default.
The sticky bombs from Sticky Bomb, Master Bomber and Ascended Shadow follow the Ninja's targeting, and they have map-wide range for the latter two. Shinobi Tactics buff targets all x-3+-x Ninjas in range including the Ninja itself. |
| Alchemist | Standard targeting options, ignores line of sight blockers.
Acidic Mixture Dip buff always targets randomly onto towers, and the brew from Berserker Brew and higher upgrades always target the closest tower (assuming it isn't brewed already or under downtime). Total Transformation affects the closest eligible monkeys. |
| Mermonkey | Standard targeting options.
Echosense Precision upgrade allows them to target Camo Bloons. The Ice Jet ability from Arctic Knight and Popseidon follows the Mermonkey's targeting with map-wide range, but can be set to be launched towards a specific point on the map. The Trance attack from Alluring Melody, Symphonic Resonance and The Final Harmonic always target First. The Trance Totem can be put at any point for Symphonic Resonance and anywhere in the map for The Final Harmonic. Abyss Dweller and above buffs target all towers in range, and The Final Harmonic's buffs separately target Magic Monkeys and Heroes depending where the trance radius is placed. |
| Druid | Standard targeting options.
The regular vine attack from Druid of the Jungle, Jungle's Bounty and Spirit of the Forest cannot target MOAB-Class Bloons and follows the Druid's targeting. Spirit of the Forest permanent vines have map-wide effects. |
| Banana Farm | No targeting options, as it cannot attack.
Bananas and crates are dropped at random positions up to 40 units from the Farm (but outside its footprint) and are collected if the cursor is 50 units or closer from the banana / crate. The collecting radius is increased 50% with the EZ Collect upgrade. Instead of bananas, Monkey Banks and higher upgrades have buttons that can be pressed to withdraw balance from the selected or from all Banks. If the player has the |
| Spike Factory | No targeting options, but if it has the Smart Spikes (or Mega Massive Munitions Factory) upgrade it gains the following options:
The Carpet of Spikes ability targets Normal with map-wide range, but if the tower has the Smart Spikes ability it will only scatter spikes on active lanes. Mega Massive Munitions Factory permanent Carpet of Spikes have map-wide effects and the Spikeageddon ability targets specific points of the track which cannot be controlled by the player. |
| Monkey Village | No targeting options, as it cannot attack.
Gains standard targeting options after being upgraded to Primary Expertise. |
| Engineer Monkey | Standard targeting options.
Sentries (and higher upgrades) are deployed at almost random positions on the Engineer's range (it prioritizes positions where the Sentries can see at least 20% of the track), they have standard targeting options and start with the targeting of its parent tower when spawned. Mega Sentries from Master Builder can be deployed to a specific location chosen by the player. Red and Blue Sentry Paragon and the Modified Paragon Sentries they spawn have standard targeting options, the Sentry Paragons start on First targeting and their children start with the option of its parent sub-tower when spawned. Green Sentry Paragon has the Normal and Locked options of a Dartling Gunner, the Modified Paragon Sentries it spawns start on First. Cleansing Foam can target a specific point of the map on the Engineer's range chosen by the player. Overclock, Ultraboost and Power Glove abilities target a specific Monkey, chosen by the player, and filter certain targets. Bloon Trap targets to the closest point of the track in the Engineer's range, but if crosspathed with Larger Service Area, it can be targeted to any point in range. |
| Beast Handler | Standard targeting options.
The targeting of beast(s) are linked to the parent tower. When bought, land and water beast placement is almost random but prioritizes where the beast can see at least 10% of the track. The positions of land and water beasts, or the drop-off point of air beasts can be set freely in the range of its parent tower in the correct terrain. It can also be set on the range of merged Beast Handlers if their ranges intersect each other. |
| Quincy | Standard targeting options. Requires Level 5+ to target Camo Bloons.
Storm of Arrows ability targets an area around a Bloon chosen by Quincy's targeting with map-wide range. |
| Gwendolin | Standard targeting options.
Cocktail of Fire can target a specific point of the map on the Gwen's range chosen by the player, defaults to the closest point of the track. Level 5+ Pyrotechnic Expert buff targets towers with at least Dragon's Breath (x-3-x Wizard Monkey), Ring of Fire (4-x-x Tack Shooter), or Signal Flare (x-x-2 Mortar Monkey) Firestorm has a map-wide effect. |
| Striker Jones | Standard targeting options.
Concussive Shell always targets Strong and ignores line of sight blockers. |
| Obyn Greenfoot | Standard targeting options, ignores line of sight blockers.
Nature's Ward Totem is placed at any random point in the track on Obyn's range. When using Brambles, if Obyn is currently targeting a Bloon with is regular attack, the brambles will be set over that Bloon, otherwise, it will target any point of the track at random on Obyn's range. Wall of Trees can target a specific point of the map on the Obyn's range chosen by the player, defaults to the closest point of the track. |
| Captain Churchill | Standard targeting options for its main attack. Machine gun always target First. Requires Level 6+ to target Camo Bloons.
MOAB Barrage shells target the 10 strongest MOAB-Class Bloons on the map, ignores line of sight blockers. |
| Benjamin | No targeting options, as it cannot attack.
Bloon Trojan targets a random Bloon in the map. Biohack ability is applied to the closest towers to Benjamin. |
| Ezili | Standard targeting options, ignores line of sight blockers and can target Camo Bloons by default.
Sacrificial Totem can target a specific point of the map on the Ezili's range chosen by the player, defaults to the closest point of the track. MOAB Hex follows Ezili's targeting with map-wide range. |
| Pat Fusty | Standard targeting options.
Big Squeeze always targets Strong. |
| Adora | Standard targeting options, ignores line of sight blockers.
Ball of Light follows Adora's targeting with map-wide range. |
| Admiral Brickell | Standard targeting options.
Sea Mines are randomly placed within Brickell's range if they would be at most 39 units of distance away from the track. They will not be placed on the footprints of other towers. Requires Level 7+ to target Camos. After Level 8, her nearby water towers can target Camo Bloons while Naval Tactics is active. Mega Mine can be placed on any point of the map with water and will charge towards the first MOAB-Class Bloon that comes within 40 units of it, and can target Camo Bloons. |
| Etienne | No standard targeting options with the exception of First, which affects all drones, he gains other options as he levels up:
All attacks ignore line of sight blockers and he requires Level 5+ to target Camo Bloons. The drones from Drone Swarm target one First, one Last, and two Strong. Requires Level 5+ to target Camos. Level 8's Camo buff targets all Monkeys on screen. UCAV (either from ability or upon reaching Level 20) always moves anticlockwise on Circle and their missiles alway targets First. |
| Sauda | Standard targeting options. She can target Camo Bloons by default.
Leaping Sword follows Sauda's targeting with map-wide range, and always pursues the target similarly to Ballistic Missile. Sword Charge creates copies on all available exit-entrance combinations, and move backwards along the track. |
| Psi | Standard targeting options, ignores line of sight blockers and can target Camo Bloons by default.
Psionic vibrations can only target Lead Bloons at Level 6+, Ceramic Bloons at Level 7+, Purple Bloons at Level 11+, MOABs at Level 14+, BFBs at Level 16+, and ZOMGs and DDTs at level Level 20. Destructive Resonance targets any nearby Bloon to the point Psi's current target is popped. Split the Mind attacks do not follow Psi's targeting, the 2nd attack from Level 9+ uses Elite targeting (see Sniper Monkey above), but the switch from Strong to First happens at 50% of the track length. The 3rd attack at Level 17+ targets First, prioritizing MOABs and Ceramics. Psionic Scream can only target Bloons that its regular attack can damage. |
| Geraldo | Standard targeting options.
Shooty Turrets have standard targeting options and start with Geraldo's targeting when placed. Creepy Idol targets every 4th Bloon that comes in range. Gerry's Fire always target First and ignores line of sight blockers. It inherits Camo targeting from its parent. Killer Rabbit ignores line of sight blockers and can target Camo Bloons. It follows Geraldo's targeting. Genie flies in Figure Eight pattern at the map's centre and follows Geraldo's targeting. |
| Corvus | Standard targeting options, which control the Spirit and his Haunt. The spirit moves towards bloons according to targeting options. The copy from Echo always targets First.
Spear targeting inherits from Corvus. Ancestral Might always targets Strong. Trample immediately sets the Spirit to travel backwards from the exit along the track containing the Bloons closest to the exit. If Echo is active, that copy travels forwards from the entrance. |
| Rosalia | Standard targeting options, ignores line of sight blockers at Level 7+. She has a reposition button that moves her to a new location within her workshop's range.
Scatter Missile and Kinetic Charge follow Rosalia's targeting with map-wide range. While Flight Boost is active, her flight pattern is set on Pursuit and follows a Bloon based on her targeting option. |
| Pontoon / Portable Lake | No targeting options, as it cannot attack. |
| Banana Farmer | No targeting options, as it cannot attack. Prioritizes picking up the oldest collectibles. |
| Tech Bot | No targeting options, as it cannot attack. |
| Energizing Totem | No targeting options, as it cannot attack. |
| Battle Cat | Standard targeting options. |
Camo prioritization
| This section is incomplete. You can help out by expanding it. The editor who added this notice elaborates: Add camo prio button image |
| This article is in need of research. You can help out by editing this article or discussing your findings on the talk page. The editor who added this notice elaborates: Determine how Camo and Marked prioritization works on Desperados when both are active. |
Most non-hero towers that gain Camo detection via an upgrade also gain an additional targeting option that forces them to attack any Camo Bloon before any other target. If there are more than one valid Camo target, the tower will follow its regular targeting option to select between them. The players can enable or disable it by clicking on the Camo Bloon icon next to the tower's portrait (see image above).
For example if a tower which deals 2 damage per shot is set to Strong, has Camo prioritization active and there are a Camo Red Bloon, a Camo Green Bloon and a MOAB on range, the order on which it will attack will be the Camo Green first, reducing it to a Camo Red, then it will shot whichever of the two Camo Reds is ahead on the track, shoot the last Camo Red third, and finally the MOAB.
Marked prioritization
| This section is incomplete. You can help out by expanding it. The editor who added this notice elaborates: Add marked prio button image |
| This article is in need of research. You can help out by editing this article or discussing your findings on the talk page. The editor who added this notice elaborates: Determine how Camo and Marked prioritization works on Desperados when both are active. |
Desperados have an additional prioritization option to target Marked Bloons which is granted to all Desperados if it is a Bounty Hunter or Golden Justice on the map.
Strong tower priority
Towers set to Strong targeting will attack Bloons in the following order:
- Dreadrock Bloon
- Bloonarius, Lych, Lych-soul, Vortex, Dreadbloon, Phayze and Blastapopoulos
- Fortified BAD
- BAD
- Fortified DDT
- DDT
- Fortified ZOMG
- ZOMG
- Fortified BFB
- BFB
- Fortified MOAB
- MOAB
- Fortified Ceramic Bloon
- Ceramic Bloon and Fortified Golden Bloon
- Golden Bloon
- Rainbow Bloon
- Fortified Lead Bloon
- Zebra and Lead Bloon
- White, Black and Purple Bloon
- Pink Bloon
- Yellow Bloon
- Green Bloon
- Blue Bloon
- Red Bloon
- Test Bloon and MOAB Test Bloon
If there are multiple Bloons in the same bracket, the one located ahead in the track is selected.
Bloons TD Battles 2
| This section is incomplete. You can help out by expanding it. The editor who added this notice elaborates: It is not necessary to go as deep as the BTD6 section as most behaviors are the same, just list the differences with their BTD6 counterparts. |
Similar to Bloons TD 6, Battles 2 has targeting priorities, albeit more limited, though more towers are able to gain camo prioritization, and some targeting options remain the same.
Below are a list of Heroes exclusive to Battles 2 and their targeting options.
| Tower | Details |
|---|---|
| Cyber Quincy | Same as normal Quincy, as both of their abilities have practically the same mechanics. |
| Scientist Gwendolin | Same as normal Gwendolin, except her Level 5+ buffs target Glue Splatter (x-2-x Glue Gunner) and Unstable Concoction (x-3-x Alchemist) instead. |
| Biker Bones | |
| Ocean Obyn | Living Coral can target a specific point of the map on the Obyn's range chosen by the player, defaults to the closest point of the track. Ocean's Ward Totem is always placed on the nearest part of the track. Unleash the Krakens places the two krakens at random spaces within Ocean Obyn's range and ignores the reticle. |
| Sentai Churchill | |
| DJ Benjammin' | |
| Smudge Catt Ezili | |
| Fusty the Snowman | |
| Agent Jericho | |
| Highwayman Jericho | |
| Star Captain Jericho | |
| Bonnie | |
| Fateweaver Adora | |
| Beetienne | Only has First when placed. Starting from level 2, he gains Making Honey. Activating Bee Swarm ability always switches to First, and will revert back to Making Honey if he was set to it before the ability. Also gains more targeting options as he levels up. |
| This section is incomplete. You can help out by expanding it. The editor who added this notice elaborates: Add all the differences of BTD6 and BTDB2 for the targeting stuffs |
Additional differences between BTD6 and Battles 2:
- Boomerang Monkey:
- Turbo Charge and Perma Charge abilities allow the tower to target Camo while the ability is active, and all projectiles launched during the ability can target Camo as well.
- Bomb Shooter
- MOAB Assassin and MOAB Eliminator abilities always target Strong.
- Tack Shooter
- Inferno Ring starts on Strong but still gains standard target options.
- Ice Monkey
- Cold Snap and above gains Camo prioritization no matter its crosspath.
- Glue Gunner
- Relentless Glue can target and affect Camo, and gains Camo prioritization.
- Monkey Sub
- Submerge and Support's Submerge is a targeting priority instead of a button, positioned after Strong.
- Monkey Buccaneer
- Monkey Pirates ability can target and affect DDTs, regardless of having innate camo detection or camo-granting sources.
- Monkey Ace
- Spy Plane gains camo prioritization with only certain crosspaths.
- Heli Pilot
- Targeting options are the same as in BTD6 except Follow Touch / Mouse only registers a new location while clicking.
- IFR gains camo prioritization.
- Mortar Monkey
- Starts with two targeting priorities: Set Target, Follow Touch / Mouse. Also gains Dense and Strong with Dynamic Targeting.
- Set Target: Same as in BTD6.
- Follow Touch / Mouse: Follows where the cursor has last tapped. Follow Mouse only registers a new location while clicking.
- Dense:
- Strong:
- Dartling Gunner
- Targeting priorities are the same as in BTD6, but only registers a new location while clicking.
- Spike Factory:
- Smart Spikes gains Normal, Close, Far, and Smart.
- Far: Targets at the farthest location(s) of the track.
- Smart Spikes gains Normal, Close, Far, and Smart.
- Obyn Greenfoot
- Both the Brambles and Wall of Trees abilities can be targeted to a specific point, and share the same reticle.
- Nature's Ward Totem always is placed at the nearest part of the track.
Bloons Adventure Time TD
| This section is empty. You can help out by adding to it. The editor who added this notice elaborates: List which towers have standard targeting options and elaborate on the ones that doesn't, if any. |
Gallery
| This article or section needs more screenshots. See the screenshot guidelines for more information on what screenshots are needed and how to add them. The editor that added this notice elaborates: Insert images of the targeting options in other games. |
-
 In the tower menu in BTD1 there are no targeting options.
 -
 Same case for BTD2.
 -
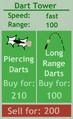
 In BTD3, the targeting option is between the upgrades and the sell button.
 -
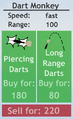
 In BTD4, each targeting option has now an independent button.
 -
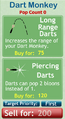
 BTD5 also has separate buttons for targeting options.
 -
 In BTD6, the individual buttons were changed for a menu below the tower's portrait.


