Captain Churchill (BTD6): Difference between revisions
Qwertyxp2000 (talk | contribs) |
|||
| (16 intermediate revisions by 6 users not shown) | |||
| Line 1: | Line 1: | ||
{{ | {{captain churchill hat}} | ||
{{BTD6 hero info | {{BTD6 hero info | ||
| id = CaptainChurchill | | id = CaptainChurchill | ||
| | | numeric id = 5 | ||
| name = Captain Churchill | | name = Captain Churchill | ||
| title = Tank | | title = Tank | ||
| image = BTD6 CaptainChurchillPortrait.png | | image = BTD6 CaptainChurchillPortrait.png | ||
|icon=BTD6 round HeroIconChurchill.png | |||
| description = In his armored battle tank, the Captain is a no-nonsense powerhouse on the battlefield. | | description = In his armored battle tank, the Captain is a no-nonsense powerhouse on the battlefield. | ||
| cost = 2000 | | cost = 2000 | ||
| Line 11: | Line 12: | ||
| cost C = | | cost C = | ||
| xp scale C = | | xp scale C = | ||
| introduced = 2.0 | | introduced = 2.0 | ||
| introduced C = | | introduced C = | ||
| rl tower 1 = | | rl tower 1 = Dart Monkey | ||
| rl tower 1 upgrades = 001 | | rl tower 1 upgrades = 001 | ||
| rl tower 2 = | | rl tower 2 = Dartling Gunner | ||
| rl tower 2 upgrades = 002 | | rl tower 2 upgrades = 002 | ||
| rl artifact = | | rl artifact = Battlefield Commission | ||
|rl artifact rarity=Rare | |||
| fl cost = 9285 | | fl cost = 9285 | ||
| fl level = 3 | | fl level = 3 | ||
| fl trait 1 = | | fl trait 1 = Patient | ||
| fl trait 2 = Itchin’ | |||
| fl trait 3 = Nullifier | |||
}} | }} | ||
'''Captain Churchill''' is a [[Hero]] in ''[[Bloons TD 6]]'', introduced in {{BTD6 version|2.0}}. He | '''Captain Churchill''' is a [[Hero]] in ''[[Bloons TD 6]]'', introduced in {{BTD6 version|2.0}}. He is purchasable for {{BTD6 mm|2500|name=y|link=y}} starting at [[level]] 15. | ||
Captain Churchill operates a tank that slowly fires shells that explode multiple times and deal high damage. As he levels up, he gains a separate machine gun attack, [[Camo detection]], and his attack speed, damage, and pierce improves. | Captain Churchill operates a tank that slowly fires shells that explode multiple times and deal high damage. As he levels up, he gains a separate machine gun attack, [[Camo detection]], and his attack speed, damage, and pierce improves. | ||
| Line 69: | Line 71: | ||
|- | |- | ||
!15 | !15 | ||
|Explosions now deal +4 damage to [[Lead Bloon (BTD6)|Lead]], [[Fortified Bloon (BTD6)|Fortified]], and | |Explosions now deal +4 damage to [[Lead Bloon (BTD6)|Lead]], [[Fortified Bloon (BTD6)|Fortified]], Camo Bloons, and stunned Bloons, which stacks for Bloons with multiple of these properties and/or mutators (i.e. stunned Camo Fortified Lead Bloons take +16 damage in total). | ||
|- | |- | ||
! | !17 | ||
|Attack cooldown reduces to 0.9 seconds, effectively increasing attack speed by ~33%. | |Attack cooldown reduces to 0.9 seconds, effectively increasing attack speed by ~33%. | ||
|- | |- | ||
| Line 81: | Line 83: | ||
|- | |- | ||
!20 | !20 | ||
|Explosion base damage increases to | |Explosion base damage increases to 25. | ||
|} | |} | ||
| Line 104: | Line 106: | ||
|- | |- | ||
!15 | !15 | ||
|Now deals +2 damage to Lead, Fortified, and | |Now deals +2 damage to Lead, Fortified, Camo Bloons, and stunned Bloons, which stacks for Bloons with multiple of these properties and/or mutators (i.e. stunned Camo Fortified Lead Bloons take +8 damage in total). | ||
|- | |- | ||
!18 | !18 | ||
|Base damage increases to | |Base damage increases to 12. Damage bonuses to Lead, Fortified, Camo Bloons, and stunned Bloons increases to +4. | ||
|- | |||
!20 | |||
|Base damage increases to 16. | |||
|} | |} | ||
| Line 135: | Line 140: | ||
|- | |- | ||
!13 | !13 | ||
|Damage per shell increases to | |Damage per shell increases to 300 (up to 4,800 in total per target). | ||
|- | |- | ||
!17 | !17 | ||
|Damage per shell increases to | |Damage per shell increases to 600 (up to 9,600 in total per target). | ||
|- | |- | ||
!20 | !20 | ||
|Damage per shell increases to 1, | |Damage per shell increases to 1,200 (up to 19,200 in total per target). Cooldown reduces to 30 seconds. Activating the ability now also buffs the base damage of the Main Gun's shells by 3 for 8 seconds. | ||
|} | |} | ||
==Levels== | ==Levels== | ||
{|class="wikitable" | {|class="wikitable" | ||
!Level | !Level | ||
| Line 187: | Line 191: | ||
|- | |- | ||
!13 | !13 | ||
|Armor Piercing Shells pop 3 layers of Bloon and do extra damage to Ceramic and higher. | |Armor Piercing Shells pop 3 layers of Bloon and do extra damage to Ceramic and higher. MOAB Barrage damage increased. | ||
|- | |- | ||
!14 | !14 | ||
| Line 193: | Line 197: | ||
|- | |- | ||
!15 | !15 | ||
|All attacks do extra damage vs Camo, Lead, and | |All attacks do extra damage vs Camo, Lead, Fortified, and Stunned Bloons. | ||
|- | |- | ||
!16 | !16 | ||
| | |Armor Piercing Shells do even more damage. MOAB Barrage damage increased. | ||
|- | |- | ||
!17 | !17 | ||
| | |Increased attack speed. | ||
|- | |- | ||
!18 | !18 | ||
| Line 208: | Line 212: | ||
|- | |- | ||
!20 | !20 | ||
|MOAB Barrage shells and | |MOAB Barrage shells, Main Gun, and Machine Gun do massively increased damage per hit. | ||
|- | |||
| colspan="2" |''This list was last updated for: {{BTD6 version|55.1}}'' | |||
|} | |} | ||
| Line 216: | Line 222: | ||
==Strategy== | ==Strategy== | ||
{{main strategy}} | {{main strategy}} | ||
Churchill's high cost means that using him requires a dedicated strategy to save up enough cash to purchase him. After he is placed, Churchill is excellent an early game carry and mid game general damager because of his high damage potential relative to his level. An additional tower is necessary to cover early game | {{BTD6 last updated|53.0|section=y}} | ||
Churchill's high cost means that using him requires a dedicated strategy to save up enough cash to purchase him. After he is placed, Churchill is excellent an early-game carry and mid-game general damager because of his high damage potential relative to his level. An additional tower is necessary to cover early game Camo Bloons because of his inability to target them until level 6. In the late game, his slow leveling rate begins to cause him to fall off because of his inability to reach higher levels that allow him to become a proper late-game DPS or cleanup tower without [[Energizer (BTD6)|Energizer]]. | |||
Churchill excels against straight lines, which allow his main shells to maximize the multiple explosions, and later on his Machine Gun covers many of his weaknesses to Black Bloons and singular targets. MOAB Barrage is quite powerful at demolishing a moderate number blimps into weaker layers, serving as a weaker Mega Mine. At later levels he can take down a decent chunk of hyperdense rounds with Armor Piercing Shells active, but still struggles to DDT rounds. Targeting micro, such as switching between Last and First, can help with maximizing his damage in order to weaken blimps and clean up super ceramics. | Churchill excels against straight lines, which allow his main shells to maximize the multiple explosions, and later on his Machine Gun covers many of his weaknesses to Black Bloons and singular targets. MOAB Barrage is quite powerful at demolishing a moderate number blimps into weaker layers, serving as a weaker Mega Mine. At later levels he can take down a decent chunk of hyperdense rounds with Armor Piercing Shells active, but still struggles to DDT rounds. Targeting micro, such as switching between Last and First, can help with maximizing his damage in order to weaken blimps and clean up super ceramics. | ||
| Line 230: | Line 237: | ||
===[[Trophy Store]] items=== | ===[[Trophy Store]] items=== | ||
{{BTD6 cosmetic item list by id|HeroesChurchillPlacementTankDrop}} | {{BTD6 cosmetic item list by id|HeroesChurchillPlacementTankDrop|HeroesChurchillSentaiSkinPetDrone}} | ||
==Gallery== | ==Gallery== | ||
| Line 236: | Line 243: | ||
===Screenshots=== | ===Screenshots=== | ||
{{screenshot needed}} | {{screenshot needed|section=y}} | ||
===Assets=== | ===Assets=== | ||
| Line 391: | Line 398: | ||
{{BTD6 hero nav}} | {{BTD6 hero nav}} | ||
{{BTD6 tower nav}} | {{BTD6 tower nav}} | ||
Latest revision as of 03:15, 22 August 2026
Tank

|
| In his armored battle tank, the Captain is a no-nonsense powerhouse on the battlefield. |
| Cost | $1,700 — Easy $2,000 — Medium $2,160 — Hard $2,400 — Impoppable With  Hero Favors: Hero Favors:$1,530 — Easy $1,800 — Medium $1,945 — Hard $2,160 — Impoppable | ||
|---|---|---|---|
| XP curve | ×1.71 (levels up at ×0.5848 the normal rate) | ||
| Rogue Legends party |  0-0-1 Dart Monkey 0-0-1 Dart Monkey 0-0-2 Dartling Gunner 0-0-2 Dartling Gunner Battlefield Commission Rare Battlefield Commission Rare
| ||
| Frontier Legends attributes | Recruit cost: $9,285 Starting level: 3 Patient Itchin’ Nullifier | ||
| Introduced | Version 2.0 | ||
Captain Churchill is a Hero in Bloons TD 6, introduced in version 2.0. He is purchasable for  2,500 Monkey Money starting at level 15.
Captain Churchill operates a tank that slowly fires shells that explode multiple times and deal high damage. As he levels up, he gains a separate machine gun attack, Camo detection, and his attack speed, damage, and pierce improves.
- Starting at level 5, he gains a rapid machine gun attack separate from his main attack that damages Bloons one at a time.
- Starting at level 6, he gains Camo detection.
- He has two Activated Abilities:
- Armor Piercing Shells (level 3) — Increases the number of times his shells can explode and gives them more damage to Ceramic and MOAB-Class Bloons, and changes the damage type of his shells and machine gun to Normal. The ability's duration increases as he levels up.
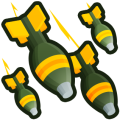
- MOAB Barrage (level 10) — Launches high damage missiles at up to 10 MOAB-Class Bloons, prioritizing the strongest ones.
Mechanics
[edit | edit source]Main Gun
[edit | edit source]Captain Churchill's main gun fires a shell every 1.5 seconds that pierces through Bloons and generates an explosion on each collision. The shells cannot generate explosions for 0.05 seconds after each collision. While each shell has infinite pierce, they can only generate up to three explosions by default, and they expire after generating the maximum number of explosions. The shells themselves deal no damage, but the explosions deal 3 Explosion-type damage and have 12 pierce with an 18-unit blast radius.
| Level | Effect |
|---|---|
| 2 | Explosion pierce increases to 15. |
| 4 | Acquisition range increases from 65 units to 75 units. |
| 6 | Gains Camo detection. Both the shells and the explosions can hit Camo Bloons. |
| 7 | Maximum explosions increases to 4. Explosion base damage increases to 6. |
| 8 | Attack cooldown reduces to 1.2 seconds, effectively increasing attack speed by 25%. |
| 9 | Maximum explosions increases to 5. |
| 11 | Explosion pierce increases to 20. |
| 12 | Explosion base damage increases to 9. |
| 14 | Explosion base damage increases to 12. |
| 15 | Explosions now deal +4 damage to Lead, Fortified, Camo Bloons, and stunned Bloons, which stacks for Bloons with multiple of these properties and/or mutators (i.e. stunned Camo Fortified Lead Bloons take +16 damage in total). |
| 17 | Attack cooldown reduces to 0.9 seconds, effectively increasing attack speed by ~33%. |
| 18 | Explosion base damage increases to 15. |
| 19 | Maximum explosions increases to 7. |
| 20 | Explosion base damage increases to 25. |
Machine Gun
[edit | edit source]At level 5, Churchill unlocks a machine gun attack that shoots at Bloons within his range. It always targets first, regardless of Churchill's target priority. Its shots collide with the target instantly without any travel time, and it can only hit one Bloon at a time, even with pierce buffs. It deals 2 Sharp-type damage every 0.1 seconds.
| Level | Effect |
|---|---|
| 6 | Gains Camo detection. |
| 7 | Base damage increases to 4. |
| 12 | Base damage increases to 6. |
| 14 | Base damage increases to 8. |
| 15 | Now deals +2 damage to Lead, Fortified, Camo Bloons, and stunned Bloons, which stacks for Bloons with multiple of these properties and/or mutators (i.e. stunned Camo Fortified Lead Bloons take +8 damage in total). |
| 18 | Base damage increases to 12. Damage bonuses to Lead, Fortified, Camo Bloons, and stunned Bloons increases to +4. |
| 20 | Base damage increases to 16. |
Abilities
[edit | edit source]Armor Piercing Shells
[edit | edit source]
Armor Piercing Shells unlocks at level 3. It temporarily allows Churchill's shells to explode 2 more times, increases the damage they deal to Ceramic and MOAB-Class Bloons by +9, and changes the damage type of both his shells and Machine Gun to Normal. It lasts for 9 seconds at level 3 and increases by 0.5 seconds each time Churchill levels up after unlocking it (up to 17.5 seconds at level 20). It has a 30-second cooldown.
| Level | Effect |
|---|---|
| 13 | Damage to Ceramic and MOAB-Class Bloons increases to +21. Now also buffs base damage by +3. |
| 17 | Damage to Ceramic and MOAB-Class Bloons increases to +33. Base damage increases to +6. |
MOAB Barrage
[edit | edit source]
MOAB Barrage unlocks at level 10. It targets up to 10 MOAB-Class Bloons on the map from anywhere, prioritizing the strongest ones, then drops a shell on each target every 0.5 seconds for 8 seconds. If a target's outer layer pops, all shells targeting it disappear. Each shell deals 200 Normal-type damage and can only hit its target, not any surrounding Bloons. The player can only activate it if there are any valid targets on-screen. It has a 60-second cooldown.
| Level | Effect |
|---|---|
| 13 | Damage per shell increases to 300 (up to 4,800 in total per target). |
| 17 | Damage per shell increases to 600 (up to 9,600 in total per target). |
| 20 | Damage per shell increases to 1,200 (up to 19,200 in total per target). Cooldown reduces to 30 seconds. Activating the ability now also buffs the base damage of the Main Gun's shells by 3 for 8 seconds. |
Levels
[edit | edit source]| Level | Description |
|---|---|
| 1 | Piercing bombs shot from the tank can explode up to 3 times. |
| 2 | Increased popping power per shot. |
| 3 | Armor Piercing Shells: Shots can pop Black Bloons and do extra damage to Ceramic Bloons. Duration increases as Churchill levels. |
| 4 | Increased attack range. |
| 5 | Adds a fast firing machine gun attack to the tank. |
| 6 | Binoculars allow Churchill to pop Camo Bloons. |
| 7 | Weapons deal more damage and shells can explode more times. |
| 8 | Increased attack speed. |
| 9 | Shells can explode 5 times. |
| 10 | MOAB Barrage: Launches a barrage of shells at up to 10 MOAB-Class Bloons on screen, dealing massive damage each time. |
| 11 | Increased popping power per shell. |
| 12 | Weapons get additional increased damage and shells can explode 6 times. |
| 13 | Armor Piercing Shells pop 3 layers of Bloon and do extra damage to Ceramic and higher. MOAB Barrage damage increased. |
| 14 | Main Gun can pop 3 additional layers and Machine Gun can pop 1 additional layer per shot. |
| 15 | All attacks do extra damage vs Camo, Lead, Fortified, and Stunned Bloons. |
| 16 | Armor Piercing Shells do even more damage. MOAB Barrage damage increased. |
| 17 | Increased attack speed. |
| 18 | All shells pop 3 extra layers of Bloon and Machine Gun can pop 1 additional layer. |
| 19 | Shells can explode 7 times. |
| 20 | MOAB Barrage shells, Main Gun, and Machine Gun do massively increased damage per hit. |
| This list was last updated for: version 55.1 | |
Level requirements
[edit | edit source]| Level | XP required | Rounds to level up | Rounds to level up w/    
| ||||||
|---|---|---|---|---|---|---|---|---|---|
| Beginner | Intermediate | Advanced | Expert | Beginner | Intermediate | Advanced | Expert | ||
| 2 | 308 (308) | 5 (5) | 4 (4) | 4 (4) | 4 (4) | — | — | — | — |
| 3 | 787 (1,095) | 5 (10) | 5 (9) | 5 (9) | 4 (8) | 1 (1) | 1 (1) | 1 (1) | 1 (1) |
| 4 | 1,710 (2,805) | 6 (16) | 6 (15) | 5 (14) | 6 (14) | 10 (11) | 9 (10) | 9 (10) | 8 (9) |
| 5 | 3,181 (5,986) | 7 (23) | 7 (22) | 7 (21) | 7 (21) | 8 (19) | 8 (18) | 7 (17) | 7 (16) |
| 6 | 5,609 (11,595) | 8 (31) | 8 (30) | 8 (29) | 7 (28) | 8 (27) | 8 (26) | 8 (25) | 8 (24) |
| 7 | 8,858 (20,453) | 9 (40) | 8 (38) | 8 (37) | 8 (36) | 8 (35) | 8 (34) | 8 (33) | 8 (32) |
| 8 | 14,227 (34,680) | 10 (50) | 10 (48) | 9 (46) | 8 (44) | 10 (45) | 9 (43) | 8 (41) | 8 (40) |
| 9 | 16,040 (50,720) | 8 (58) | 8 (56) | 8 (54) | 8 (52) | 8 (53) | 8 (51) | 8 (49) | 7 (47) |
| 10 | 23,290 (74,010) | 9 (67) | 8 (64) | 8 (62) | 8 (60) | 8 (61) | 8 (59) | 8 (57) | 8 (55) |
| 11 | 28,010 (102,020) | 8 (75) | 8 (72) | 8 (70) | 8 (68) | 8 (69) | 7 (66) | 7 (64) | 7 (62) |
| 12 | 24,624 (126,644) | 6 (81) | 6 (78) | 5 (75) | 5 (73) | 5 (74) | 6 (72) | 6 (70) | 6 (68) |
| 13 | 28,472 (155,116) | 6 (87) | 6 (84) | 6 (81) | 6 (79) | 6 (80) | 5 (77) | 5 (75) | 5 (73) |
| 14 | 25,547 (180,663) | 5 (92) | 5 (89) | 5 (86) | 4 (83) | 4 (84) | 5 (82) | 4 (79) | 4 (77) |
| 15 | 28,010 (208,673) | 5 (97) | 4 (93) | 4 (90) | 5 (88) | 5 (89) | 4 (86) | 4 (83) | 4 (81) |
| 16 | 30,472 (239,145) | 5 (102) | 5 (98) | 5 (95) | 4 (92) | 5 (94) | 4 (90) | 5 (88) | 4 (85) |
| 17 | 32,935 (272,080) | 5 (107) | 5 (103) | 5 (100) | 5 (97) | 4 (98) | 5 (95) | 4 (92) | 4 (89) |
| 18 | 35,397 (307,477) | 5 (112) | 5 (108) | 4 (104) | 4 (101) | 5 (103) | 4 (99) | 4 (96) | 4 (93) |
| 19 | 28,164 (335,641) | 4 (116) | 4 (112) | 4 (108) | 4 (105) | 3 (106) | 3 (102) | 3 (99) | 3 (96) |
| 20 | 29,549 (365,190) | 4 (120) | 3 (115) | 3 (111) | 3 (108) | 4 (110) | 4 (106) | 3 (102) | 3 (99) |
Strategy
[edit | edit source]Churchill's high cost means that using him requires a dedicated strategy to save up enough cash to purchase him. After he is placed, Churchill is excellent an early-game carry and mid-game general damager because of his high damage potential relative to his level. An additional tower is necessary to cover early game Camo Bloons because of his inability to target them until level 6. In the late game, his slow leveling rate begins to cause him to fall off because of his inability to reach higher levels that allow him to become a proper late-game DPS or cleanup tower without Energizer.
Churchill excels against straight lines, which allow his main shells to maximize the multiple explosions, and later on his Machine Gun covers many of his weaknesses to Black Bloons and singular targets. MOAB Barrage is quite powerful at demolishing a moderate number blimps into weaker layers, serving as a weaker Mega Mine. At later levels he can take down a decent chunk of hyperdense rounds with Armor Piercing Shells active, but still struggles to DDT rounds. Targeting micro, such as switching between Last and First, can help with maximizing his damage in order to weaken blimps and clean up super ceramics.
In general, Churchill attempts to be useful in all stages of the game but does not do enough to be considered better than most other heroes. However, as a pure DPS hero, he is relatively simple to use and is a good pick for towers that require a hefty save-up such as Bloon Exclusion Zone even if he can't buff them directly.
Update history
[edit | edit source]
|
This article or section uses Cargo to generate its content. It will automatically fill up as other articles are completed. To add to this section, create the articles it is looking up. Do not add content to this section manually and do not remove this notice until you are sure this section is complete. |
| Levels | Changes |
|---|---|
| 10+ |
|
| Levels | Changes |
|---|---|
| All |
|

| Levels | Changes |
|---|---|
| 3+ |
|
| 10–19 |
|
| 20 |
|

| Levels | Changes |
|---|---|
| 11+ |
|
| Levels | Changes |
|---|---|
| 7–11 |
|
| 12+ |
|
"Fixed projectile ejection point location"
— Update notes
| Levels | Changes |
|---|---|
| All |
|
| 10–19 |
|
| 20 |
|
— Update notes
| Levels | Changes |
|---|---|
| All |
|
— Update notes
| Levels | Changes |
|---|---|
| 1–6 |
|
| 1–7 |
|
| 3–13 |
|
| 7–11 |
|
| 8–15 |
|
| 12–13 |
|
| 13–16 |
|
| 14–17 |
|
| 15+ |
|
| 16+ |
|
| 17+ |
|
| 18+ |
|
— Update notes
| Levels | Changes |
|---|---|
| 1–7 |
|
| 8–15 |
|
| 1–3 |
|
| 4+ |
|
| 5-6 |
|
| 7–11 |
|
| 12–13 |
|
| 13–16 |
|
| 17+ |
|
| 14–17 |
|
| 15–17 |
|
| 18+ |
|
| 20 |
|
- Churchill Level 13 description changed ― Armor Piercing Shells pop 3 layers of Bloon and do extra damage to Ceramic and higher. → Armor Piercing Shells pop 3 layers of Bloon and do extra damage to Ceramic and higher. MOAB Barrage damage increased.
- Churchill Level 17 description changed ― Armor Piercing Shells do even more damage. → Armor Piercing Shells do even more damage. MOAB Barrage damage increased.
— Update notes
| Levels | Changes |
|---|---|
| 13–16 |
|
| 17–19 |
|
| 20 |
|
- Captain Churchill Level 15 description changed ― All attacks do extra damage vs Fortified Bloons. → All attacks do extra damage vs Fortified and Lead Bloons.
— Update notes
| Levels | Changes |
|---|---|
| 15+ |
|
— Update notes
| Levels | Changes |
|---|---|
| 15+ |
|
| 15–16 |
|
| 15–17 |
|
| 15 |
|
| 17+ |
|
| 17 |
|
| 18+ |
|
| Levels | Changes |
|---|---|
| 17+ |
|
| 17 |
|
| 18+ |
|
— Update notes
| Levels | Changes | ||||
|---|---|---|---|---|---|
| 13–15 |
| ||||
| 16–19 |
| ||||
| 16–17 |
| ||||
| 18–19 |
| ||||
| 20 |
|
— Update notes
| Levels | Changes | ||||
|---|---|---|---|---|---|
| 15+ |
| ||||
| 15-17 |
| ||||
| 18+ |
| ||||
| 15 |
|
Cosmetic items
[edit | edit source]![[[Sentai Churchill (BTD6)|Sentai Churchill]]](/images/thumb/f/f0/BTD6_SentaiChurchillLVL1.png/91px-BTD6_SentaiChurchillLVL1.png)
![[[Sleigh Churchill|Sleigh Churchill]]](/images/thumb/c/c1/BTD6_SleighChurchillLV1.png/83px-BTD6_SleighChurchillLV1.png)
Trophy Store items
[edit | edit source]| Item | Category | Unlock method(s) | Introduced |
|---|---|---|---|
 Churchill Tank Drop Place & Upgrade Churchill Tank Drop Place & Upgrade |
Heroes — Place FX | Trophy Store —  35 35 |
Version 19.0 |
 Churchill Drone Pet Churchill Drone Pet |
Heroes — Pets | Trophy Store — 95 |
Version 28.0 |
Gallery
[edit | edit source]Screenshots
[edit | edit source]
|
This section needs more screenshots. See the screenshot guidelines for more information on what screenshots are needed and how to add them. |
Assets
[edit | edit source]-
 Levels 1–2
 -
 Levels 3–4
 -
 Level 5
 -
 Levels 6–9
 -
 Levels 10–19
 -
 Level 20
 -
 Round icon
 -
 Square icon
 -
 Armor Piercing Shells icon
 -
 MOAB Barrage icon


Voice lines
[edit | edit source]- When selected in the Heroes menu
- ⓘ "The Sun God fights on the side with the best artillery."
In other languages
[edit | edit source]| Language | Text | Notes |
|---|---|---|
| Arabic | كابتن تشرشل | — |
| Danish | Kaptajn Churchill | — |
| German | Hauptmann Churchill | — |
| Spanish | Capitán Churchill | — |
| Spanish (Latin America) | Capitán Churchill | — |
| Finnish | Kapteeni Churchill | — |
| French | Capitaine Churchill | — |
| Italian | Capitan Churchill | — |
| Japanese | チャーチル大佐 | — |
| Korean | 캡틴 처칠 | — |
| Dutch | Kapitein Churchill | — |
| Norwegian | Kaptein Churchill | — |
| Polish | Kapitan Churchill | — |
| Portuguese (Brazil) | Capitão Churchill | — |
| Russian | Капитан Черчилль | — |
| Swedish | Kapten Churchill | — |
| Thai | กัปตันเชอร์ชิล | — |
| Turkish | Yüzbaşı Churchill | — |
| Chinese (simplified) | 上尉丘吉尔 | — |
| Chinese (traditional) | 上尉邱吉爾 | — |
| Language | Text | Notes |
|---|---|---|
| Arabic | يعتبر الكابتن وهو في دبابته القتالية المدرعة قوة أكيدة لا يُستهان بها في ساحة المعركة. | — |
| Danish | Kaptajnen, der patruljerer i sin pansrede kampvogn, udgør en magtfuld tilstedeværelse på slagmarken. | — |
| German | In seinem Kampfpanzer ist der Hauptmann ein totales Kraftpaket auf dem Schlachtfeld. | — |
| Spanish | En su tanque de batalla blindado, el capitán es una fuerza imparable en el campo de batalla. | — |
| Spanish (Latin America) | En su tanque de batalla blindado, el capitán es una fuerza imparable en el campo de batalla. | — |
| Finnish | Panssarivaunussaan viihtyvä kapteeni on voimanpesä taistelukentällä eikä kuuntele järjettömyyksiä. | — |
| French | Dans son char de combat blindé, le Capitaine approche le champ de bataille de façon pragmatique et déterminée. | — |
| Italian | A comando del suo carrarmato corazzato da battaglia, il capitano non conosce avversari sul campo di battaglia. | — |
| Japanese | 武装した戦車の中にいるこの大佐には、戦場でのナンセンスは一切通用しない。 | — |
| Korean | 전용 중장갑 전투 탱크에 타면 전장에서 감히 캡틴을 막을 수 있는 자는 아무도 없습니다. | — |
| Dutch | In zijn gepantserde tank is de kapitein een no-nonsense krachtpatser op het slagveld. | — |
| Norwegian | I sin lille, pansrede tank er kapteinen en farlig krigskjempe ute på slagmarken. | — |
| Polish | Kapitan w swoim pancernym bojowym czołgu to prawdziwa elektrownia na polu bitwy. | — |
| Portuguese (Brazil) | Em seu tanque blindado, o Capitão é uma séria potência no campo de batalha. | — |
| Russian | Сидя в танке, капитан становится серьёзной угрозой на поле боя. | — |
| Swedish | I sin stridsvagn är kaptenen en klippa som absolut inte skämtar på slagfältet. | — |
| Thai | ด้วยรถถังหุ้มเกราะ กัปตันผู้นี้ไม่ได้มาสนามรบเล่นๆ | — |
| Turkish | Zırhlı savaş tankındaki Yüzbaşı, savaş alanında pratik ve etkin bir güçtür. | — |
| Chinese (simplified) | 在装甲战斗坦克中,上尉立马化身成不苟言笑的强力人物。 | — |
| Chinese (traditional) | 在作戰坦克的裝甲之下,上尉是戰場上悍將,絕不拖泥帶水。 | — |
Navigation
[edit | edit source]| Towers in Bloons TD 6 | ||||||||||||
|---|---|---|---|---|---|---|---|---|---|---|---|---|
|