Pat Fusty (BTD6): Difference between revisions
updated to 55.1 |
No edit summary Tags: Visual edit Mobile edit Mobile web edit |
||
| (6 intermediate revisions by 3 users not shown) | |||
| Line 14: | Line 14: | ||
| introduced = 9.0 | | introduced = 9.0 | ||
| introduced C = | | introduced C = | ||
| rl tower 1 = | | rl tower 1 = Tack Shooter | ||
| rl tower 1 upgrades = 020 | | rl tower 1 upgrades = 020 | ||
| rl tower 2 = | | rl tower 2 = Spike Factory | ||
| rl tower 2 upgrades = 200 | | rl tower 2 upgrades = 200 | ||
| rl artifact = Heightened Perception | | rl artifact = Heightened Perception | ||
| Line 135: | Line 135: | ||
|- | |- | ||
!8 | !8 | ||
|Increased attack | |Increased attack speed. | ||
|- | |- | ||
!9 | !9 | ||
|Increased attack range. | |Increased attack range, and Rallying Roar further increases damage of rallied Monkeys. | ||
|- | |- | ||
!10 | !10 | ||
| Line 181: | Line 181: | ||
==Strategy== | ==Strategy== | ||
{{main strategy}} | {{main strategy}} | ||
{{BTD6 last updated|55.2|section=y}} | |||
{{BTD6 last updated| | *Pat Fusty is a very map-dependent Hero whose best assets are his MOAB-Class Bloon stalling and level 3 ability. | ||
Pat Fusty is | *Rallying Roar synergizes with towers that have low base damage, have a lot of projectiles, and/or attack really fast. Notable examples include [[The Tack Zone (BTD6)|The Tack Zone]] and [[Super Maelstrom (BTD6)|Super Maelstrom]]. | ||
*In the early game, his high Ceramic damage and stuns help with cleaning up [[MOAB (BTD6)|MOAB]] children, but his damage output is otherwise very dependent on how much of the path he can reach. | |||
*Pat is very effective at stunning crowds of Bloons in the mid-late game, especially by buffing him with [[Berserker Brew (BTD6)|Berserker Brew]] and/or [[Overclock (BTD6)|Overclock]]. This can either be used in a stalling strategy to stall for [[Perma-Spike (BTD6)|Perma-Spike]], or combined with a tower that does extra damage against stunned Bloons (most notably [[Tyrannosaurus Rex|T-Rex]]). | |||
*Big Squeeze might sound good on paper, but since it disables his powerful stun and knockback for a few seconds, it's not very useful without level 20. It's best used on rounds with only a few blimps (namely 60, 80, 85, 87, and 97). | |||
*Due to his short range, he works best on maps where he can reach all paths. | |||
==Update history== | ==Update history== | ||
| Line 320: | Line 318: | ||
{{BTD6 last updated|49.2|section=y}} | {{BTD6 last updated|49.2|section=y}} | ||
{{langlist | {{langlist | ||
|label=Name | | label = Name | ||
|key=PatFusty | | key = PatFusty | ||
|ar | | ar = بات فستي | ||
|da | | da = Pat Fusty | ||
|de | | de = Pat Fusty | ||
|es | | es = Pat Fusty | ||
|es-la=Pat Fusty | | es-la = Pat Fusty | ||
|fi | | fi = Pat Fusty | ||
|fr | | fr = Pat Fusty | ||
|it | | it = Pat Fusty | ||
|ja | | ja = ビッグパット | ||
|ko | | ko = 팻 퍼스티 | ||
|nl | | nl = Pat Fusty | ||
|no | | no = Pat Fusty | ||
|pl | | pl = Pat Fusty | ||
|pt-br=Pat Fusty | | pt-br = Pat Fusty | ||
|ru | | ru = Пэт Фасти | ||
|sv | | sv = Pat Fusty | ||
|th | | th = แพ็ท ฟัสตี้ | ||
|tr | | tr = Pat Fusty | ||
|zh-cn=帕特·法斯第 | | zh-cn = 帕特·法斯第 | ||
|zh-tw=派特佛斯提 | | zh-tw = 派特佛斯提 | ||
| ja note = Transliterated from "Big Pat". | |||
}} | }} | ||
{{langlist | {{langlist | ||
Latest revision as of 02:10, 10 August 2026
Giant Monkey

|
| Pat is a huge Monkey of enormous strength. His unique size and power is a great asset in the war on Bloons. |
| Cost | $680 — Easy $800 — Medium $865 — Hard $960 — Impoppable With  Hero Favors: Hero Favors:$610 — Easy $720 — Medium $780 — Hard $865 — Impoppable | ||
|---|---|---|---|
| XP curve | ×1.425 (levels up at ×0.7018 the normal rate) | ||
| Rogue Legends party |  0-2-0 Tack Shooter 0-2-0 Tack Shooter 2-0-0 Spike Factory 2-0-0 Spike Factory Heightened Perception Legendary Heightened Perception Legendary
| ||
| Frontier Legends attributes | Recruit cost: $5,130 Starting level: 3 Brutal Slugga Quickshot | ||
| Introduced | Version 9.0 | ||
Pat Fusty is a Hero in Bloons TD 6, introduced in version 9.0. He is purchasable for  3,000 Monkey Money starting at level 15.
Pat's basic attack is slamming Bloons with his fists, which deals damage in an area of effect around the target, deals extra damage to the first Bloon hit, and deals more damage to Ceramic Bloons. He has short range and cannot detect Camo Bloons, but can damage all other Bloon types. He can be placed on both land and water. As he levels up, his range, damage, and attack speed increase, he does more damage to Ceramic Bloons, and his slams stun Bloons briefly.
- Starting at level 5, he periodically does a slap instead, which knocks Bloons back instead of dealing more damage to the target.
- Starting at level 6, his slams briefly stun Bloons. Level 14 allows him to temporarily stun non-BAD MOAB-Class Bloons.
- He has two Activated Abilities:
- Rallying Roar (level 3) — Increases the damage of all nearby towers in Pat Fusty's range for a short time. The damage buff increases at levels 9 and 14, and level 14 increases its duration.
- Big Squeeze (level 10) — Grabs the strongest non-BAD MOAB-Class Bloon nearby and crushes it, destroying its outer layer and stunning its children, which takes a few seconds and stops him from attacking. At level 20, he can grab four MOAB-Class Bloons at once.
Mechanics
[edit | edit source]
|
This section needs more screenshots. See the screenshot guidelines for more information on what screenshots are needed and how to add them. The editor that added this notice elaborates: Pat slam, slap, etc |
Slam attack
[edit | edit source]Pat Fusty's basic attack uses his fists to slam a target Bloon within range every 1.1 seconds, which generates area of effect around the target. He alternates between using his left and right fists, which is purely visual. It has 27 range and cannot detect Camo Bloons. With enough range buffs (mainly via Artifacts), his slams cannot reach further than a certain amount, about 45 units, even though he can target Bloons past that distance.
The slam deals 3 Normal-type damage to the target and +2 damage if it is a Ceramic Bloon, and can only hit the target. The area of effect has 10 pierce, an 8-unit radius, and deals 2 Normal-type damage and +2 damage to Ceramic Bloons, and can hit the same Bloon as the initial hit.
| Level | Effect |
|---|---|
| 2 | AoE radius increases to 13 units. |
| 4 | Attack cooldown reduces to 0.9 seconds, effectively increasing attack speed by roughly 22.2%. |
| 6 | AoE radius increases to 20 units. Both the slam and the AoE now stun non-MOAB-Class Bloons hit for 0.3 seconds. |
| 7 | Slam damage increases to 4. AoE damage increases to 3. AoE pierce increases to 20. |
| 8 | Attack cooldown reduces to 0.75 seconds, effectively increasing attack speed by 20%. |
| 9 | Range increases to 30 units. |
| 11 | Slam damage increases to 5. AoE damage increases to 4. |
| 12 | Attack cooldown reduces to 0.65 seconds, effectively increasing attack speed by roughly 15.4%. |
| 13 | Both the slam and the AoE now stun regular Bloons for 0.5 seconds and MOAB-Class Bloons for 0.2 seconds. |
| 15 | AoE pierce increases to 30 |
| 16 | Slam damage to Ceramic Bloons increases to +7. AOE damage to Ceramic Bloons increases to +8. |
| 17 | Attack cooldown reduces to 0.55 seconds, effectively increasing attack speed by roughly 18.2%. |
| 18 | AoE pierce increases to 40. |
| 19 | Slam damage increases to 10. AoE damage increases to 9. |
Slap attack
[edit | edit source]Starting at level 5, Pat does a backhand slap instead of a slam on every fifth attack. It deals no damage, but has 8 pierce, a 20-unit radius, and inflicts knockback on regular Bloons and MOABs, causing them to move backwards at three times their normal speed for 1 second. It also generates an AOE that has exactly the same properties as the slam AOE at all levels.
Starting at level 15, it has 16 pierce instead of 8.
Abilities
[edit | edit source]Rallying Roar
[edit | edit source]
Rallying Roar unlocks at level 3. It applies a buff that grants +1 damage to all towers in Pat Fusty's' range, including himself, for 8 seconds. It has a 45-second cooldown.
At level 9 the damage bonus increases to +2 and starting at level 14, the damage buff increases to +3 and the duration increases to 10 seconds.
Big Squeeze
[edit | edit source]
Big Squeeze unlocks at level 10. It causes Pat to stop attacking and grab the strongest MOAB-Class Bloon within 35 units, hold it in place for 3.8 seconds, then deal 9,999,999 damage to its outer layer and release it or its children stunned for 2.2 seconds.[fn 1] While being crushed, the target Bloon is untargetable by all towers, immune to all damage, and unable to collide with any projectiles. He cannot grab BADs and requires a Camo detection buff or decamo to grab DDTs. He cannot use his main attack for 5 seconds after activation, but he can still activate Rallying Roar. It has a 20-second cooldown.
At level 20, it grabs the four strongest Bloons within range instead of one, and Pat Fusty will create a no-damage area-of-effect that stuns Bloons for 5 seconds immediately after activating the ability.
Levels
[edit | edit source]| Level | Description |
|---|---|
| 1 | Pat slams Bloons into the ground. |
| 2 | Increase radius of slam attack. |
| 3 | Rallying Roar: All nearby Monkeys can pop +1 layer for a short time. |
| 4 | Increased attack speed. |
| 5 | Sometimes does a powerful slap that pushes Bloons away from the exit. |
| 6 | Bloons struck by Pat are stunned for a short time. |
| 7 | Pat has increased pierce and deals more damage. |
| 8 | Increased attack speed. |
| 9 | Increased attack range, and Rallying Roar further increases damage of rallied Monkeys. |
| 10 | Big Squeeze: Grabs a MOAB, BFB, DDT (if visible), or ZOMG and crushes it to bits over 5 seconds. |
| 11 | Attack pops more layers. |
| 12 | Increased attack speed. |
| 13 | Attack stuns Bloons for longer and can stun MOAB-Class Bloons very briefly. |
| 14 | Rallying Roar increased duration and increased damage of rallied monkeys. |
| 15 | Slam and Slap attacks can hit more Bloons. |
| 16 | Pat deals much more damage to Ceramic Bloons. |
| 17 | Increased attack speed. |
| 18 | Increased pierce. |
| 19 | Attack pops more layers. |
| 20 | Squeeze can hug several big Bloons at once, with such intensity nearby Bloons are left stunned! |
| This list was last updated for: version 55.1 | |
Level requirements
[edit | edit source]| Level | XP required | Rounds to level up | Rounds to level up w/    
| ||||||
|---|---|---|---|---|---|---|---|---|---|
| Beginner | Intermediate | Advanced | Expert | Beginner | Intermediate | Advanced | Expert | ||
| 2 | 257 (257) | 4 (4) | 4 (4) | 4 (4) | 4 (4) | — | — | — | — |
| 3 | 656 (913) | 5 (9) | 4 (8) | 4 (8) | 4 (8) | 1 (1) | 1 (1) | 1 (1) | 1 (1) |
| 4 | 1,425 (2,338) | 5 (14) | 6 (14) | 5 (13) | 4 (12) | 9 (10) | 8 (9) | 8 (9) | 7 (8) |
| 5 | 2,651 (4,989) | 7 (21) | 6 (20) | 6 (19) | 7 (19) | 7 (17) | 7 (16) | 7 (16) | 7 (15) |
| 6 | 4,674 (9,663) | 8 (29) | 8 (28) | 8 (27) | 7 (26) | 8 (25) | 8 (24) | 7 (23) | 7 (22) |
| 7 | 7,382 (17,045) | 8 (37) | 7 (35) | 7 (34) | 7 (33) | 8 (33) | 7 (31) | 7 (30) | 7 (29) |
| 8 | 11,856 (28,901) | 9 (46) | 9 (44) | 9 (43) | 8 (41) | 8 (41) | 9 (40) | 8 (38) | 8 (37) |
| 9 | 13,367 (42,268) | 8 (54) | 8 (52) | 7 (50) | 7 (48) | 8 (49) | 7 (47) | 7 (45) | 7 (44) |
| 10 | 19,409 (61,677) | 8 (62) | 8 (60) | 8 (58) | 9 (57) | 8 (57) | 8 (55) | 8 (53) | 7 (51) |
| 11 | 23,342 (85,019) | 8 (70) | 8 (68) | 7 (65) | 7 (64) | 7 (64) | 7 (62) | 7 (60) | 7 (58) |
| 12 | 20,520 (105,539) | 5 (75) | 5 (73) | 6 (71) | 5 (69) | 6 (70) | 5 (67) | 5 (65) | 5 (63) |
| 13 | 23,726 (129,265) | 6 (81) | 5 (78) | 5 (76) | 5 (74) | 5 (75) | 5 (72) | 5 (70) | 5 (68) |
| 14 | 21,290 (150,555) | 5 (86) | 5 (83) | 4 (80) | 4 (78) | 4 (79) | 4 (76) | 4 (74) | 4 (72) |
| 15 | 23,342 (173,897) | 4 (90) | 4 (87) | 5 (85) | 4 (82) | 4 (83) | 4 (80) | 4 (78) | 4 (76) |
| 16 | 25,394 (199,291) | 5 (95) | 5 (92) | 4 (89) | 4 (86) | 5 (88) | 5 (85) | 4 (82) | 4 (80) |
| 17 | 27,446 (226,737) | 5 (100) | 4 (96) | 4 (93) | 5 (91) | 4 (92) | 4 (89) | 4 (86) | 3 (83) |
| 18 | 29,498 (256,235) | 4 (104) | 5 (101) | 5 (98) | 4 (95) | 4 (96) | 4 (93) | 4 (90) | 4 (87) |
| 19 | 23,470 (279,705) | 4 (108) | 3 (104) | 3 (101) | 3 (98) | 3 (99) | 3 (96) | 3 (93) | 3 (90) |
| 20 | 24,624 (304,329) | 3 (111) | 3 (107) | 3 (104) | 3 (101) | 3 (102) | 3 (99) | 3 (96) | 3 (93) |
Strategy
[edit | edit source]- Pat Fusty is a very map-dependent Hero whose best assets are his MOAB-Class Bloon stalling and level 3 ability.
- Rallying Roar synergizes with towers that have low base damage, have a lot of projectiles, and/or attack really fast. Notable examples include The Tack Zone and Super Maelstrom.
- In the early game, his high Ceramic damage and stuns help with cleaning up MOAB children, but his damage output is otherwise very dependent on how much of the path he can reach.
- Pat is very effective at stunning crowds of Bloons in the mid-late game, especially by buffing him with Berserker Brew and/or Overclock. This can either be used in a stalling strategy to stall for Perma-Spike, or combined with a tower that does extra damage against stunned Bloons (most notably T-Rex).
- Big Squeeze might sound good on paper, but since it disables his powerful stun and knockback for a few seconds, it's not very useful without level 20. It's best used on rounds with only a few blimps (namely 60, 80, 85, 87, and 97).
- Due to his short range, he works best on maps where he can reach all paths.
Update history
[edit | edit source]General
[edit | edit source]
|
This article or section uses Cargo to generate its content. It will automatically fill up as other articles are completed. To add to this section, create the articles it is looking up. Do not add content to this section manually and do not remove this notice until you are sure this section is complete. |
| Levels | Changes |
|---|---|
| 3–13 |
|
| 5+ |
|
| 20 |
|

| Levels | Changes |
|---|---|
| 3+ |
|
| Levels | Changes |
|---|---|
| 7+ |
|
| 14+ |
|
| 16+ |
|
| Levels | Changes |
|---|---|
| 3+ |
|
| 3–13 |
|
| 14+ |
|
— Update notes
| Levels | Changes |
|---|---|
| 3–13 |
|
| Levels | Changes |
|---|---|
| 3+ |
|
| 10+ |
|
| Levels | Changes |
|---|---|
| 3+ |
|
| Levels | Changes |
|---|---|
| 3+ |
|
| Levels | Changes |
|---|---|
| 13+ |
|
— Update notes
| Levels | Changes |
|---|---|
| All |
|
| Levels | Changes |
|---|---|
| 1+ |
|
| 3+ |
|
— Update notes
| Levels | Changes |
|---|---|
| 5–14 |
|
| 15+ |
|
| Levels | Changes |
|---|---|
| 3+ |
|
| Levels | Changes |
|---|---|
| 1+ |
|
| Levels | Changes |
|---|---|
| All |
|
— Update notes
| Levels | Changes | ||||
|---|---|---|---|---|---|
| 3–13 |
| ||||
| 14+ |
|

— Update notes
| Levels | Changes | ||||
|---|---|---|---|---|---|
| 1-8 |
| ||||
| 9-15 |
| ||||
| 16+ |
| ||||
| 9-13 |
| ||||
| 15-17 |
| ||||
| 18+ |
| ||||
| 20 |
| ||||
| 7 |
| ||||
| 9 |
| ||||
| 15 |
| ||||
| 16 |
| ||||
| 18 |
|
Rogue Legends
[edit | edit source]— Update notes
 Starting Artifact changed ― Heightened Perception Common → Heightened Perception Legendary
Cosmetic items
[edit | edit source]![[[Fusty the Snowman (BTD6)|Fusty the Snowman]]](/images/thumb/3/34/BTD6_FustyTheSnowmanPortrait.png/93px-BTD6_FustyTheSnowmanPortrait.png)
![[[Kaiju Pat|Kaiju Pat]]](/images/thumb/5/56/BTD6_KaijuPatPortrait.png/91px-BTD6_KaijuPatPortrait.png)
Trophy Store items
[edit | edit source]| Item | Category | Unlock method(s) | Introduced |
|---|---|---|---|
 Fusty the Snowman Penguin Pet Fusty the Snowman Penguin Pet |
Heroes — Pets | Trophy Store —  75, Prime Gaming drop 1 75, Prime Gaming drop 1 |
Version 22.0 |
 Pat Super Jump Place & Upgrade Pat Super Jump Place & Upgrade |
Heroes — Place FX | Trophy Store — 30 |
Version 25.0 |
 Pat Fusty Pig Pet Pat Fusty Pig Pet |
Heroes — Pets | Trophy Store — 120 |
Version 45.0 |
Related achievement
[edit | edit source]  |
Big Bloons Pat likes hugging Big Bloons even more Reward(s):  Big Bloons Big Bloons
|
|---|
Gallery
[edit | edit source]Screenshots
[edit | edit source]|
|
This section needs more screenshots. See the screenshot guidelines for more information on what screenshots are needed and how to add them. |
Assets
[edit | edit source]-
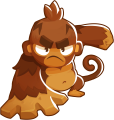 Levels 1–2
 -
 Levels 3–4
 -
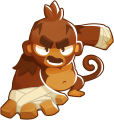 Levels 5–9
 -
 Levels 10–19
 -
 Level 20
 -
 Round icon
 -
 Square icon
 -
 Rallying Roar icon
 -
 Big Squeeze icon
 -
 Rallying Roar buff icon


Voice lines
[edit | edit source]- When selected in the Heroes menu
- ⓘ "Huh-huh! It's squashing time!"
In other languages
[edit | edit source]| Language | Text | Notes |
|---|---|---|
| Arabic | بات فستي | — |
| Danish | Pat Fusty | — |
| German | Pat Fusty | — |
| Spanish | Pat Fusty | — |
| Spanish (Latin America) | Pat Fusty | — |
| Finnish | Pat Fusty | — |
| French | Pat Fusty | — |
| Italian | Pat Fusty | — |
| Japanese | ビッグパット | Transliterated from "Big Pat". |
| Korean | 팻 퍼스티 | — |
| Dutch | Pat Fusty | — |
| Norwegian | Pat Fusty | — |
| Polish | Pat Fusty | — |
| Portuguese (Brazil) | Pat Fusty | — |
| Russian | Пэт Фасти | — |
| Swedish | Pat Fusty | — |
| Thai | แพ็ท ฟัสตี้ | — |
| Turkish | Pat Fusty | — |
| Chinese (simplified) | 帕特·法斯第 | — |
| Chinese (traditional) | 派特佛斯提 | — |
| Language | Text | Notes |
|---|---|---|
| Arabic | بات هو قرد ضخم يتمتع بقوة هائلة. يتميز حجمه وقوته الفريدان من نوعهما بأنهما ميزة كبيرة في الحرب على البالونات. | — |
| Danish | Pat er en enorm abe med kolonorm styrke. Hans unikke størrelse og kraft er i sandhed et aktiv i krigen mod bloons'ene. | — |
| German | Pat ist ein großer Affe mit enormen Kräften. Seine einzigartige Größe und seine Stärke sind ein großer Gewinn im Kampf gegen die Bloons. | — |
| Spanish | Pat es un Mono enorme con una fuerza tremenda. Su tamaño y potencia únicos lo hacen muy valioso para la lucha contra los bloons. | — |
| Spanish (Latin America) | Pat es un Mono enorme con una fuerza tremenda. Su tamaño y potencia únicos lo hacen muy valioso para la lucha contra los bloons. | — |
| Finnish | Pat on valtava apina, jolla on valtaisat voimat. Hänen ainutlaatuinen kokonsa ja voimansa auttavat bloonien vastaisessa sodassa. | — |
| French | Pat est un énorme singe à la force immense. Sa taille et sa puissance uniques sont un grand avantage dans la guerre contre les Bloons. | — |
| Italian | Pat è noto tra le scimmie per la stazza e l'enorme forza che lo rendono una risorsa irrinunciabile nella guerra contro i bloon. | — |
| Japanese | パットはものすごい力を備えた巨大モンキー。彼のユニークな大きさとパワーは、ブルーン戦争では素晴らしい資産だ。 | — |
| Korean | 팻은 어마어마한 힘을 가진 거대한 원숭이입니다. 팻의 독보적인 체구와 근력은 풍선과의 싸움에서 큰 도움이 되지요. | — |
| Dutch | Pat is een enorme aap die enorm sterk is. Zijn unieke afmetingen en kracht zijn een grote troef in de oorlog tegen de Bloons. | — |
| Norwegian | Pat er en svær ape med enorm styrke. Hans unike størrelse og kraft er en stor ressurs i krigen mot bloons. | — |
| Polish | Pat to wielka małpka o ogromnej sile. Jego unikalny rozmiar i moc to zaleta w wojnie z blonami. | — |
| Portuguese (Brazil) | Pat é um macaco imenso de enorme força. Seu tamanho e força únicos são uma grande vantagem na guerra aos Bloons. | — |
| Russian | Пэт — огромная обезьяна недюжинной силы. Его уникальные размеры и сила — отличное средство в борьбе с шарами. | — |
| Swedish | Pat är en stor apa med enorm styrka. Hans unika storlek och kraft är en stor tillgång i kriget mot Bloons. | — |
| Thai | แพ็ทเป็นลิงตัวใหญ่ผู้มีพละกำลังมหาศาล ร่างกายกำยำและพลังที่ไม่เหมือนใครของเขาเป็นประโยชน์ในการทำสงครามกับลูกโป่งอย่างยิ่ง | — |
| Turkish | Pat, muazzam güce sahip dev bir maymundur. Benzersiz boyutu ve gücü, Bloon’larla savaşırken son derece yararlıdır. | — |
| Chinese (simplified) | 帕特是一个力大无比的巨型猴子。在对抗气球的战争中,它的体型和力量可是一笔宝贵财富。 | — |
| Chinese (traditional) | 派特是一隻巨猴,擁有巨大力量。他獨特個頭和力量是我們對氣球之戰的巨大財富。 | — |
Footnotes
[edit | edit source]- ↑ While this ability usually does enough damage to destroy the outer layer in regular gameplay, the MOAB Test Bloon can survive it.
Navigation
[edit | edit source]| Towers in Bloons TD 6 | ||||||||||||
|---|---|---|---|---|---|---|---|---|---|---|---|---|
|