Crucible of Steel and Flame: Difference between revisions
Overclockbtd (talk | contribs) /Meteor Impact ability damage update |
m Fixed Blastapopoulos misspelling |
||
| Line 70: | Line 70: | ||
Crucible of Steel of Flame's best matchup is [[Blastapopoulos (BTD6)|Blastapopoulos]]; despite the increased ability cooldowns, Meteor Impact's massive burst damage is still very strong for its price. Its worst matchup is [[Phayze (BTD6)|Phayze]] as it lacks any way to naturally affect Camo Bloons, and even with Camo detection from [[Ascended Shadow]] it loses almost all of its DPS whenever Phayze hits a skull. Additionally, the Maelstrom ability is almost useless versus [[Lych]] because it steals the self-buff. | Crucible of Steel of Flame's best matchup is [[Blastapopoulos (BTD6)|Blastapopoulos]]; despite the increased ability cooldowns, Meteor Impact's massive burst damage is still very strong for its price. Its worst matchup is [[Phayze (BTD6)|Phayze]] as it lacks any way to naturally affect Camo Bloons, and even with Camo detection from [[Ascended Shadow]] it loses almost all of its DPS whenever Phayze hits a skull. Additionally, the Maelstrom ability is almost useless versus [[Lych]] because it steals the self-buff. | ||
Alongside positioning, timing abilities are important. Time Maelstrom when the Boss is within the Crucible's range to make the most of its Ring of Fire's damage. Use Meteor Impact for certain Bosses when they are no longer immune to damage after reaching a skull (e.g. Vortex when its shield is down, Dreadbloon when no longer in Primary immunity, and | Alongside positioning, timing abilities are important. Time Maelstrom when the Boss is within the Crucible's range to make the most of its Ring of Fire's damage. Use Meteor Impact for certain Bosses when they are no longer immune to damage after reaching a skull (e.g. Vortex when its shield is down, Dreadbloon when no longer in Primary immunity, and Blastapopoulos a few seconds after creating Pyroclastic Rocks). | ||
For maximum pops, place all of the T5 Tacks near the front of the track. For cheapest T2 and T3 crosspaths for the most tiers, use 0-2-2 and 0-2-3, the cheapest T4 for the most tiers is 0-4-2 [[Blade Maelstrom (BTD6)|Blade Maelstrom]], and for most expensive use 4-2-0 [[Ring of Fire (BTD6)|Ring of Fire]]s. However, 2-0-4 [[Overdrive (BTD6)|Overdrive]] is preferred if transitioning into the Paragon, since this T4 has the best DPS against MOAB-class Bloons. | For maximum pops, place all of the T5 Tacks near the front of the track. For cheapest T2 and T3 crosspaths for the most tiers, use 0-2-2 and 0-2-3, the cheapest T4 for the most tiers is 0-4-2 [[Blade Maelstrom (BTD6)|Blade Maelstrom]], and for most expensive use 4-2-0 [[Ring of Fire (BTD6)|Ring of Fire]]s. However, 2-0-4 [[Overdrive (BTD6)|Overdrive]] is preferred if transitioning into the Paragon, since this T4 has the best DPS against MOAB-class Bloons. | ||
Revision as of 17:21, 18 April 2026

|
 Spinning blades of Bloon immolation! Spinning blades of Bloon immolation!
|
| Tower | Tack Shooter | |
|---|---|---|
| XP cost | 500,000 | |
| Cash cost | $170,000 — Easy $200,000 — Medium $216,000 — Hard $240,000 — Impoppable | |
| Introduced | Version 46.0 | |
The Crucible of Steel and Flame is the Tack Shooter's Paragon in Bloons TD 6, introduced in version 46.0. It is a combination of Inferno Ring, Super Maelstrom, and The Tack Zone.
The Crucible of Steel and Flame's basic attack is similar to the Blade Maelstrom ability, but with limited area coverage. It shoots four rotating streams of white hot blades that each split into a nova of eight tacks when they expire. It constantly fires blades even when Bloons are not within its range. It can only detect Camo Bloons when granted Camo detection by the Ascended Shadow.[1]
It has two Activated Abilities:
- The Maelstrom ability temporarily increases its projectile lifespan, allowing both its blades and tacks to travel much further and cover a much larger area overall, and grants it a second attack that blasts jets of flame in a ring around itself, dealing damage in an area similarly to Ring of Fire and Inferno Ring. It lasts for 9 seconds and has a 20-second cooldown.
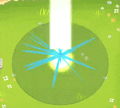
- The Meteor Impact ability targets a Bloon and strikes it with a meteor, dealing heavy damage in a large area around the target and spawning a circle of 32 homing fireballs around the point of impact. It has a 60-second cooldown.
Mechanics
Main attack

|
This article or section needs more images. The editor who added this notice elaborates: GIF of a d1 crucible |

|
This article is in need of research. You can help out by editing this article or discussing your findings on the talk page. The editor who added this notice elaborates: Confirm if tacks can hit the same target as blades (look for the presence or absence of a "filter" to the parent, whether it be a property that matches Shrapnel Shot, Airburst Darts, or something like that) |
Crucible of Steel and Flame's main attack is a passively attacking blade nova that is offset higher than its own centerpoint. The blade nova consists of two copies of a rotating twin blade attack 180° apart, rotating their offsets in opposite directions at 360° per second. Each blade has 2 radius and moves at 140 units per second, and lasts up to 0.25s. Once expired or hits an obstacle, each blade produces a nova of eight tacks that can hit the same target. The nova has 360° spread. Each tack has 0 radius (i.e. can only hit Bloons with its centerpoint), move at 120 units per second, and last up to 0.15s. Both blades and tacks have low pierce and damage but do extra damage to Bosses. None of its attacks can hit Camo without Camo detection from Ascended Shadow. It is affected by  Fast Tack Attacks.
Its range is 42.32, which is roughly less range than its blade nova.
At Degree 1:
- The blade attack is shot every 0.0325 seconds.
- Each blade deals 20 damage, +30 Boss damage, and has 5 pierce.
- Each tack deals 10 damage, +20 Boss damage, and has 3 pierce.
Activated Abilities
Maelstrom ability
|
|
This article is in need of research. You can help out by editing this article or discussing your findings on the talk page. The editor who added this notice elaborates: Confirm if bonus lifespan also affects Meteor Impact when triggered while ability is active |

Maelstrom ability increases lifespan of all its attacks by ×2.5, and adds a flame ring that is similar to Ring of Fire, both lasting for 9 seconds. The lifespan bonus also affects Meteor Impact when that ability is activated while Maelstrom ability is active. The flame ring has 45 radius, high pierce, and does more damage to Bosses. The flame ring cannot detect Camo Bloons without the support of Ascended Shadow. This ability has a base cooldown of 20 seconds.
At Degree 1:
- The flame ring attacks every 1 second and does 250 damage, +250 Boss damage, and has 80 pierce.
Meteor Impact ability
|
|
This article is in need of research. You can help out by editing this article or discussing your findings on the talk page. The editor who added this notice elaborates: Confirm delay amount of meteor initial delay between triggering and hitting target. |

Meteor Impact creates a meteor that targets and pursues a Bloon based on targeting priority, producing a large explosion that produces 32 homing fireballs that can re-hit Bloons. None of its attacks detect Camo without support of Ascended Shadow. It has a base cooldown of 60 seconds.
The meteor takes about 0.5 seconds to hit its target. The explosion has 120 radius and has very high damage and pierce. The resulting fireballs have 360° spread. Each fireball moves at a rate of 40 units per second, accelerates at 2 units/s2, and has a max speed of 80 units per second. While seeking, a fireball can target Bloons practically everywhere,[fn 1] can seek from any direction, rotates at a rate of 360°/s, and lasts up to 5 seconds. Each fireball has 2 radius and can re-hit Bloons after 0.5s.
At Degree 1:
- The meteor does 60,000 damage and has 500 pierce.
- Each fireball does 900 damage and has 2 pierce.
Stats

|
This section is incomplete. You can help out by expanding it. The editor who added this notice elaborates: Add the "delay" stat akin to Mortar and x3x Sub Ballistic Missile |
| Tower | ||||||
|---|---|---|---|---|---|---|
| ||||||
| Attack | ||||||||||||||||||||||||||||||||||||||||||||||
|---|---|---|---|---|---|---|---|---|---|---|---|---|---|---|---|---|---|---|---|---|---|---|---|---|---|---|---|---|---|---|---|---|---|---|---|---|---|---|---|---|---|---|---|---|---|---|
| ||||||||||||||||||||||||||||||||||||||||||||||
| ||||||||||||||||||||||||||||||||||||||||||||||
|
| Maelstrom | ||||||||||||||||||||||||||||||||
|---|---|---|---|---|---|---|---|---|---|---|---|---|---|---|---|---|---|---|---|---|---|---|---|---|---|---|---|---|---|---|---|---|
| ||||||||||||||||||||||||||||||||
| ||||||||||||||||||||||||||||||||
|
| Meteor Impact | |||||||||||||||||||||||||||||||||||||||||||||||||||||||||||||||||||||
|---|---|---|---|---|---|---|---|---|---|---|---|---|---|---|---|---|---|---|---|---|---|---|---|---|---|---|---|---|---|---|---|---|---|---|---|---|---|---|---|---|---|---|---|---|---|---|---|---|---|---|---|---|---|---|---|---|---|---|---|---|---|---|---|---|---|---|---|---|---|
| |||||||||||||||||||||||||||||||||||||||||||||||||||||||||||||||||||||
|
| Degree | Power | Boss multiplier | Attack | Projectile | Sub-projectile | Maelstrom | Attack | Projectile | Meteor Impact | Explosion | Fireball | ||||||||
|---|---|---|---|---|---|---|---|---|---|---|---|---|---|---|---|---|---|---|---|
| Cooldown | Pierce | Damage | Damage to bosses | Pierce | Damage | Damage to bosses | Cooldown | Cooldown | Pierce | Damage | Damage to bosses | Cooldown | Pierce | Damage | Pierce | Damage | |||
| 1 | 0 | ×1.0 | 0.0325s | 5 | 20 | +30 | 3 | 10 | +20 | 20s | 1s | 80 | 250 | +250 | 60s | 500 | 6e+04 | 2 | 900 |
| 2 | 2000 | ×1.0 | 0.03035s | 5.1 | 20.2 | +30.3 | 3.1 | 10.1 | +20.2 | 18.68s | 0.934s | 80.1 | 252.5 | +252.5 | 56.04s | 505.1 | 6.06e+04 | 2.1 | 909 |
| 3 | 2324 | ×1.0 | 0.02955s | 5.2 | 20.4 | +30.6 | 3.2 | 10.2 | +20.4 | 18.18s | 0.9091s | 81.2 | 255 | +255 | 54.55s | 510.2 | 6.12e+04 | 2.2 | 918 |
| 4 | 2666 | ×1.0 | 0.02895s | 5.3 | 20.6 | +30.9 | 3.3 | 10.3 | +20.6 | 17.82s | 0.8909s | 82.3 | 257.5 | +257.5 | 53.45s | 515.3 | 6.18e+04 | 2.3 | 927 |
| 5 | 3027 | ×1.0 | 0.02847s | 5.4 | 20.8 | +31.2 | 3.4 | 10.4 | +20.8 | 17.52s | 0.8761s | 83.4 | 260 | +260 | 52.57s | 520.4 | 6.24e+04 | 2.4 | 936 |
| 6 | 3408 | ×1.0 | 0.02806s | 5.5 | 21 | +31.5 | 3.5 | 10.5 | +21 | 17.27s | 0.8635s | 84.5 | 262.5 | +262.5 | 51.81s | 525.5 | 6.3e+04 | 2.5 | 945 |
| 7 | 3808 | ×1.0 | 0.0277s | 5.6 | 21.2 | +31.8 | 3.6 | 10.6 | +21.2 | 17.05s | 0.8524s | 84.6 | 265 | +265 | 51.14s | 530.6 | 6.36e+04 | 2.6 | 954 |
| 8 | 4228 | ×1.0 | 0.02738s | 5.7 | 21.4 | +32.1 | 3.7 | 10.7 | +21.4 | 16.85s | 0.8424s | 85.7 | 267.5 | +267.5 | 50.54s | 535.7 | 6.42e+04 | 2.7 | 963 |
| 9 | 4669 | ×1.0 | 0.02708s | 5.8 | 21.6 | +32.4 | 3.8 | 10.8 | +21.6 | 16.67s | 0.8333s | 86.8 | 270 | +270 | 50s | 540.8 | 6.48e+04 | 2.8 | 972 |
| 10 | 5131 | ×1.0 | 0.02681s | 5.9 | 21.8 | +32.7 | 3.9 | 10.9 | +21.8 | 16.5s | 0.825s | 87.9 | 272.5 | +272.5 | 49.5s | 545.9 | 6.54e+04 | 2.9 | 981 |
| 11 | 5615 | ×1.0 | 0.02656s | 6 | 23 | +33 | 4 | 12 | +22 | 16.35s | 0.8173s | 89 | 276 | +275 | 49.04s | 551 | 6.6e+04 | 3 | 991 |
| 12 | 6121 | ×1.0 | 0.02633s | 6.1 | 23.2 | +33.3 | 4.1 | 12.1 | +22.2 | 16.2s | 0.81s | 89.1 | 278.5 | +277.5 | 48.6s | 556.1 | 6.66e+04 | 3.1 | 1000 |
| 13 | 6650 | ×1.0 | 0.02611s | 6.2 | 23.4 | +33.6 | 4.2 | 12.2 | +22.4 | 16.06s | 0.8032s | 90.2 | 281 | +280 | 48.19s | 561.2 | 6.72e+04 | 3.2 | 1009 |
| 14 | 7203 | ×1.0 | 0.0259s | 6.3 | 23.6 | +33.9 | 4.3 | 12.3 | +22.6 | 15.94s | 0.7968s | 91.3 | 283.5 | +282.5 | 47.81s | 566.3 | 6.78e+04 | 3.3 | 1018 |
| 15 | 7779 | ×1.0 | 0.0257s | 6.4 | 23.8 | +34.2 | 4.4 | 12.4 | +22.8 | 15.82s | 0.7908s | 92.4 | 286 | +285 | 47.45s | 571.4 | 6.84e+04 | 3.4 | 1027 |
| 16 | 8379 | ×1.0 | 0.02551s | 6.5 | 24 | +34.5 | 4.5 | 12.5 | +23 | 15.7s | 0.785s | 93.5 | 288.5 | +287.5 | 47.1s | 576.5 | 6.9e+04 | 3.5 | 1036 |
| 17 | 9004 | ×1.0 | 0.02533s | 6.6 | 24.2 | +34.8 | 4.6 | 12.6 | +23.2 | 15.59s | 0.7795s | 93.6 | 291 | +290 | 46.77s | 581.6 | 6.96e+04 | 3.6 | 1045 |
| 18 | 9654 | ×1.0 | 0.02516s | 6.7 | 24.4 | +35.1 | 4.7 | 12.7 | +23.4 | 15.49s | 0.7743s | 94.7 | 293.5 | +292.5 | 46.46s | 586.7 | 7.02e+04 | 3.7 | 1054 |
| 19 | 10330 | ×1.0 | 0.025s | 6.8 | 24.6 | +35.4 | 4.8 | 12.8 | +23.6 | 15.38s | 0.7692s | 95.8 | 296 | +295 | 46.15s | 591.8 | 7.08e+04 | 3.8 | 1063 |
| 20 | 11032 | ×1.25 | 0.02484s | 6.9 | 24.8 | +35.7 | 4.9 | 12.9 | +23.8 | 15.29s | 0.7644s | 96.9 | 298.5 | +297.5 | 45.86s | 596.9 | 7.14e+04 | 3.9 | 1072 |
| 21 | 11761 | ×1.25 | 0.02469s | 8 | 26 | +36 | 5 | 14 | +24 | 15.19s | 0.7597s | 98 | 302 | +300 | 45.58s | 602 | 7.2e+04 | 4 | 1082 |
| 22 | 12518 | ×1.25 | 0.02455s | 8.1 | 26.2 | +36.3 | 5.1 | 14.1 | +24.2 | 15.11s | 0.7553s | 98.1 | 304.5 | +302.5 | 45.32s | 607.1 | 7.26e+04 | 4.1 | 1091 |
| 23 | 13302 | ×1.25 | 0.02441s | 8.2 | 26.4 | +36.6 | 5.2 | 14.2 | +24.4 | 15.02s | 0.7509s | 99.2 | 307 | +305 | 45.06s | 612.2 | 7.32e+04 | 4.2 | 1100 |
| 24 | 14114 | ×1.25 | 0.02427s | 8.3 | 26.6 | +36.9 | 5.3 | 14.3 | +24.6 | 14.94s | 0.7468s | 100.3 | 309.5 | +307.5 | 44.81s | 617.3 | 7.38e+04 | 4.3 | 1109 |
| 25 | 14955 | ×1.25 | 0.02414s | 8.4 | 26.8 | +37.2 | 5.4 | 14.4 | +24.8 | 14.85s | 0.7427s | 101.4 | 312 | +310 | 44.56s | 622.4 | 7.44e+04 | 4.4 | 1118 |
| 26 | 15825 | ×1.25 | 0.02401s | 8.5 | 27 | +37.5 | 5.5 | 14.5 | +25 | 14.78s | 0.7388s | 102.5 | 314.5 | +312.5 | 44.33s | 627.5 | 7.5e+04 | 4.5 | 1127 |
| 27 | 16725 | ×1.25 | 0.02389s | 8.6 | 27.2 | +37.8 | 5.6 | 14.6 | +25.2 | 14.7s | 0.735s | 102.6 | 317 | +315 | 44.1s | 632.6 | 7.56e+04 | 4.6 | 1136 |
| 28 | 17655 | ×1.25 | 0.02377s | 8.7 | 27.4 | +38.1 | 5.7 | 14.7 | +25.4 | 14.63s | 0.7313s | 103.7 | 319.5 | +317.5 | 43.88s | 637.7 | 7.62e+04 | 4.7 | 1145 |
| 29 | 18616 | ×1.25 | 0.02365s | 8.8 | 27.6 | +38.4 | 5.8 | 14.8 | +25.6 | 14.55s | 0.7277s | 104.8 | 322 | +320 | 43.66s | 642.8 | 7.68e+04 | 4.8 | 1154 |
| 30 | 19609 | ×1.25 | 0.02354s | 8.9 | 27.8 | +38.7 | 5.9 | 14.9 | +25.8 | 14.48s | 0.7242s | 105.9 | 324.5 | +322.5 | 43.45s | 647.9 | 7.74e+04 | 4.9 | 1163 |
| 31 | 20633 | ×1.25 | 0.02343s | 9 | 29 | +39 | 6 | 16 | +26 | 14.42s | 0.7208s | 107 | 328 | +325 | 43.25s | 653 | 7.8e+04 | 5 | 1173 |
| 32 | 21689 | ×1.25 | 0.02332s | 9.1 | 29.2 | +39.3 | 6.1 | 16.1 | +26.2 | 14.35s | 0.7175s | 107.1 | 330.5 | +327.5 | 43.05s | 658.1 | 7.86e+04 | 5.1 | 1182 |
| 33 | 22778 | ×1.25 | 0.02321s | 9.2 | 29.4 | +39.6 | 6.2 | 16.2 | +26.4 | 14.29s | 0.7143s | 108.2 | 333 | +330 | 42.86s | 663.2 | 7.92e+04 | 5.2 | 1191 |
| 34 | 23900 | ×1.25 | 0.02311s | 9.3 | 29.6 | +39.9 | 6.3 | 16.3 | +26.6 | 14.22s | 0.7111s | 109.3 | 335.5 | +332.5 | 42.67s | 668.3 | 7.98e+04 | 5.3 | 1200 |
| 35 | 25056 | ×1.25 | 0.02301s | 9.4 | 29.8 | +40.2 | 7.4 | 16.4 | +26.8 | 14.16s | 0.7081s | 110.4 | 338 | +335 | 42.48s | 673.4 | 8.04e+04 | 5.4 | 1209 |
| 36 | 26246 | ×1.25 | 0.02291s | 9.5 | 30 | +40.5 | 7.5 | 16.5 | +27 | 14.1s | 0.7051s | 111.5 | 340.5 | +337.5 | 42.3s | 678.5 | 8.1e+04 | 5.5 | 1218 |
| 37 | 27471 | ×1.25 | 0.02282s | 9.6 | 30.2 | +40.8 | 7.6 | 16.6 | +27.2 | 14.04s | 0.7021s | 111.6 | 343 | +340 | 42.13s | 682.6 | 8.16e+04 | 5.6 | 1227 |
| 38 | 28732 | ×1.25 | 0.02273s | 9.7 | 30.4 | +41.1 | 7.7 | 16.7 | +27.4 | 13.98s | 0.6992s | 112.7 | 345.5 | +342.5 | 41.95s | 688.7 | 8.22e+04 | 5.7 | 1236 |
| 39 | 30028 | ×1.25 | 0.02263s | 9.8 | 30.6 | +41.4 | 7.8 | 16.8 | +27.6 | 13.93s | 0.6964s | 113.8 | 348 | +345 | 41.79s | 693.8 | 8.28e+04 | 5.8 | 1245 |
| 40 | 31360 | ×1.5 | 0.02254s | 9.9 | 30.8 | +41.7 | 7.9 | 16.9 | +27.8 | 13.87s | 0.6937s | 114.9 | 350.5 | +347.5 | 41.62s | 698.9 | 8.34e+04 | 5.9 | 1254 |
| 41 | 32729 | ×1.5 | 0.02246s | 11 | 32 | +42 | 8 | 18 | +28 | 13.82s | 0.691s | 116 | 354 | +350 | 41.46s | 704 | 8.4e+04 | 6 | 1264 |
| 42 | 34135 | ×1.5 | 0.02237s | 11.1 | 32.2 | +42.3 | 8.1 | 18.1 | +28.2 | 13.77s | 0.6883s | 116.1 | 356.5 | +352.5 | 41.3s | 709.1 | 8.46e+04 | 6.1 | 1273 |
| 43 | 35579 | ×1.5 | 0.02229s | 11.2 | 32.4 | +42.6 | 8.2 | 18.2 | +28.4 | 13.71s | 0.6857s | 117.2 | 359 | +355 | 41.14s | 714.2 | 8.52e+04 | 6.2 | 1282 |
| 44 | 37061 | ×1.5 | 0.0222s | 11.3 | 32.6 | +42.9 | 8.3 | 18.3 | +28.6 | 13.66s | 0.6832s | 118.3 | 361.5 | +357.5 | 40.99s | 719.3 | 8.58e+04 | 6.3 | 1291 |
| 45 | 38582 | ×1.5 | 0.02212s | 11.4 | 32.8 | +43.2 | 8.4 | 18.4 | +28.8 | 13.61s | 0.6807s | 119.4 | 364 | +360 | 40.84s | 724.4 | 8.64e+04 | 6.4 | 1300 |
| 46 | 40143 | ×1.5 | 0.02204s | 11.5 | 33 | +43.5 | 8.5 | 18.5 | +29 | 13.57s | 0.6783s | 120.5 | 366.5 | +362.5 | 40.7s | 729.5 | 8.7e+04 | 6.5 | 1309 |
| 47 | 41743 | ×1.5 | 0.02197s | 11.6 | 33.2 | +43.8 | 8.6 | 18.6 | +29.2 | 13.52s | 0.6759s | 120.6 | 369 | +365 | 40.55s | 734.6 | 8.76e+04 | 6.6 | 1318 |
| 48 | 43383 | ×1.5 | 0.02189s | 11.7 | 33.4 | +44.1 | 8.7 | 18.7 | +29.4 | 13.47s | 0.6735s | 121.7 | 371.5 | +367.5 | 40.41s | 739.7 | 8.82e+04 | 6.7 | 1327 |
| 49 | 45064 | ×1.5 | 0.02181s | 11.8 | 33.6 | +44.4 | 8.8 | 18.8 | +29.6 | 13.42s | 0.6712s | 122.8 | 374 | +370 | 40.27s | 744.8 | 8.88e+04 | 6.8 | 1336 |
| 50 | 46786 | ×1.5 | 0.02174s | 11.9 | 33.8 | +44.7 | 8.9 | 18.9 | +29.8 | 13.38s | 0.6689s | 123.9 | 376.5 | +372.5 | 40.13s | 749.9 | 8.94e+04 | 6.9 | 1345 |
| 51 | 48550 | ×1.5 | 0.02167s | 12 | 35 | +45 | 9 | 20 | +30 | 13.33s | 0.6667s | 125 | 380 | +375 | 40s | 755 | 9e+04 | 8 | 1355 |
| 52 | 50356 | ×1.5 | 0.0216s | 12.1 | 35.2 | +45.3 | 9.1 | 20.1 | +30.2 | 13.29s | 0.6645s | 125.1 | 382.5 | +377.5 | 39.87s | 760.1 | 9.06e+04 | 8.1 | 1364 |
| 53 | 52205 | ×1.5 | 0.02152s | 12.2 | 35.4 | +45.6 | 9.2 | 20.2 | +30.4 | 13.25s | 0.6623s | 126.2 | 385 | +380 | 39.74s | 765.2 | 9.12e+04 | 8.2 | 1373 |
| 54 | 54098 | ×1.5 | 0.02146s | 12.3 | 35.6 | +45.9 | 9.3 | 20.3 | +30.6 | 13.2s | 0.6602s | 127.3 | 387.5 | +382.5 | 39.61s | 770.3 | 9.18e+04 | 8.3 | 1382 |
| 55 | 56034 | ×1.5 | 0.02139s | 12.4 | 35.8 | +46.2 | 9.4 | 20.4 | +30.8 | 13.16s | 0.6581s | 128.4 | 390 | +385 | 39.48s | 775.4 | 9.24e+04 | 8.4 | 1391 |
| 56 | 58014 | ×1.5 | 0.02132s | 12.5 | 36 | +46.5 | 9.5 | 20.5 | +31 | 13.12s | 0.656s | 129.5 | 392.5 | +387.5 | 39.36s | 780.5 | 9.3e+04 | 8.5 | 1400 |
| 57 | 60039 | ×1.5 | 0.02125s | 12.6 | 36.2 | +46.8 | 9.6 | 20.6 | +31.2 | 13.08s | 0.654s | 129.6 | 395 | +390 | 39.24s | 785.6 | 9.36e+04 | 8.6 | 1409 |
| 58 | 62109 | ×1.5 | 0.02119s | 12.7 | 36.4 | +47.1 | 9.7 | 20.7 | +31.4 | 13.04s | 0.652s | 130.7 | 397.5 | +392.5 | 39.12s | 790.7 | 9.42e+04 | 8.7 | 1418 |
| 59 | 64225 | ×1.5 | 0.02112s | 12.8 | 36.6 | +47.4 | 9.8 | 20.8 | +31.6 | 13s | 0.65s | 131.8 | 400 | +395 | 39s | 795.8 | 9.48e+04 | 8.8 | 1427 |
| 60 | 66387 | ×1.75 | 0.02106s | 12.9 | 36.8 | +47.7 | 9.9 | 20.9 | +31.8 | 12.96s | 0.648s | 132.9 | 402.5 | +397.5 | 38.88s | 799.9 | 9.54e+04 | 8.9 | 1436 |
| 61 | 68596 | ×1.75 | 0.021s | 14 | 38 | +48 | 10 | 22 | +32 | 12.92s | 0.6461s | 134 | 406 | +400 | 38.77s | 806 | 9.601e+04 | 9 | 1446 |
| 62 | 70853 | ×1.75 | 0.02094s | 14.1 | 38.2 | +48.3 | 10.1 | 22.1 | +32.2 | 12.88s | 0.6442s | 134.1 | 408.5 | +402.5 | 38.65s | 810.1 | 9.661e+04 | 9.1 | 1455 |
| 63 | 73157 | ×1.75 | 0.02088s | 14.2 | 38.4 | +48.6 | 10.2 | 22.2 | +32.4 | 12.85s | 0.6424s | 135.2 | 411 | +405 | 38.54s | 816.2 | 9.721e+04 | 9.2 | 1464 |
| 64 | 75509 | ×1.75 | 0.02082s | 14.3 | 38.6 | +48.9 | 10.3 | 22.3 | +32.6 | 12.81s | 0.6405s | 136.3 | 413.5 | +407.5 | 38.43s | 821.3 | 9.781e+04 | 9.3 | 1473 |
| 65 | 77910 | ×1.75 | 0.02076s | 14.4 | 38.8 | +49.2 | 10.4 | 22.4 | +32.8 | 12.77s | 0.6387s | 137.4 | 416 | +410 | 38.32s | 826.4 | 9.841e+04 | 9.4 | 1482 |
| 66 | 80360 | ×1.75 | 0.0207s | 14.5 | 39 | +49.5 | 10.5 | 22.5 | +33 | 12.74s | 0.6369s | 138.5 | 418.5 | +412.5 | 38.21s | 831.5 | 9.901e+04 | 9.5 | 1491 |
| 67 | 82860 | ×1.75 | 0.02064s | 14.6 | 39.2 | +49.8 | 10.6 | 22.6 | +33.2 | 12.7s | 0.6351s | 138.6 | 421 | +415 | 38.11s | 836.6 | 9.961e+04 | 9.6 | 1500 |
| 68 | 85410 | ×1.75 | 0.02059s | 14.7 | 39.4 | +50.1 | 11.7 | 22.7 | +33.4 | 12.67s | 0.6334s | 139.7 | 423.5 | +417.5 | 38s | 841.7 | 1.002e+05 | 9.7 | 1509 |
| 69 | 88011 | ×1.75 | 0.02053s | 14.8 | 39.6 | +50.4 | 11.8 | 22.8 | +33.6 | 12.63s | 0.6317s | 140.8 | 426 | +420 | 37.9s | 846.8 | 1.008e+05 | 9.8 | 1518 |
| 70 | 90664 | ×1.75 | 0.02047s | 14.9 | 39.8 | +50.7 | 11.9 | 22.9 | +33.8 | 12.6s | 0.63s | 141.9 | 428.5 | +422.5 | 37.8s | 851.9 | 1.014e+05 | 9.9 | 1527 |
| 71 | 93368 | ×1.75 | 0.02042s | 15 | 41 | +51 | 12 | 24 | +34 | 12.57s | 0.6283s | 143 | 432 | +425 | 37.7s | 857 | 1.02e+05 | 10 | 1537 |
| 72 | 96124 | ×1.75 | 0.02037s | 15.1 | 41.2 | +51.3 | 12.1 | 24.1 | +34.2 | 12.53s | 0.6266s | 143.1 | 434.5 | +427.5 | 37.6s | 862.1 | 1.026e+05 | 10.1 | 1546 |
| 73 | 98933 | ×1.75 | 0.02031s | 15.2 | 41.4 | +51.6 | 12.2 | 24.2 | +34.4 | 12.5s | 0.625s | 144.2 | 437 | +430 | 37.5s | 867.2 | 1.032e+05 | 10.2 | 1555 |
| 74 | 101795 | ×1.75 | 0.02026s | 15.3 | 41.6 | +51.9 | 12.3 | 24.3 | +34.6 | 12.47s | 0.6234s | 145.3 | 439.5 | +432.5 | 37.4s | 872.3 | 1.038e+05 | 10.3 | 1564 |
| 75 | 104711 | ×1.75 | 0.02021s | 15.4 | 41.8 | +52.2 | 12.4 | 24.4 | +34.8 | 12.44s | 0.6218s | 146.4 | 442 | +435 | 37.31s | 877.4 | 1.044e+05 | 10.4 | 1573 |
| 76 | 107681 | ×1.75 | 0.02016s | 15.5 | 42 | +52.5 | 12.5 | 24.5 | +35 | 12.4s | 0.6202s | 147.5 | 444.5 | +437.5 | 37.21s | 882.5 | 1.05e+05 | 10.5 | 1582 |
| 77 | 110706 | ×1.75 | 0.02011s | 15.6 | 42.2 | +52.8 | 12.6 | 24.6 | +35.2 | 12.37s | 0.6186s | 147.6 | 447 | +440 | 37.12s | 887.6 | 1.056e+05 | 10.6 | 1591 |
| 78 | 113787 | ×1.75 | 0.02006s | 15.7 | 42.4 | +53.1 | 12.7 | 24.7 | +35.4 | 12.34s | 0.6171s | 148.7 | 449.5 | +442.5 | 37.03s | 892.7 | 1.062e+05 | 10.7 | 1600 |
| 79 | 116923 | ×1.75 | 0.02001s | 15.8 | 42.6 | +53.4 | 12.8 | 24.8 | +35.6 | 12.31s | 0.6156s | 149.8 | 452 | +445 | 36.93s | 897.8 | 1.068e+05 | 10.8 | 1609 |
| 80 | 120115 | ×2.0 | 0.01996s | 15.9 | 42.8 | +53.7 | 12.9 | 24.9 | +35.8 | 12.28s | 0.6141s | 150.9 | 454.5 | +447.5 | 36.84s | 902.9 | 1.074e+05 | 10.9 | 1618 |
| 81 | 123364 | ×2.0 | 0.01991s | 17 | 44 | +54 | 13 | 26 | +36 | 12.25s | 0.6126s | 152 | 458 | +450 | 36.75s | 908 | 1.08e+05 | 11 | 1628 |
| 82 | 126670 | ×2.0 | 0.01986s | 17.1 | 44.2 | +54.3 | 13.1 | 26.1 | +36.2 | 12.22s | 0.6111s | 152.1 | 460.5 | +452.5 | 36.67s | 913.1 | 1.086e+05 | 11.1 | 1637 |
| 83 | 130034 | ×2.0 | 0.01981s | 17.2 | 44.4 | +54.6 | 13.2 | 26.2 | +36.4 | 12.19s | 0.6096s | 153.2 | 463 | +455 | 36.58s | 918.2 | 1.092e+05 | 11.2 | 1646 |
| 84 | 133456 | ×2.0 | 0.01977s | 17.3 | 44.6 | +54.9 | 13.3 | 26.3 | +36.6 | 12.16s | 0.6082s | 154.3 | 465.5 | +457.5 | 36.49s | 923.3 | 1.098e+05 | 11.3 | 1655 |
| 85 | 136937 | ×2.0 | 0.01972s | 17.4 | 44.8 | +55.2 | 13.4 | 26.4 | +36.8 | 12.14s | 0.6068s | 155.4 | 468 | +460 | 36.41s | 927.4 | 1.104e+05 | 11.4 | 1664 |
| 86 | 140478 | ×2.0 | 0.01967s | 17.5 | 45 | +55.5 | 13.5 | 26.5 | +37 | 12.11s | 0.6054s | 156.5 | 470.5 | +462.5 | 36.32s | 933.5 | 1.11e+05 | 11.5 | 1673 |
| 87 | 144078 | ×2.0 | 0.01963s | 17.6 | 45.2 | +55.8 | 13.6 | 26.6 | +37.2 | 12.08s | 0.604s | 156.6 | 473 | +465 | 36.24s | 937.6 | 1.116e+05 | 11.6 | 1682 |
| 88 | 147738 | ×2.0 | 0.01958s | 17.7 | 45.4 | +56.1 | 13.7 | 26.7 | +37.4 | 12.05s | 0.6026s | 157.7 | 475.5 | +467.5 | 36.15s | 943.7 | 1.122e+05 | 11.7 | 1691 |
| 89 | 151459 | ×2.0 | 0.01954s | 17.8 | 45.6 | +56.4 | 13.8 | 26.8 | +37.6 | 12.02s | 0.6012s | 158.8 | 478 | +470 | 36.07s | 948.8 | 1.128e+05 | 11.8 | 1700 |
| 90 | 155241 | ×2.0 | 0.0195s | 17.9 | 45.8 | +56.7 | 13.9 | 26.9 | +37.8 | 12s | 0.5999s | 159.9 | 480.5 | +472.5 | 35.99s | 953.9 | 1.134e+05 | 11.9 | 1709 |
| 91 | 159085 | ×2.0 | 0.01945s | 18 | 47 | +57 | 14 | 28 | +38 | 11.97s | 0.5985s | 161 | 484 | +475 | 35.91s | 959 | 1.14e+05 | 12 | 1719 |
| 92 | 162991 | ×2.0 | 0.01941s | 18.1 | 47.2 | +57.3 | 14.1 | 28.1 | +38.2 | 11.94s | 0.5972s | 161.1 | 486.5 | +477.5 | 35.83s | 964.1 | 1.146e+05 | 12.1 | 1728 |
| 93 | 166960 | ×2.0 | 0.01937s | 18.2 | 47.4 | +57.6 | 14.2 | 28.2 | +38.4 | 11.92s | 0.5959s | 162.2 | 489 | +480 | 35.75s | 969.2 | 1.152e+05 | 12.2 | 1737 |
| 94 | 170993 | ×2.0 | 0.01932s | 18.3 | 47.6 | +57.9 | 14.3 | 28.3 | +38.6 | 11.89s | 0.5946s | 163.3 | 491.5 | +482.5 | 35.67s | 974.3 | 1.158e+05 | 12.3 | 1746 |
| 95 | 175089 | ×2.0 | 0.01928s | 18.4 | 47.8 | +58.2 | 14.4 | 28.4 | +38.8 | 11.87s | 0.5933s | 164.4 | 494 | +485 | 35.6s | 979.4 | 1.164e+05 | 12.4 | 1755 |
| 96 | 179249 | ×2.0 | 0.01924s | 18.5 | 48 | +58.5 | 14.5 | 28.5 | +39 | 11.84s | 0.592s | 165.5 | 496.5 | +487.5 | 35.52s | 984.5 | 1.17e+05 | 12.5 | 1764 |
| 97 | 183474 | ×2.0 | 0.0192s | 18.6 | 48.2 | +58.8 | 14.6 | 28.6 | +39.2 | 11.81s | 0.5907s | 165.6 | 499 | +490 | 35.44s | 989.6 | 1.176e+05 | 12.6 | 1773 |
| 98 | 187764 | ×2.0 | 0.01916s | 18.7 | 48.4 | +59.1 | 14.7 | 28.7 | +39.4 | 11.79s | 0.5895s | 166.7 | 501.5 | +492.5 | 35.37s | 994.7 | 1.182e+05 | 12.7 | 1782 |
| 99 | 192120 | ×2.0 | 0.01912s | 18.8 | 48.6 | +59.4 | 14.8 | 28.8 | +39.6 | 11.76s | 0.5882s | 167.8 | 504 | +495 | 35.29s | 999.8 | 1.188e+05 | 12.8 | 1791 |
| 100 | 200000 | ×2.25 | 0.01908s | 20 | 50 | +70 | 16 | 30 | +50 | 11.74s | 0.587s | 170 | 510 | +510 | 35.22s | 1010 | 1.2e+05 | 14 | 1810 |
Costs and sell values
Cost of all required upgrades
| Easy | Medium | Hard | Impoppable | |
|---|---|---|---|---|
| Total cost | $248,850 | $292,755 | $316,175 | $351,305 |
| Sell value | $174,195 | $204,929 | $221,323 | $245,914 |
Cost of the upgraded tower
| Tiers | Total cost | Sell value | ||||||
|---|---|---|---|---|---|---|---|---|
| Easy | Medium | Hard | Impoppable | Easy | Medium | Hard | Impoppable | |
| 5-0-0 | $212,695 | $250,230 | $270,250 | $300,275 | $148,887 | $175,161 | $189,175 | $210,193 |
| 5-1-0 | $212,780 | $250,330 | $270,360 | $300,395 | $148,946 | $175,231 | $189,252 | $210,277 |
| 5-2-0 | $212,970 | $250,555 | $270,605 | $300,665 | $149,079 | $175,389 | $189,424 | $210,466 |
| 5-0-1 | $212,825 | $250,380 | $270,410 | $300,455 | $148,978 | $175,266 | $189,287 | $210,319 |
| 5-0-2 | $212,955 | $250,530 | $270,570 | $300,635 | $149,069 | $175,371 | $189,399 | $210,445 |
| 0-5-0 | $186,010 | $218,835 | $236,345 | $262,600 | $130,207 | $153,185 | $165,442 | $183,820 |
| 1-5-0 | $186,140 | $218,985 | $236,505 | $262,780 | $130,298 | $153,290 | $165,554 | $183,946 |
| 2-5-0 | $186,325 | $219,205 | $236,745 | $263,045 | $130,428 | $153,444 | $165,722 | $184,132 |
| 0-5-1 | $186,140 | $218,985 | $236,505 | $262,780 | $130,298 | $153,290 | $165,554 | $183,946 |
| 0-5-2 | $186,270 | $219,135 | $236,665 | $262,960 | $130,389 | $153,395 | $165,666 | $184,072 |
| 0-0-5 | $190,585 | $224,210 | $242,140 | $269,050 | $133,410 | $156,947 | $169,498 | $188,335 |
| 1-0-5 | $190,715 | $224,360 | $242,300 | $269,230 | $133,501 | $157,052 | $169,610 | $188,461 |
| 2-0-5 | $190,900 | $224,580 | $242,540 | $269,495 | $133,630 | $157,206 | $169,778 | $188,647 |
| 0-1-5 | $190,670 | $224,310 | $242,250 | $269,170 | $133,469 | $157,017 | $169,575 | $188,419 |
| 0-2-5 | $190,860 | $224,535 | $242,495 | $269,440 | $133,602 | $157,175 | $169,747 | $188,608 |
Cost of cash investment
| Source | Cost per power | Maximum | ||||||
|---|---|---|---|---|---|---|---|---|
| Easy | Medium | Hard | Impoppable | Easy | Medium | Hard | Impoppable | |
| Tower sacrifices | $8.5 | $10 | $10.8 | $12 | $510,000 | $600,000 | $648,000 | $720,000 |
| Cash slider | $8.925 | $10.5 | $11.34 | $12.6 | $535,501 | $630,001 | $680,401 | $756,001 |
| Degree | Power | Tower sacrifices | Cash slider | ||||||
|---|---|---|---|---|---|---|---|---|---|
| Easy | Medium | Hard | Impoppable | Easy | Medium | Hard | Impoppable | ||
| 2 | 2,000 | $17,000 | $20,000 | $21,600 | $24,000 | $17,850 | $21,000 | $22,680 | $25,200 |
| 3 | 2,324 | $19,754 | $23,240 | $25,099.2 | $27,888 | $20,741.7 | $24,402 | $26,354.16 | $29,282.4 |
| 4 | 2,666 | $22,661 | $26,660 | $28,792.8 | $31,992 | $23,794.05 | $27,993 | $30,232.44 | $33,591.6 |
| 5 | 3,027 | $25,729.5 | $30,270 | $32,691.6 | $36,324 | $27,015.975 | $31,783.5 | $34,326.18 | $38,140.2 |
| 6 | 3,408 | $28,968 | $34,080 | $36,806.4 | $40,896 | $30,416.4 | $35,784 | $38,646.72 | $42,940.8 |
| 7 | 3,808 | $32,368 | $38,080 | $41,126.4 | $45,696 | $33,986.4 | $39,984 | $43,182.72 | $47,980.8 |
| 8 | 4,228 | $35,938 | $42,280 | $45,662.4 | $50,736 | $37,734.9 | $44,394 | $47,945.52 | $53,272.8 |
| 9 | 4,669 | $39,686.5 | $46,690 | $50,425.2 | $56,028 | $41,670.825 | $49,024.5 | $52,946.46 | $58,829.4 |
| 10 | 5,131 | $43,613.5 | $51,310 | $55,414.8 | $61,572 | $45,794.175 | $53,875.5 | $58,185.54 | $64,650.6 |
| 11 | 5,615 | $47,727.5 | $56,150 | $60,642 | $67,380 | $50,113.875 | $58,957.5 | $63,674.1 | $70,749 |
| 12 | 6,121 | $52,028.5 | $61,210 | $66,106.8 | $73,452 | $54,629.925 | $64,270.5 | $69,412.14 | $77,124.6 |
| 13 | 6,650 | $56,525 | $66,500 | $71,820 | $79,800 | $59,351.25 | $69,825 | $75,411 | $83,790 |
| 14 | 7,203 | $61,225.5 | $72,030 | $77,792.4 | $86,436 | $64,286.775 | $75,631.5 | $81,682.02 | $90,757.8 |
| 15 | 7,779 | $66,121.5 | $77,790 | $84,013.2 | $93,348 | $69,427.575 | $81,679.5 | $88,213.86 | $98,015.4 |
| 16 | 8,379 | $71,221.5 | $83,790 | $90,493.2 | $100,548 | $74,782.575 | $87,979.5 | $95,017.86 | $105,575.4 |
| 17 | 9,004 | $76,534 | $90,040 | $97,243.2 | $108,048 | $80,360.7 | $94,542 | $102,105.36 | $113,450.4 |
| 18 | 9,654 | $82,059 | $96,540 | $104,263.2 | $115,848 | $86,161.95 | $101,367 | $109,476.36 | $121,640.4 |
| 19 | 10,330 | $87,805 | $103,300 | $111,564 | $123,960 | $92,195.25 | $108,465 | $117,142.2 | $130,158 |
| 20 | 11,032 | $93,772 | $110,320 | $119,145.6 | $132,384 | $98,460.6 | $115,836 | $125,102.88 | $139,003.2 |
| 21 | 11,761 | $99,968.5 | $117,610 | $127,018.8 | $141,132 | $104,966.925 | $123,490.5 | $133,369.74 | $148,188.6 |
| 22 | 12,518 | $106,403 | $125,180 | $135,194.4 | $150,216 | $111,723.15 | $131,439 | $141,954.12 | $157,726.8 |
| 23 | 13,302 | $113,067 | $133,020 | $143,661.6 | $159,624 | $118,720.35 | $139,671 | $150,844.68 | $167,605.2 |
| 24 | 14,114 | $119,969 | $141,140 | $152,431.2 | $169,368 | $125,967.45 | $148,197 | $160,052.76 | $177,836.4 |
| 25 | 14,955 | $127,117.5 | $149,550 | $161,514 | $179,460 | $133,473.375 | $157,027.5 | $169,589.7 | $188,433 |
| 26 | 15,825 | $134,512.5 | $158,250 | $170,910 | $189,900 | $141,238.125 | $166,162.5 | $179,455.5 | $199,395 |
| 27 | 16,725 | $142,162.5 | $167,250 | $180,630 | $200,700 | $149,270.625 | $175,612.5 | $189,661.5 | $210,735 |
| 28 | 17,655 | $150,067.5 | $176,550 | $190,674 | $211,860 | $157,570.875 | $185,377.5 | $200,207.7 | $222,453 |
| 29 | 18,616 | $158,236 | $186,160 | $201,052.8 | $223,392 | $166,147.8 | $195,468 | $211,105.44 | $234,561.6 |
| 30 | 19,609 | $166,676.5 | $196,090 | $211,777.2 | $235,308 | $175,010.325 | $205,894.5 | $222,366.06 | $247,073.4 |
| 31 | 20,633 | $175,380.5 | $206,330 | $222,836.4 | $247,596 | $184,149.525 | $216,646.5 | $233,978.22 | $259,975.8 |
| 32 | 21,689 | $184,356.5 | $216,890 | $234,241.2 | $260,268 | $193,574.325 | $227,734.5 | $245,953.26 | $273,281.4 |
| 33 | 22,778 | $193,613 | $227,780 | $246,002.4 | $273,336 | $203,293.65 | $239,169 | $258,302.52 | $287,002.8 |
| 34 | 23,900 | $203,150 | $239,000 | $258,120 | $286,800 | $213,307.5 | $250,950 | $271,026 | $301,140 |
| 35 | 25,056 | $212,976 | $250,560 | $270,604.8 | $300,672 | $223,624.8 | $263,088 | $284,135.04 | $315,705.6 |
| 36 | 26,246 | $223,091 | $262,460 | $283,456.8 | $314,952 | $234,245.55 | $275,583 | $297,629.64 | $330,699.6 |
| 37 | 27,471 | $233,503.5 | $274,710 | $296,686.8 | $329,652 | $245,178.675 | $288,445.5 | $311,521.14 | $346,134.6 |
| 38 | 28,732 | $244,222 | $287,320 | $310,305.6 | $344,784 | $256,433.1 | $301,686 | $325,820.88 | $362,023.2 |
| 39 | 30,028 | $255,238 | $300,280 | $324,302.4 | $360,336 | $267,999.9 | $315,294 | $340,517.52 | $378,352.8 |
| 40 | 31,360 | $266,560 | $313,600 | $338,688 | $376,320 | $279,888 | $329,280 | $355,622.4 | $395,136 |
| 41 | 32,729 | $278,196.5 | $327,290 | $353,473.2 | $392,748 | $292,106.325 | $343,654.5 | $371,146.86 | $412,385.4 |
| 42 | 34,135 | $290,147.5 | $341,350 | $368,658 | $409,620 | $304,654.875 | $358,417.5 | $387,090.9 | $430,101 |
| 43 | 35,579 | $302,421.5 | $355,790 | $384,253.2 | $426,948 | $317,542.575 | $373,579.5 | $403,465.86 | $448,295.4 |
| 44 | 37,061 | $315,018.5 | $370,610 | $400,258.8 | $444,732 | $330,769.425 | $389,140.5 | $420,271.74 | $466,968.6 |
| 45 | 38,582 | $327,947 | $385,820 | $416,685.6 | $462,984 | $344,344.35 | $405,111 | $437,519.88 | $486,133.2 |
| 46 | 40,143 | $341,215.5 | $401,430 | $433,544.4 | $481,716 | $358,276.275 | $421,501.5 | $455,221.62 | $505,801.8 |
| 47 | 41,743 | $354,815.5 | $417,430 | $450,824.4 | $500,916 | $372,556.275 | $438,301.5 | $473,365.62 | $525,961.8 |
| 48 | 43,383 | $368,755.5 | $433,830 | $468,536.4 | $520,596 | $387,193.275 | $455,521.5 | $491,963.22 | $546,625.8 |
| 49 | 45,064 | $383,044 | $450,640 | $486,691.2 | $540,768 | $402,196.2 | $473,172 | $511,025.76 | $567,806.4 |
| 50 | 46,786 | $397,681 | $467,860 | $505,288.8 | $561,432 | $417,565.05 | $491,253 | $530,553.24 | $589,503.6 |
| 51 | 48,550 | $412,675 | $485,500 | $524,340 | $582,600 | $433,308.75 | $509,775 | $550,557 | $611,730 |
| 52 | 50,356 | $428,026 | $503,560 | $543,844.8 | $604,272 | $449,427.3 | $528,738 | $571,037.04 | $634,485.6 |
| 53 | 52,205 | $443,742.5 | $522,050 | $563,814 | $626,460 | $465,929.625 | $548,152.5 | $592,004.7 | $657,783 |
| 54 | 54,098 | $459,833 | $540,980 | $584,258.4 | $649,176 | $482,824.65 | $568,029 | $613,471.32 | $681,634.8 |
| 55 | 56,034 | $476,289 | $560,340 | $605,167.2 | $672,408 | $500,103.45 | $588,357 | $635,425.56 | $706,028.4 |
| 56 | 58,014 | $493,119 | $580,140 | $626,551.2 | $696,168 | $517,774.95 | $609,147 | $657,878.76 | $730,976.4 |
Strategy

|
This strategy section is empty or incomplete. See the strategy guidelines for more information on how to write strategy sections. The editor who added this notice elaborates: Add more strategizations of Crucible, do a few cleanups, and also state degree processes and how to do paragonning stuff like makeshift paragon and optimizing degrees. (Also, ascended camobuff isn't full uptime on paragons? people are rumoring ascended shadow full uptime on paragons) And verify use cases of when to properly time abilities (maelstrom ability debatable of in center better, might be worse?) |
The Crucible of Steel and Flame is notable for being the second cheapest Paragon in the game, second to Apex Plasma Master. The majority of the Crucible's power stems from its abilities, most notably Meteor Impact for its powerful burst damage and AoE making it a very cost efficient Paragon.
Degrees have a great impact on the Crucible's potential DPS, giving Maelstrom greater uptime and further enhancing its main attack by shooting out more blades and tacks, Maelstrom's Ring of Fire by increasing its overall DPS, as well as Meteor Impact by having a shorter cooldown and dealing much greater damage overall, and the increased flat pierce improves the homing meteor's total DPS.
Crucible of Steel of Flame's best matchup is Blastapopoulos; despite the increased ability cooldowns, Meteor Impact's massive burst damage is still very strong for its price. Its worst matchup is Phayze as it lacks any way to naturally affect Camo Bloons, and even with Camo detection from Ascended Shadow it loses almost all of its DPS whenever Phayze hits a skull. Additionally, the Maelstrom ability is almost useless versus Lych because it steals the self-buff.
Alongside positioning, timing abilities are important. Time Maelstrom when the Boss is within the Crucible's range to make the most of its Ring of Fire's damage. Use Meteor Impact for certain Bosses when they are no longer immune to damage after reaching a skull (e.g. Vortex when its shield is down, Dreadbloon when no longer in Primary immunity, and Blastapopoulos a few seconds after creating Pyroclastic Rocks).
For maximum pops, place all of the T5 Tacks near the front of the track. For cheapest T2 and T3 crosspaths for the most tiers, use 0-2-2 and 0-2-3, the cheapest T4 for the most tiers is 0-4-2 Blade Maelstrom, and for most expensive use 4-2-0 Ring of Fires. However, 2-0-4 Overdrive is preferred if transitioning into the Paragon, since this T4 has the best DPS against MOAB-class Bloons.
Pre-release
The Crucible of Steel and Flame was first announced in the update notes for version 44.0 as a feature to be introduced in version 46.0. It revealed that the monkey inside the Tack Shooter would be involved in its design.[2] Its release in version 46.0 was reaffirmed in the update notes for version 45.0.[3]
— Version 44.0 update notes
Version 46.0 preview

The Crucible of Steel and Flame was showcased for the first time in previews for version 46.0.[4]
Update history

|
This article or section uses Cargo to generate its content. It will automatically fill up as other articles are completed. To add to this section, create the articles it is looking up. Do not add content to this section manually and do not remove this notice until you are sure this section is complete. |
 Resolved an issue where Tack Paragon’s Maelstrom ability stopped increasing lifespan (bug fix)
 No longer grants full map range to Advanced Intel Subs (bug fix)
— Update notes
- Meteor Impact ability: Cooldown reduced ― 90s → 60s
- Maelstrom ability: Pierce increased ― 60 → 80
— Update notes
- Main attack — sub-projectile: Count increased ― 6 → 8
- Main attack — main projectile ― Lifespan reduced → 0.3s (0.25s)
- Main attack — sub-projectile: Lifespan reduced ― 0.2s → 0.15s
- Maelstrom ability: Projectile lifespan bonus increased ― ×2 → ×2.5
- Note: With Maelstrom, blade lifespan increased from 84 to 87.5, tack lifespan decreased from 48 to 45.
- Maelstrom ability: Initial cooldown is fully reset ― 6.67s → 20s (undocumented)
- Meteor Impact ability: Initial cooldown is fully reset ― 20s → 60s (undocumented)
— Update notes
- Meteor Impact explosion: Damage increased ― 50,000 → 60,000
- Meteor Impact fireball: Damage increased ― 700 → 900
Gallery
|
|
This article or section needs more images. The editor who added this notice elaborates: Just the attack animation (watching the upgrade and attack animation stops people from seeing a full loop of the attack animation) |
-
 Placeholder portrait in the update preview video
 -
 Tack Paragon at Degree 1
 -
 Tack Paragon at Degree 20
 -
 Tack Paragon at Degree 40
 -
 Tack Paragon at Degree 60
 -
 Tack Paragon at Degree 80
 -
 Tack Paragon upgrade and attack animation
 -
Tack Paragon Maelstrom ability
-
Tack Paragon Meteor ability


Assets
-
 Portrait
 -
 Upgrade icon
 -
 Maelstrom icon
 -
 Meteor Impact icon
Trivia
- The internal file name for the Crucible of Steel and Flame's portrait is
Paragon-CycloneOfFireAndMetal.
Notes
- ↑ 2,000 units of seeking distance
References
- ↑ "rohan_spibo comments on Bloons TD 6 v46.0 - Update Preview!". Reddit. Retrieved Sat, 5 Oct 2024.
- ↑ "Update: Bloons TD 6 v44.0 - Update Notes!". Reddit. Retrieved Sat, 5 Oct 2024.
- ↑ "Bloons TD 6 v45.0 - Update Notes!". Reddit. Retrieved Sat, 5 Oct 2024.
- ↑ "Bloons TD 6 v46.0 - Update Preview!". Reddit. Retrieved Sat, 5 Oct 2024.
Navigation
| Tack Shooter in Bloons TD 6 | ||||||||
|---|---|---|---|---|---|---|---|---|
| ||||||||
| Stats • Strategies • Update history |