|
|
| Line 27: |
Line 27: |
| ==Strategy== | | ==Strategy== |
| {{BTD6 last updated|51.0|section=y}} | | {{BTD6 last updated|51.0|section=y}} |
| Bloonjitsu thrives on its fast and effective projectile seeking and how well it responds to buffs. Bloonjitsu should never be used without buffs, as it is exceedingly weak for its cost<!-- Total unbuffed damage output equals 22 Dart Monkeys, which is significantly cheaper. -->. The tower should be used with a [[Berserker Brew (BTD6)|Berserker Brew]] at minimum, preferably with [[Shinobi Tactics (BTD6)|Shinobi Tactics]] as well. With large numbers of Shinobi, the extra speed and pierce coupled with [[Distraction (BTD6)|Distraction]] hits from Shinobi let it effectively handle even dense midgame rounds like 63. In this context, Bloonjitsu serves as a stepping stone to [[Grandmaster Ninja (BTD6)|Grandmaster Ninja]] or [[Master Bomber (BTD6)|Master Bomber]] or a late game defense setup with several Bloonjitsus surrounded by Shinobi coupled with damage-increasing buffs and debuffs. If not building into a Ninja-centric late game defense, Shinobi are more expensive than other mid game options, and Bloonjitsu without Shinobi is very weak. As Shinobi upgrades can all be discounted, these setups should be used with two discount [[Monkey Village (BTD6)|Monkey Villages]], one x-0-2 and one 0-x-2. This saves extra cash in the long run, particularly if going for [[Monkey Intelligence Bureau (BTD6)|MIB]] for [[DDT (BTD6)|DDTs]]. | | Bloonjitsu thrives on its strong reception to buffs, having the capability to shoot many seeking projectiles quickly. Without buffs, it's not at all worth it, being exceedingly weak for its cost.<!-- Total unbuffed damage output equals 22 Dart Monkeys, which is significantly cheaper--> At minimum, the tower should be used with a [[Berserker Brew (BTD6)|Berserker Brew]], preferably with [[Shinobi Tactics (BTD6)|Shinobi Tactics]] as well. With large numbers of Shinobi, the extra speed and pierce coupled with [[Distraction (BTD6)|Distraction]] hits from Shinobi let it effectively handle even dense midgame rounds like 63. In this context, Bloonjitsu serves as a stepping stone to [[Grandmaster Ninja (BTD6)|Grandmaster Ninja]] or [[Master Bomber (BTD6)|Master Bomber]] or a late game defense setup with several Bloonjitsus surrounded by Shinobi coupled with damage-increasing buffs and debuffs. If not building into a Ninja-centric late game defense, Shinobi are more expensive than other mid game options, and Bloonjitsu without Shinobi is very weak. As Shinobi upgrades can all be discounted, these setups should be used with two discount [[Monkey Village (BTD6)|Monkey Villages]], one x-0-2 and one 0-x-2. This saves extra cash in the long run, particularly if going for [[Monkey Intelligence Bureau (BTD6)|MIB]] for [[DDT (BTD6)|DDTs]]. |
|
| |
|
| In late [[Freeplay]], Bloonjitsu becomes the most cost-efficient damage option in the game with Shinobi Tactics buffs and damage buffs. With max Shinobi Tactics stacks, [[Permanent Brew (BTD6)|Permanent Brew]], [[Sun Temple (BTD6)|Sun Temple]] and [[True Sun God (BTD6)|True Sun God]] Support buffs, coupled with all blimp debuffs, a Bloonjitsu can put out 100x<!-- 100.7x to be exact --> the single target damage of the base tower. [[Sun Avatar (BTD6)|Sun Avatars]] can still be more space-efficient, but otherwise Bloonjitsu is the best tower to spam in late Freeplay. | | In late [[Freeplay]], Bloonjitsu becomes the most cost-efficient damage option in the game with Shinobi Tactics buffs and damage buffs. With max Shinobi Tactics stacks, [[Permanent Brew (BTD6)|Permanent Brew]], [[Sun Temple (BTD6)|Sun Temple]] and [[True Sun God (BTD6)|True Sun God]] Support buffs, coupled with all blimp debuffs, a Bloonjitsu can put out a little over 100x<!-- 100.7x to be exact --> the single target damage of the base tower. [[Sun Avatar (BTD6)|Sun Avatars]] can still be more space-efficient, but otherwise Bloonjitsu is the best tower to spam in late Freeplay. |
|
| |
|
| Bloonjitsu's favored crosspath is 4-0-2. [[Seeking Shuriken (BTD6)|Seeking Shuriken]] allows shurikens to maximize pierce on multiple targets, while [[Caltrops (BTD6)|Caltrops]] piles up more damage without detrimenting uptime with Alchemist buffs. Note that 4-0-1 is sometimes used in deep Freeplay due to Caltrops contributing to lag. The middle crosspath's benefits are better covered by Shinobi. | | Bloonjitsu's favored crosspath is 4-0-2. [[Seeking Shuriken (BTD6)|Seeking Shuriken]] allows shurikens to maximize pierce on multiple targets, while [[Caltrops (BTD6)|Caltrops]] piles up more damage without detrimenting uptime with Alchemist buffs. Note that 4-0-1 is sometimes used in deep Freeplay due to Caltrops contributing to lag. The middle crosspath's benefits are better covered by Shinobi. |
Bloonjitsu

|
 Throws 5 shurikens at once! Throws 5 shurikens at once!
|
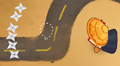
Bloonjitsu is the Ninja Monkey's path 1 tier 4 upgrade in Bloons TD 6. It allows the Ninja Monkey to throw five shurikens at a time (six with  Deadly Tranquility) instead of two. Like Double Shot, the center of each shot's spread is randomly offset by 5° clockwise or anticlockwise, but the projectiles are always spread over a 45° angle (even with Deadly Tranquility).
Stats
4-1-0
| Attack |
|---|
|
| Projectile |
|---|
| | Blowback |
|---|
| Chance | 15% |
|---|
| Min distance | 100 units |
|---|
| Max distance | 150 units |
|---|
|
|
|
4-2-0
4-0-1
| Attack |
|---|
|
| Projectile |
|---|
| Seeking distance | ∞ units |
|---|
| Seeking angle | 144° |
|---|
| Seeking rotation speed | ∞ °/s |
|---|
| Seeking time | 3.48s |
|---|
| |
|
4-0-2
Costs and sell values
| Tiers
|
Total cost
|
Sell value
|
| Easy
|
Medium
|
Hard
|
Impoppable
|
Easy
|
Medium
|
Hard
|
Impoppable
|
| 4-0-0
|
$4,045 |
$4,750 |
$5,130 |
$5,700 |
$2,832 |
$3,325 |
$3,591 |
$3,990
|
| 4-1-0
|
$4,255 |
$5,000 |
$5,400 |
$6,000 |
$2,979 |
$3,500 |
$3,780 |
$4,200
|
| 4-2-0
|
$4,595 |
$5,400 |
$5,830 |
$6,480 |
$3,217 |
$3,780 |
$4,081 |
$4,536
|
| 4-0-1
|
$4,300 |
$5,050 |
$5,455 |
$6,060 |
$3,010 |
$3,535 |
$3,819 |
$4,242
|
| 4-0-2
|
$4,685 |
$5,500 |
$5,940 |
$6,600 |
$3,280 |
$3,850 |
$4,158 |
$4,620
|
Strategy
Bloonjitsu thrives on its strong reception to buffs, having the capability to shoot many seeking projectiles quickly. Without buffs, it's not at all worth it, being exceedingly weak for its cost. At minimum, the tower should be used with a Berserker Brew, preferably with Shinobi Tactics as well. With large numbers of Shinobi, the extra speed and pierce coupled with Distraction hits from Shinobi let it effectively handle even dense midgame rounds like 63. In this context, Bloonjitsu serves as a stepping stone to Grandmaster Ninja or Master Bomber or a late game defense setup with several Bloonjitsus surrounded by Shinobi coupled with damage-increasing buffs and debuffs. If not building into a Ninja-centric late game defense, Shinobi are more expensive than other mid game options, and Bloonjitsu without Shinobi is very weak. As Shinobi upgrades can all be discounted, these setups should be used with two discount Monkey Villages, one x-0-2 and one 0-x-2. This saves extra cash in the long run, particularly if going for MIB for DDTs.
In late Freeplay, Bloonjitsu becomes the most cost-efficient damage option in the game with Shinobi Tactics buffs and damage buffs. With max Shinobi Tactics stacks, Permanent Brew, Sun Temple and True Sun God Support buffs, coupled with all blimp debuffs, a Bloonjitsu can put out a little over 100x the single target damage of the base tower. Sun Avatars can still be more space-efficient, but otherwise Bloonjitsu is the best tower to spam in late Freeplay.
Bloonjitsu's favored crosspath is 4-0-2. Seeking Shuriken allows shurikens to maximize pierce on multiple targets, while Caltrops piles up more damage without detrimenting uptime with Alchemist buffs. Note that 4-0-1 is sometimes used in deep Freeplay due to Caltrops contributing to lag. The middle crosspath's benefits are better covered by Shinobi.
Update history

|
This article or section uses Cargo to generate its content. It will automatically fill up as other articles are completed.
To add to this section, create the articles it is looking up. Do not add content to this section manually and do not remove this notice until you are sure this section is complete.
|
 "[S]hould no longer be able to occasionally shoot with an infinite range in specific setups" (bug fix)
“
As ninja is the ‘Camo Specialist’ and has been since inception, it is the only tower that will unlock Camo Prioritization on the base tower.
— Update notes
”
 Camo Prioritization filter added
“
We’re mindful that this has been in place since launch, but still think this change could lead to more balanced crosspath Ninja play for casual and for apex players. Ninja's 1xx feels like it does too much, granting both range and attack speed to all crosspaths, so these benefits are now being split apart.
— Update notes
”
- Range decreased ― 47 units → 40 units
 Seeking Shuriken crosspath is unchanged
- 4-0-2
- Caltrop attack: Attack cooldown increased ― 2.728s → 2.73s (attack speed reduced by 0.07%)
Gallery
Screenshots
-
Bloonjitsu with no crosspath
-
Bloonjitsu with 410 crosspath
-
Bloonjitsu with 420 crosspath
-
Bloonjitsu with 401 crosspath
-
Bloonjitsu with 402 crosspath
-
Attacking with
Deadly Tranquility active
Assets
In other languages
Name
| Language
|
Text
|
Notes
|
| Arabic
|
بلونجيتسو
|
—
|
| Danish
|
Bloonjitsu
|
—
|
| German
|
Bloonjitsu
|
—
|
| Spanish
|
Bloonjitsu
|
—
|
| Spanish (Latin America)
|
Bloonjitsu
|
—
|
| Finnish
|
Bloonjitsu
|
—
|
| French
|
Bloonjitsu
|
—
|
| Italian
|
Bloonjitsu
|
—
|
| Japanese
|
ブルーンの術
|
—
|
| Korean
|
풍선짓수
|
—
|
| Dutch
|
Bloon-jitsu
|
—
|
| Norwegian
|
Bloonjitsu
|
—
|
| Polish
|
Blonjitsu
|
—
|
| Portuguese (Brazil)
|
Bloonjitsu
|
—
|
| Russian
|
Шару-джитсу
|
—
|
| Swedish
|
Bloonjitsu
|
—
|
| Thai
|
ลูกโป่งจิตสึ
|
—
|
| Turkish
|
Bloonjitsu
|
—
|
| Chinese (simplified)
|
气球柔道
|
—
|
| Chinese (traditional)
|
氣球柔術
|
—
|
Description
| Language
|
Text
|
Notes
|
| Arabic
|
رمى 5 شوريكينز مرة واحدة!
|
—
|
| Danish
|
Kaster 5 ninjastjerner på én gang!
|
—
|
| German
|
Wirft gleichzeitig 5 Shuriken!
|
—
|
| Spanish
|
¡Lanza 5 shuriken a la vez!
|
—
|
| Spanish (Latin America)
|
¡Lanza 5 shuriken a la vez!
|
—
|
| Finnish
|
Heittää 5 shurikenia kerralla!
|
—
|
| French
|
Lance 5 shurikens d’un coup !
|
—
|
| Italian
|
Lancia 5 shuriken alla volta.
|
—
|
| Japanese
|
一度に五枚の手裏剣を投げる!
|
—
|
| Korean
|
한번에 5개의 표창을 던집니다!
|
—
|
| Dutch
|
Gooit 5 shurikens tegelijk!
|
—
|
| Norwegian
|
Kaster 5 kastestjerner samtidig!
|
—
|
| Polish
|
Rzuca 5 shurikenów naraz!
|
—
|
| Portuguese (Brazil)
|
Lança 5 shurikens de vez!
|
—
|
| Russian
|
Бросает по 5 сюрикенов.
|
—
|
| Swedish
|
Kastar 5 kaststjärnor samtidigt!
|
—
|
| Thai
|
ขว้างชูริเคนคราวละ 5 อัน!
|
—
|
| Turkish
|
Tek seferde 5 ninja yıldızı fırlatır!
|
—
|
| Chinese (simplified)
|
一次投掷5支手里剑!
|
—
|
| Chinese (traditional)
|
一次擲出5把手裡劍!
|
—
|
Navigation

 Throws 5 shurikens at once!

 Bloonjitsu with no crosspath
 Bloonjitsu with 410 crosspath
 Bloonjitsu with 420 crosspath
 Bloonjitsu with 401 crosspath
 Bloonjitsu with 402 crosspath
 Attacking with


 Portrait
 Upgrade icon
 Insta Monkey icon