Embrittlement (BTD6): Difference between revisions
Qwertyxp2000 (talk | contribs) →Strategy: lych exists |
Qwertyxp2000 (talk | contribs) →Strategy: you can bypass this vortex limitation but of course there's the downside of lesser attack speed, though I still can't think of a way to justify using short-ranged towers against vortex otherwise |
||
| Line 34: | Line 34: | ||
Embrittlement is somewhat map-dependent tower but a versatile support. In its optimal locations that allow wide coverage, such as a 90° bend, Embrittlement reliably provides de-camo, de-regrow (mainly against [[Lych]]), de-lead, and damage amplifiers, all within a cheap price. | Embrittlement is somewhat map-dependent tower but a versatile support. In its optimal locations that allow wide coverage, such as a 90° bend, Embrittlement reliably provides de-camo, de-regrow (mainly against [[Lych]]), de-lead, and damage amplifiers, all within a cheap price. | ||
Embrittlement's best synergies are towers that shoot high amounts of projectiles and attack quickly (e.g. [[Overdrive (BTD6)|Overdrive]]), because the flat damage amplification provides a large DPS increase. Most of its best synergies benefit much from Embrittlement, since most of them are weak to {{BTD6|DDT}}s. In particular, Embrittlement + Overdrives is a powerful strategy against [[Boss Bloon]]s (except {{BTD6|Vortex}}). {{BTD6|Bloon Sabotage}} is recommended support to compensate Embrittlement's otherwise poor consistency against DDTs. | Embrittlement's best synergies are towers that shoot high amounts of projectiles and attack quickly (e.g. [[Overdrive (BTD6)|Overdrive]]), because the flat damage amplification provides a large DPS increase. Most of its best synergies benefit much from Embrittlement, since most of them are weak to {{BTD6|DDT}}s. In particular, Embrittlement + Overdrives is a powerful strategy against [[Boss Bloon]]s (except {{BTD6|Vortex}}, unless supported by an active [[Dan D'Monke (BTD6)|Dan D'Monke]]'s Rabble Rouser ability). {{BTD6|Bloon Sabotage}} is recommended support to compensate Embrittlement's otherwise poor consistency against DDTs. | ||
[[Enhanced Freeze (BTD6)|Enhanced Freeze]] is the preferred crosspath, increasing rate of debuffs enough to have permanent uptime on continuous hits. [[Deep Freeze (BTD6)|Deep Freeze]] is mildly useful, allowing self-sharding in the absence of external speed buffs. [[Larger Radius (BTD6)|Larger Radius]] is better if it already has many attack speed buffs, and [[Re-Freeze (BTD6)|Re-Freeze]] is not necessary unless interacting with multiple Ice Monkeys. | [[Enhanced Freeze (BTD6)|Enhanced Freeze]] is the preferred crosspath, increasing rate of debuffs enough to have permanent uptime on continuous hits. [[Deep Freeze (BTD6)|Deep Freeze]] is mildly useful, allowing self-sharding in the absence of external speed buffs. [[Larger Radius (BTD6)|Larger Radius]] is better if it already has many attack speed buffs, and [[Re-Freeze (BTD6)|Re-Freeze]] is not necessary unless interacting with multiple Ice Monkeys. | ||
Revision as of 15:12, 11 June 2026

|
 Can hit MOAB-class Bloons. All hit Bloons become brittle, taking extra damage while frozen, and losing Lead immunity for a short time. Can hit MOAB-class Bloons. All hit Bloons become brittle, taking extra damage while frozen, and losing Lead immunity for a short time.
|
| Tower | Ice Monkey — Path 1 — Tier 4 | |
|---|---|---|
| XP cost | 8,250 | |
| Cash cost | $1,955 — Easy $2,300 — Medium $2,485 — Hard $2,760 — Impoppable | |
Embrittlement is the Ice Monkey's path 1 tier 4 upgrade in Bloons TD 6. Its attack now applies a brittle debuff to Bloons hit, which has the following effects:
- Removes Lead and Frozen immunities from affected Bloons for 2 seconds. The effect is reapplied on each attack.
- Makes affected Bloons take +1 damage from all sources for 2 seconds. This does not stack with Super Brittle or Herald of Everfrost
This effect soaks through layers along with ice shards, and they both soak through 3 layers (4 with Deep Freeze). Shards can also strip Camo and Regrow properties, unlike Ice Shards which can only do so with its blasts. Additionally, the attack can now target and damage Bloons that are already frozen, and reapply the freeze effect to them, without crosspathing with Re-Freeze.
Stats
| Tower | ||||||
|---|---|---|---|---|---|---|
| ||||||
| Attack | ||||||||||||||||||||||||||||||||||||||||||||||||||||||||||||||||||||||
|---|---|---|---|---|---|---|---|---|---|---|---|---|---|---|---|---|---|---|---|---|---|---|---|---|---|---|---|---|---|---|---|---|---|---|---|---|---|---|---|---|---|---|---|---|---|---|---|---|---|---|---|---|---|---|---|---|---|---|---|---|---|---|---|---|---|---|---|---|---|---|
| ||||||||||||||||||||||||||||||||||||||||||||||||||||||||||||||||||||||
|
4-1-0
| Attack | |||||||
|---|---|---|---|---|---|---|---|
| |||||||
|
4-2-0
| Attack | |||||||||||||||||||||||
|---|---|---|---|---|---|---|---|---|---|---|---|---|---|---|---|---|---|---|---|---|---|---|---|
|
4-0-1
| Tower | ||
|---|---|---|
| ||
| Attack | |||||
|---|---|---|---|---|---|
| |||||
|
Costs and sell values
| Tiers | Total cost | Sell value | ||||||
|---|---|---|---|---|---|---|---|---|
| Easy | Medium | Hard | Impoppable | Easy | Medium | Hard | Impoppable | |
| 4-0-0 | $4,000 | $4,700 | $5,075 | $5,640 | $2,800 | $3,290 | $3,553 | $3,948 |
| 4-1-0 | $4,170 | $4,900 | $5,290 | $5,880 | $2,919 | $3,430 | $3,703 | $4,116 |
| 4-2-0 | $4,425 | $5,200 | $5,615 | $6,240 | $3,098 | $3,640 | $3,931 | $4,368 |
| 4-0-1 | $4,130 | $4,850 | $5,235 | $5,820 | $2,891 | $3,395 | $3,665 | $4,074 |
| 4-0-2 | $4,300 | $5,050 | $5,450 | $6,060 | $3,010 | $3,535 | $3,815 | $4,242 |
Strategy
Embrittlement is somewhat map-dependent tower but a versatile support. In its optimal locations that allow wide coverage, such as a 90° bend, Embrittlement reliably provides de-camo, de-regrow (mainly against Lych), de-lead, and damage amplifiers, all within a cheap price.
Embrittlement's best synergies are towers that shoot high amounts of projectiles and attack quickly (e.g. Overdrive), because the flat damage amplification provides a large DPS increase. Most of its best synergies benefit much from Embrittlement, since most of them are weak to DDTs. In particular, Embrittlement + Overdrives is a powerful strategy against Boss Bloons (except Vortex, unless supported by an active Dan D'Monke's Rabble Rouser ability). Bloon Sabotage is recommended support to compensate Embrittlement's otherwise poor consistency against DDTs.
Enhanced Freeze is the preferred crosspath, increasing rate of debuffs enough to have permanent uptime on continuous hits. Deep Freeze is mildly useful, allowing self-sharding in the absence of external speed buffs. Larger Radius is better if it already has many attack speed buffs, and Re-Freeze is not necessary unless interacting with multiple Ice Monkeys.
Update history

|
This article or section uses Cargo to generate its content. It will automatically fill up as other articles are completed. To add to this section, create the articles it is looking up. Do not add content to this section manually and do not remove this notice until you are sure this section is complete. |
 Ice shard: Pierce and max pierce increased ― 1 → 3
- Pierce increased ― 30 → 40
- Now allows frozen Bloons to take Sharp damage (bug fix)
- 4-1-0, 4-0-1
- 4-1-0 and 4-0-1 Ice Monkeys now have different models
- Can now pop Lead Bloons when buffed by Acidic Mixture Dip (bug fix)
- Now has Camo detection
- Now removes Camo and Regrow properties from Bloons it freezes
- Range increased ― 20 → 25
- Now allows Sharp-type damage to damage frozen Bloons again (bug fix)
— Update notes
- Upgrade cost reduced ― $3,000 → $2,200
- Now applies the Permafrost effect to White and Zebra Bloons (bug)
- Note: Unconfirmed
- Now applies the Razor Shards effect to White and Zebra Bloons (bug)
- Note: Unconfirmed
 Ice Shards requires Re-Freeze to be able to damage Frozen Bloons, even under the influence of a X-3-X MIB Village (bug)
 - Note: Unconfirmed
- No longer allows frozen Bloons to take damage from Sharp attacks (bug)
— Update notes
- Overall cost increased by $50 (due to cost changes for previous tiers)
- Can now target and hit MOAB-class
- Note: Can apply damage, debuff, and decamo, but not freeze or permafrost
- 4-0-1, 4-0-2
- Larger Radius no longer prevents the Ice Monkey from stacking its debuffs (bug fix)
- Should no longer slow & remove camo from White Bloons without being able to damage them (bug fix)
- Overall cost increased by $50 (due to cost changes for previous tiers)
— Update notes
- Shard: Damage increased ― 1 → 2
- Pierce reduced ― 40 → 30 (extra pierce moved to Deep Freeze crosspath)
— Update notes
- Pierce increased ― 30 → 40
— Update notes
- Shard: Damage is no longer capped
- Description changed ― "Can hit MOAB-class Bloons. All hit Bloons become brittle, take extra damage while frozen, and lose Camo properties." → "Can hit MOAB-class Bloons. All hit Bloons become brittle, taking extra damage while frozen, and losing Lead immunity for a short time."
— Update notes
- Upgrade cost increased ― $2,200 → $2,300
 Overall cost is unchanged (due to cost changes for previous tiers)
- Can now be placed on water
- Embrittlement debuff: Different tiers no longer stack with each other
- Note: Super Brittle overrides Embrittlement and both are removed by the Paragon
- Embrittlement debuff: No longer works on BADs (bug)
- Note: Paragon works normally
- Can now target and hit frozen Bloons without removing their frozen immunities first (undocumented)
- Embrittlement debuff: Solved an issue where it would not affect BADs and Bosses (bug fix)
Gallery
Screenshots
-
 Embrittlement with no crosspath
 -
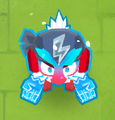 Embrittlement with 410 crosspath
 -
 Embrittlement with 420 crosspath
 -
 Embrittlement with 401 crosspath
 -
 Embrittlement with 402 crosspath


Assets
-
 Portrait
 -
 Upgrade icon
 -
 Insta Monkey icon

Trivia
- Its appearance may have been based on the Japanese macaque, also known as the snow monkey. It has a distinctive red face and light-colored fur.
In other languages
| Language | Name / Description | Notes | |
|---|---|---|---|
| Arabic | قصافة يمكنها إصابة البالونات من فئة MOAB، حيث تصاب جميع البالونات المصابة بالهشاشة، وتتلقى ضررًا إضافيًا أثناء تجميدها، وتفقد المناعة ضد الرصاص لفترة قصيرة. |
— | |
| Danish | Skørhed Kan ramme MOAB-klasse bloons. Alle ramte Bloons bliver skrøbelige, tager ekstra skade, mens de er frosne, og mister bly-immunitet i en kort periode. |
— | |
| German | Versprödung Kann Bloons der MOAB-Klasse treffen. Alle getroffenen Bloons werden brüchig, erleiden Extraschaden solange sie gefroren sind und verlieren für kurze Zeit Blei-Immunität. |
— | |
| Spanish | Resquebrajamiento Ataca a los bloons clase MOAB y todos los bloons golpeados se vuelven frágiles, reciben daño extra cuando están congelados y pierden inmunidad al plomo por poco tiempo. |
— | |
| Spanish (LA) | Resquebrajamiento Ataca a los bloons clase MOAB y todos los bloons golpeados se vuelven frágiles, reciben daño extra cuando están congelados y pierden la inmunidad de emplomados. |
— | |
| Finnish | Haurastus Voi osua MOAB-luokan blooneihin. Kaikista osuman saaneista blooneista tulee hauraita, ne kärsivät enemmän vahinkoa jäädytyksen aikana ja menettävät lyijyimmuniteetin hetkeksi. |
— | |
| French | Effritement Peut toucher les Bloons de classe MOAB. Tous les Bloons touchés s'effritent, subissant davantage de dégâts lorsqu'ils sont gelés et perdant leur immunité de plomb pendant une courte durée. |
— | |
| Italian | Fragilizzazione Può colpire i bloon di classe MOAB. Tutti i bloon colpiti diventano fragili, subendo danni extra mentre sono congelati e perdendo l'immunità del piombo per un breve lasso di tempo. |
— | |
| Japanese | 脆化 MOAB級ブルーンに命中できる。命中した全てのブルーンはもろくなり、凍結中に追加のダメージを受け、少しの間鉛効果が消える。 |
— | |
| Korean | 유리멘탈화 MOAB급 풍선을 공격할 수 있습니다. 공격에 맞은 풍선은 깨지기 쉬워져 얼린 상태에서 추가 피해를 받고 잠시 동안 납의 면역성을 잃습니다. |
— | |
| Dutch | Verbrozing Kan MOAB-klasse Bloons raken. Alle geraakte Bloons worden broos, lopen extra schade op als ze bevroren zijn en verliezen tijdelijk Loden immuniteit. |
— | |
| Norwegian | Skjørhet Kan treffe bloons av MOAB-klasse. Alle trufne bloons blir skjøre og påføres ekstra skade mens de er frosne og mister blyimmunitet i en kort periode. |
— | |
| Polish | Krucho Może trafiać blony klasy MOAB. Wszystkie trafione blony stają się kruche, podczas zamrożenia ponoszą większe obrażenia i na pewien czas tracą ołowianą osłonę. |
— | |
| Portuguese (Brazil) | Fragilização Pode atingir Bloons Classe MOAB. Todos os Bloons atingidos se tornam frágeis, recebendo dano extra quando congelados e perdendo imunidade de chumbo por um curto período. |
— | |
| Russian | Повышение хрупкости Может бить по шарам MOAB. Все пораженные шары становятся хрупкими, получают больше урона, будучи замороженными, и ненадолго теряют свой иммунитет. |
— | |
| Swedish | Försprödning Kan träffa Bloons i MOAB-klassen. Alla Bloons som träffas blir sköra, tar extra skada när de är frusna och förlorar blyimmuniteten under en kort stund. |
— | |
| Thai | แตกเปราะ โจมตีบลูนคลาส MOAB ได้ บลูนทั้งหมดที่ถูกโจมตีจะมีสถานะเปราะ ได้รับแรงโจมตีเพิ่มเติมเมื่อแช่แข็ง และเสียคุณสมบัติป้องกันตัวเองจากตะกั่วเป็นระยะเวลาสั้น ๆ |
— | |
| Turkish | Kırılganlaşma MOAB Sınıfı Bloon’ları vurabilir. Vurulan tüm Bloon’lar kırılganlaşır, donukken ekstra hasar alırlar ve Kurşun dayanıklılığını kısa süreliğine kaybederler. |
— | |
| Chinese (simplified) | 脆变 可击中MOAB级气球。所有被击中的气球都会变脆弱,处于冰冻状态时将遭到额外伤害,并在短时间内失去铅免疫。 |
— | |
| Chinese (traditional) | 脆化 可以擊中MOAB級氣球。所有被擊中的氣球會變得脆弱,在被凍結時受到額外傷害,並在短時間內失去鉛免疫力。 |
— | |
| This list was last updated for: version 45.1 | |||
Navigation
| Ice Monkey in Bloons TD 6 | ||||||||
|---|---|---|---|---|---|---|---|---|
| ||||||||
| Stats • Strategies • Update history |