Deadeye: Difference between revisions
Qwertyxp2000 (talk | contribs) |
moved a bunch of stuff to a mechanics section |
||
| (29 intermediate revisions by 5 users not shown) | |||
| Line 16: | Line 16: | ||
|xp =3750 | |xp =3750 | ||
}} | }} | ||
'''Deadeye''' is the [[Desperado (BTD6)|Desperado]]'s path 2 tier 3 [[upgrade]] in ''[[Bloons TD 6]]''. | '''Deadeye''' is the [[Desperado (BTD6)|Desperado]]'s path 2 tier 3 [[upgrade]] in ''[[Bloons TD 6]]''. <section begin="lede"/>This upgrade unlocks a long-range rifle [[attack]] that the Desperado uses on Bloons that are out of range of the pistol. It is a non-burst attack that shoots more slowly than the pistol, but deals 10 damage and +10 damage to [[Fortified Bloon (BTD6)|Fortified Bloon]]s, has 4 [[pierce]], and can damage all Bloon types. Like the pistol attack, it has a chance to [[crit]] for 4× damage depending on the distance between the Desperado and the target Bloon. | ||
This upgrade also modifies the pistol, increasing its base damage from 1 to 6 but reducing its range to 40. It also unlocks the Take Aim [[Activated Ability]], which allows the Desperado to temporarily [[buff]] a selected [[tower]], increasing its [[range]] by 25%, reducing its projectile spread by 50%, and granting it [[Camo detection]] for 15 seconds, with a 30-second cooldown.<section end="lede"/> | |||
Take Aim allows the player to select any [[tower]] on-screen | ==Mechanics== | ||
===Rifle=== | |||
The rifle attack has 80 range and a cooldown of 1.59 seconds. It deals 10 [[damage type|Normal-type]] damage and +10 damage to [[Fortified Bloon (BTD6)|Fortified Bloon]]s. It has 4 [[pierce]], allowing it to hit up to 3 other Bloons within a small radius of the target Bloon. Like the pistol, the rifle has a chance to [[crit]] for 4× damage that increases based on the distance between the Desperado and the target, starting at 2.5% and increasing by 0.4% per distance unit from the target (minimum of 18.5% due to its range restrictions, up to 34.5%<!--2.5+.4*80--> at max range before buffs). | |||
The Desperado can only use one attack at a time. It uses the rifle by default, but the rifle cannot target Bloons that are within range of the pistol (that is, the deadzone). It uses the pistol only if there are Bloons it can target using the pistol and none it can target using the rifle. Range modifiers only affect the rifle's range, not the pistol's. | |||
If [[crosspath]]ed with [[Quickdraw (BTD6)|Quickdraw]] or [[Standoff]], when using the rifle attack, the Desperado does not count Bloons within its deadzone when determining these upgrades' attack speed modifiers. However, if crosspathed with [[Nomad]], its attack speed modifier does count Bloons within the deadzone. | |||
===Take Aim=== | |||
Take Aim is an [[Activated Ability]] that allows the player to select any [[tower]] on-screen (except [[sub-tower]]s and [[Beast Handler (BTD6)|Beast Handler]]s that control a path 3 beast but not a path 1 or path 2 beast<!-- it can target 000 handlers -->). It applies a [[buff]] that grants +25% range, -50% projectile spread (including fixed<!--e.g. grapeshot--> and random spread<!--e.g. mortar and dartling-->), and [[Camo detection]]. While it cannot target sub-towers, if it targets a tower that has any sub-towers, all those sub-towers also receive its buff. It lasts for 15 seconds and has a 30-second cooldown. | |||
==Stats== | ==Stats== | ||
| Line 29: | Line 38: | ||
==Strategy== | ==Strategy== | ||
{{BTD6 last updated| | {{Strategy needed|Elaborate more about why Deadeye spam is so good and how to use it optimally. Are you supposed to use pex strategy?}} | ||
{{outdated|v55.0 rework to deadeye rifle vs pistol now alters the range buffing strategy}} | |||
{{BTD6 last updated|52.2|section=y}} | |||
Deadeye offers supplementary high damage and support for the midgame at a reasonable cost. Its Take Aim ability can help counter difficult situations temporarily, allowing the target tower to reach more Bloons with better accuracy, and clear away Camos that Deadeye cannot alone. The rifle should be aimed far away to maximize crit chances and avoid the pistol; the pistol is worse at anything but exactly one target. | |||
Deadeye can also be spammed inside the range of [[Primary Mentoring (BTD6)|Primary Mentoring]] for bursts of damage; it's a viable T3 spam strategy that excels at taking down large groups. [[Primary Expertise (BTD6)|Primary Expertise]] is also a solid choice, granting cheap T2's and additional cleanup. Targeting Strong is preferred for single-target damage, with only some set on First for cleanup. | |||
Take Aim ability's extra range and temporary camo detection is often used to assist rounds that have Camos,<!--we often use bhunt for the max monkeyopolis--> though occasionally used to boost Villages (such as [[Monkey Commerce (BTD6)|Monkey Commerce]] to discount more towers in range). Take Aim is also useful in maximizing the damage of towers with high projectile spread, such as [[Buckshot (BTD6)|Buckshot]] and its upgrades, [[Grape Shot (BTD6)|Grape Shot]] Buccaneers, or [[Sun Avatar (BTD6)|Sun Avatars]], allowing all if not most of their projectiles to hit Bloons. | Take Aim ability's extra range and temporary camo detection is often used to assist rounds that have Camos,<!--we often use bhunt for the max monkeyopolis--> though occasionally used to boost Villages (such as [[Monkey Commerce (BTD6)|Monkey Commerce]] to discount more towers in range). Take Aim is also useful in maximizing the damage of towers with high projectile spread, such as [[Buckshot (BTD6)|Buckshot]] and its upgrades, [[Grape Shot (BTD6)|Grape Shot]] Buccaneers, or [[Sun Avatar (BTD6)|Sun Avatars]], allowing all if not most of their projectiles to hit Bloons. | ||
For | Deadeye's preferred crosspath depends. For most situations, 2-3-0 is preferred because [[Quickdraw (BTD6)|Quickdraw]] already takes advantage of the rifle attack's high range, plus better single-target damage with [[Standoff]]. 0-3-2 has a consistent speed bonus compared to 2-3-0, retaining it if Bloons enter its close range too often, and better versus groups due to [[Nomad]], but more prone to the [[Wanderer]] penalty due to the extra range it gains. If used only for Take Aim, not crosspathing is optimal. | ||
== Update history == | == Update history == | ||
| Line 42: | Line 55: | ||
{{main gallery|Desperado}} | {{main gallery|Desperado}} | ||
===Screenshots=== | ===Screenshots=== | ||
{{screenshot needed| | {{screenshot needed|Demonstrate how it interacts with sub-towers (ideally on an Engineer Monkey) and Beast Handlers that only control a path 3 beast ([https://www.reddit.com/r/btd6/s/ce2VOwktlL context])}} | ||
<gallery> | <gallery> | ||
BTD6 030 desperado sc.png|0-3-0 Desperado | BTD6 030 desperado sc.png|0-3-0 Desperado | ||
BTD6 x3x desperado sc.png|All [[crosspath]]s | BTD6 x3x desperado sc.png|All [[crosspath]]s | ||
BTD6 deadeye take aim activation.png|Take Aim being used on {{BTD6|Quincy}} | BTD6 deadeye take aim activation.png|Take Aim being used on {{BTD6|Quincy}} | ||
BTD6 deadeye take aim spreads.png|Top: 3-2-0 {{BTD6|Monkey Buccaneer}} buffed by 0-3-0 Take Aim with reduced spread<br>Middle: 3-2-0 Monkey Buccaneer with no buffs<br>Bottom: 3-2-0 Monkey Buccaneer buffed by 0-3-2 Take Aim with increased spread | BTD6 deadeye take aim spreads.png|3-2-0 {{BTD6|Monkey Buccaneer}} affected by bugged spread in version 49.0<ref>Top: 3-2-0 {{BTD6|Monkey Buccaneer}} buffed by 0-3-0 Take Aim with reduced spread<br>Middle: 3-2-0 Monkey Buccaneer with no buffs<br>Bottom: 3-2-0 Monkey Buccaneer buffed by 0-3-2 Take Aim with increased spread</ref> | ||
BTD6 Wanderer Rifle.png|0-3-1 Deadeye's Wanderer stacks maxed | |||
BTD6 Deadeye Wanderer Rifle Interfere.png|Dart Monkey in rifle range losing a 0-3-1 Deadeye's Wanderer stack for rifle | |||
BTD6 Deadeye Wanderer Pistol Interfere.png|Dart Monkey in pistol range losing a 0-3-1 Deadeye's Wanderer stack for rifle and pistol | |||
</gallery> | </gallery> | ||
| Line 58: | Line 74: | ||
BTD6 030-DesperadoInsta.png|[[Insta Monkey]] icon | BTD6 030-DesperadoInsta.png|[[Insta Monkey]] icon | ||
</gallery> | </gallery> | ||
==Trivia== | |||
*In [[wp:Western culture|Western culture]], the term "deadeye" means expert marksman. | |||
==In other languages== | ==In other languages== | ||
| Line 108: | Line 127: | ||
|zh-tw=「瞄準」技能:目標猴子提升攻擊範圍、精確度和偽裝偵測能力。亡命之猴獲得一把遠程步槍,可用來攻擊遠處的目標。該步槍擅長對付強化氣球,並且能擊破鉛氣球。 | |zh-tw=「瞄準」技能:目標猴子提升攻擊範圍、精確度和偽裝偵測能力。亡命之猴獲得一把遠程步槍,可用來攻擊遠處的目標。該步槍擅長對付強化氣球,並且能擊破鉛氣球。 | ||
}} | }} | ||
==References== | |||
<references /> | |||
==Navigation== | ==Navigation== | ||
{{BTD6 desperado nav}} | {{BTD6 desperado nav}} | ||
{{BTD6 upgrade nav}} | {{BTD6 upgrade nav}} | ||
Latest revision as of 09:34, 3 August 2026

|
 Take Aim ability: target Monkey gains improved range, accuracy, and Camo detection. Desperado gains a long range rifle to use against distant targets. Rifle shots excel against Fortified targets and can pop Lead Bloons. Take Aim ability: target Monkey gains improved range, accuracy, and Camo detection. Desperado gains a long range rifle to use against distant targets. Rifle shots excel against Fortified targets and can pop Lead Bloons.
|
| Tower | Desperado — Path 2 — Tier 3 | |
|---|---|---|
| XP cost | 3,750 | |
| Cash cost | $2,550 — Easy $3,000 — Medium $3,240 — Hard $3,600 — Impoppable | |
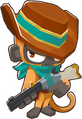
Deadeye is the Desperado's path 2 tier 3 upgrade in Bloons TD 6. This upgrade unlocks a long-range rifle attack that the Desperado uses on Bloons that are out of range of the pistol. It is a non-burst attack that shoots more slowly than the pistol, but deals 10 damage and +10 damage to Fortified Bloons, has 4 pierce, and can damage all Bloon types. Like the pistol attack, it has a chance to crit for 4× damage depending on the distance between the Desperado and the target Bloon.
This upgrade also modifies the pistol, increasing its base damage from 1 to 6 but reducing its range to 40. It also unlocks the Take Aim Activated Ability, which allows the Desperado to temporarily buff a selected tower, increasing its range by 25%, reducing its projectile spread by 50%, and granting it Camo detection for 15 seconds, with a 30-second cooldown.
Mechanics
[edit | edit source]Rifle
[edit | edit source]The rifle attack has 80 range and a cooldown of 1.59 seconds. It deals 10 Normal-type damage and +10 damage to Fortified Bloons. It has 4 pierce, allowing it to hit up to 3 other Bloons within a small radius of the target Bloon. Like the pistol, the rifle has a chance to crit for 4× damage that increases based on the distance between the Desperado and the target, starting at 2.5% and increasing by 0.4% per distance unit from the target (minimum of 18.5% due to its range restrictions, up to 34.5% at max range before buffs).
The Desperado can only use one attack at a time. It uses the rifle by default, but the rifle cannot target Bloons that are within range of the pistol (that is, the deadzone). It uses the pistol only if there are Bloons it can target using the pistol and none it can target using the rifle. Range modifiers only affect the rifle's range, not the pistol's.
If crosspathed with Quickdraw or Standoff, when using the rifle attack, the Desperado does not count Bloons within its deadzone when determining these upgrades' attack speed modifiers. However, if crosspathed with Nomad, its attack speed modifier does count Bloons within the deadzone.
Take Aim
[edit | edit source]Take Aim is an Activated Ability that allows the player to select any tower on-screen (except sub-towers and Beast Handlers that control a path 3 beast but not a path 1 or path 2 beast). It applies a buff that grants +25% range, -50% projectile spread (including fixed and random spread), and Camo detection. While it cannot target sub-towers, if it targets a tower that has any sub-towers, all those sub-towers also receive its buff. It lasts for 15 seconds and has a 30-second cooldown.
Stats
[edit | edit source]| Tower | ||||||
|---|---|---|---|---|---|---|
| ||||||
| Attack | ||||||||||||||||||||
|---|---|---|---|---|---|---|---|---|---|---|---|---|---|---|---|---|---|---|---|---|
| ||||||||||||||||||||
|
| Rifle attack | |||||||||||||||||
|---|---|---|---|---|---|---|---|---|---|---|---|---|---|---|---|---|---|
| |||||||||||||||||
|
| Take Aim | |||||||||
|---|---|---|---|---|---|---|---|---|---|
| |||||||||
|
1-3-0
| Attack | ||||
|---|---|---|---|---|
|
| Rifle attack | ||||
|---|---|---|---|---|
|
2-3-0
| Attack | ||||
|---|---|---|---|---|
|
| Rifle attack | ||||
|---|---|---|---|---|
|
0-3-1
| Attack | ||||
|---|---|---|---|---|
|
| Rifle attack | ||||
|---|---|---|---|---|
|
0-3-2
| Attack | ||||
|---|---|---|---|---|
|
| Rifle attack | ||||
|---|---|---|---|---|
|
| Nomad buff | ||||||||
|---|---|---|---|---|---|---|---|---|
| ||||||||
Costs and sell values
[edit | edit source]| Tiers | Total cost | Sell value | ||||||
|---|---|---|---|---|---|---|---|---|
| Easy | Medium | Hard | Impoppable | Easy | Medium | Hard | Impoppable | |
| 0-3-0 | $3,235 | $3,800 | $4,105 | $4,560 | $2,265 | $2,660 | $2,874 | $3,192 |
| 1-3-0 | $3,405 | $4,000 | $4,320 | $4,800 | $2,384 | $2,800 | $3,024 | $3,360 |
| 2-3-0 | $3,575 | $4,200 | $4,535 | $5,040 | $2,503 | $2,940 | $3,175 | $3,528 |
| 0-3-1 | $3,420 | $4,020 | $4,345 | $4,825 | $2,394 | $2,814 | $3,042 | $3,378 |
| 0-3-2 | $3,660 | $4,300 | $4,645 | $5,160 | $2,562 | $3,010 | $3,252 | $3,612 |
Strategy
[edit | edit source]
|
This strategy section is empty or incomplete. See the strategy guidelines for more information on how to write strategy sections. The editor who added this notice elaborates: Elaborate more about why Deadeye spam is so good and how to use it optimally. Are you supposed to use pex strategy? |

|
This article or section is outdated and needs to be updated to reflect recent updates or newly available information. You can help out by editing this article. The editor who added this notice elaborates: v55.0 rework to deadeye rifle vs pistol now alters the range buffing strategy |
Deadeye offers supplementary high damage and support for the midgame at a reasonable cost. Its Take Aim ability can help counter difficult situations temporarily, allowing the target tower to reach more Bloons with better accuracy, and clear away Camos that Deadeye cannot alone. The rifle should be aimed far away to maximize crit chances and avoid the pistol; the pistol is worse at anything but exactly one target.
Deadeye can also be spammed inside the range of Primary Mentoring for bursts of damage; it's a viable T3 spam strategy that excels at taking down large groups. Primary Expertise is also a solid choice, granting cheap T2's and additional cleanup. Targeting Strong is preferred for single-target damage, with only some set on First for cleanup.
Take Aim ability's extra range and temporary camo detection is often used to assist rounds that have Camos, though occasionally used to boost Villages (such as Monkey Commerce to discount more towers in range). Take Aim is also useful in maximizing the damage of towers with high projectile spread, such as Buckshot and its upgrades, Grape Shot Buccaneers, or Sun Avatars, allowing all if not most of their projectiles to hit Bloons.
Deadeye's preferred crosspath depends. For most situations, 2-3-0 is preferred because Quickdraw already takes advantage of the rifle attack's high range, plus better single-target damage with Standoff. 0-3-2 has a consistent speed bonus compared to 2-3-0, retaining it if Bloons enter its close range too often, and better versus groups due to Nomad, but more prone to the Wanderer penalty due to the extra range it gains. If used only for Take Aim, not crosspathing is optimal.
Update history
[edit | edit source]
|
This article or section uses Cargo to generate its content. It will automatically fill up as other articles are completed. To add to this section, create the articles it is looking up. Do not add content to this section manually and do not remove this notice until you are sure this section is complete. |
 Take Aim: Now applies to sub-towers (bug fix)
- 1-3-0, 2-3-0, 0-3-1, 0-3-2
- Take Aim ability: Now applies the correct range buff when the Desperado is crosspathed ― +15% → +25% (bug fix)
- Take Aim: Now applies the correct spread modifier when the Desperado is crosspathed ― +50% → -50% (bug fix)
— Update notes
- Overall cost reduced by $150 (due to cost changes for previous tiers)
- Rifle: Pierce increased ― 3 → 4
- Note: X-5-X Golden Justice unchanged (∞)
 Rifle: No longer ignores Boss immunity windows (bug fix)
- Note: The issue can still happen on certain circumstances
- Rifle: No longer fails to hit targets next to a wall (bug fix)
- Partially fixed an issue where they could hit Boss Bloons during their immunity windows (bug fix)
- Fixed an issue where they could hit Boss Bloons during their immunity windows (bug fix)
- Pistol now reloads at the end of the round
— Update notes
- Rifle: Damage reduced ― 12 → 10
- Note: X-4-X Bounty Hunter unchanged (24)
- Rifle attack: Bonus damage to Fortified Bloons reduced ― +12 → +10
- Note: X-4-X Bounty Hunter unchanged (+24)
- 0-3-1, 0-3-2
- No longer crashes when loading a game save or using Retry Last Round (bug fix)
— Update notes
 Desperados will now prioritize attacking Bloons with the rifle over any pistol target
- Rifle attack: No longer targets Bloons in the pistol's range
- Note: This is implemented as a minimum range of 40 units
- Pistol attack: Range increased ― 28 units → 40 units
- Pistol attack: Range can no longer be buffed
- This allows range buffs to not reduce the minimum range of the rifle, but prevents the pistol attack from triggering at longer ranges.
- T3 Take Aim buff icon is no longer shown when both T3 and T4 Take Aim effects are active on a tower
Gallery
[edit | edit source]Screenshots
[edit | edit source]
|
This article or section needs more screenshots. See the screenshot guidelines for more information on what screenshots are needed and how to add them. The editor that added this notice elaborates: Demonstrate how it interacts with sub-towers (ideally on an Engineer Monkey) and Beast Handlers that only control a path 3 beast (context) |
-
 0-3-0 Desperado
 -
 All crosspaths
 -
 Take Aim being used on Quincy
 -
![3-2-0 Monkey Buccaneer affected by bugged spread in version 49.0[1]](/images/thumb/a/ad/BTD6_deadeye_take_aim_spreads.png/94px-BTD6_deadeye_take_aim_spreads.png) 3-2-0 Monkey Buccaneer affected by bugged spread in version 49.0[1]
3-2-0 Monkey Buccaneer affected by bugged spread in version 49.0[1] -
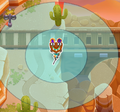 0-3-1 Deadeye's Wanderer stacks maxed
 -
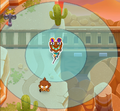 Dart Monkey in rifle range losing a 0-3-1 Deadeye's Wanderer stack for rifle
 -
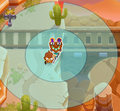 Dart Monkey in pistol range losing a 0-3-1 Deadeye's Wanderer stack for rifle and pistol


![3-2-0 Monkey Buccaneer affected by bugged spread in version 49.0[1]](/File:BTD6_deadeye_take_aim_spreads.png)


Assets
[edit | edit source]-
 Portrait
 -
 Icon
Icon -
 Ability icon
 -
 Buff icon
 -
 Insta Monkey icon


Trivia
[edit | edit source]- In Western culture, the term "deadeye" means expert marksman.
In other languages
[edit | edit source]| Language | Text | Notes |
|---|---|---|
| Arabic | التصويب القاتل | — |
| Danish | Skarpskytte | — |
| German | Jungfer | — |
| Spanish | Tirador certero | — |
| Spanish (Latin America) | Puntería letal | — |
| Finnish | Tappava katse | — |
| French | Précision mortelle | — |
| Italian | Tiratore scelto | — |
| Japanese | 射撃の名手 | — |
| Korean | 명사수 | — |
| Dutch | Scherpschutter | — |
| Norwegian | Mesterskytter | — |
| Polish | Sokole oko | — |
| Portuguese (Brazil) | Tiro Certo | — |
| Russian | Смертельный взор | — |
| Swedish | Skjutsäker | — |
| Thai | เดดอาย | — |
| Turkish | Keskin Nişancı | — |
| Chinese (simplified) | 神射手 | — |
| Chinese (traditional) | 神槍手 | — |
| Language | Text | Notes |
|---|---|---|
| Arabic | قدرة التصويب الدقيق: يحصل القرد المستهدف على مدى محسّن ودقة أعلى وكشف للتمويه. يحصل المجرم الطائش على بندقية طويلة المدى لاستخدامها ضد الأهداف البعيدة. تتميز طلقات البندقية بفاعلية كبيرة ضد الأهداف المحصنة ويمكنها تفجير البالونات المصنوعة من الرصاص. | — |
| Danish | Sigteevne: Den målrettede abe får forbedret rækkevidde, præcision og camouflagedetektion. Desperado får en langdistanceriffel til brug mod fjerne mål. Riffelskud udmærker sig mod forstærkede mål og kan sprænge bly-bloons. | — |
| German | Anvisierfähigkeit: Zielaffen erhält erhöhte Reichweite, Präzision und Tarnerkennung. Desperado erhält ein Fernschussgewehr, um es gegen Fernziele zu verwenden. Gewehrschüsse sind besonders gut gegen verstärkte Ziele und können Blei-Bloons platzen lassen. | — |
| Spanish | Habilidad Apuntar: el mono objetivo obtiene mayor alcance, precisión y detección de camuflaje. Desperado obtiene un rifle de largo alcance para usar contra objetivos distantes. Los disparos de rifle son excelentes contra objetivos fortificados y pueden explotar bloons emplomados. | — |
| Spanish (Latin America) | Habilidad Apuntar: el mono objetivo gana mayor alcance, precisión y detección de camuflaje. El forajido gana un fusil de largo alcance para usar contra los enemigos alejados. Los disparos del fusil son muy útiles contra objetivos fortificados y revientan bloons emplomados. | — |
| Finnish | Tähtää-kyky: Kohdeapina saa paremman kantaman ja tarkkuuden sekä maastokuvioinnin tunnistuksen. Desperado saa pitkän kantaman kiväärin kaukaisia kohteita varten. Kivääri loistaa vahvistettuja kohteita vastaan ja voi poksauttaa lyijyblooneja. | — |
| French | Aptitude Visée : le singe ciblé bénéficie d'une portée, d'une précision et d'une détection de camouflage accrues. Le desperado gagne une carabine qui lui permet d'attaquer ses cibles à distance. Cette carabine est particulièrement efficace contre les cibles fortifiées et peut faire éclater les Bloons en plomb. | — |
| Italian | Abilità Prendi la mira: le scimmie bersaglio ottengono portata, precisione e rilevamento mimetizzazione migliorati. Fuorilegge ottiene un fucile a lungo raggio da usare contro bersagli distanti. I colpi del fucile sono ottimi contro bersagli fortificati e possono far scoppiare i bloon di piombo. | — |
| Japanese | 照準アビリティ:標的のモンキーの射程距離、精度、カモフラージュ検知が向上する。デスペラードは、遠方のターゲットを狙い撃てる長距離ライフルを獲得する。ライフルは、強化された標的に対して威力を発揮し、鉛ブルーンを貫通することができる。 | — |
| Korean | 조준하기 능력: 대상 원숭이에게 사정거리 증가, 명중률 증가, 캐모 감지 능력을 부여합니다. 데스페라도가 멀리 있는 표적을 공격할 수 있도록 장거리 소총을 획득합니다. 소총 공격은 강화 표적에게 특히 효과적이며, 납 풍선을 터트릴 수 있습니다. | — |
| Dutch | Mikken-vaardigheid: de doelaap krijgt een groter bereik, hogere nauwkeurigheid en camouflagedetectie. Desperado krijgt een jachtgeweer om doelwitten op grote afstand te raken. Dit wapen is bijzonder sterk tegen Gepantserde doelwitten en kan Loden Bloons laten knallen. | — |
| Norwegian | Evnen Sikt godt: Utptekte aper får forbedret rekkevidde, presisjon og kamuflasjeoppdagelse. Desperado får et gevær som han kan bruke mot fjerne mål. Geværskudd er utmerket mot forsterkede mål, og de kan poppe bly-bloons. | — |
| Polish | Umiejętność Celny strzał: wybrana małpka zyskuje większy zasięg, celność oraz wykrywanie kamuflażu. Desperado otrzymuje dystansowy karabin do ostrzału odległych celów. Strzały z niego są skuteczne przeciwko celom ufortyfikowanym i mogą przebijać blony ołowiane. | — |
| Portuguese (Brazil) | Habilidade Mirar com Atenção: o macaco alvo ganha aumento de alcance, precisão e detecção de camuflagem. O Pistoleiro ganha um rifle para usar contra alvos distantes. Disparos de rifle são ótimos contra alvos fortificados e podem estourar Bloons de Chumbo. | — |
| Russian | Способность «Прицел»: целевая обезьяна дальше и метче стреляет и видит камуфляж. Десперадо обзаводится дальнобойной винтовкой для удаленных целей. Винтовка отлично бьет по укрепленным целям и пробивает свинец. | — |
| Swedish | Siktesförmåga: den utvalda Apan får längre räckvidd, högre precision och Kamodetektering. Desperado får ett långdistansgevär att använda mot avlägsna mål. Gevärsskott är extra effektiva mot Bepansrade mål och kan smälla Blybloons. | — |
| Thai | สกิลการเล็ง: ลิงเป้าหมายได้รับระยะ ความแม่นยำ และการตรวจจับลายพรางดีขึ้น เดสเปอราโดได้รับปืนไรเฟิลระยะไกลเพื่อใช้ต่อสู้กับเป้าหมายที่อยู่ไกล การยิงปืนไรเฟิลนั้นยอดเยี่ยมมากเมื่อต่อสู้กับเป้าหมายเสริมเกราะ และสามารถระเบิดบลูนตะกั่วได้ | — |
| Turkish | Nişan Alma yeteneği: Hedef Maymun gelişmiş menzil, isabet ve kamuflajlı tespiti kazanır. Desperado, uzaktaki hedeflere karşı kullanmak üzere uzun menzilli bir tüfek kuşanır. Tüfekle yapılan atışlar, Güçlendirilmiş hedeflere karşı etkilidir ve Kurşun Bloon'ları patlatabilir. | — |
| Chinese (simplified) | 瞄准技能:目标猴子获得射程、精准度和迷彩探测能力的提升。亡命猴将装备一把远程步枪用于攻击远处目标。步枪对强化气球效果显著,并能击破铅气球。 | — |
| Chinese (traditional) | 「瞄準」技能:目標猴子提升攻擊範圍、精確度和偽裝偵測能力。亡命之猴獲得一把遠程步槍,可用來攻擊遠處的目標。該步槍擅長對付強化氣球,並且能擊破鉛氣球。 | — |
References
[edit | edit source]- ↑ Top: 3-2-0 Monkey Buccaneer buffed by 0-3-0 Take Aim with reduced spread
Middle: 3-2-0 Monkey Buccaneer with no buffs
Bottom: 3-2-0 Monkey Buccaneer buffed by 0-3-2 Take Aim with increased spread
Navigation
[edit | edit source]| Desperado in Bloons TD 6 | ||||||
|---|---|---|---|---|---|---|
| ||||||
| Stats • Strategies • Update history |