Bloon Trap (BTD6): Difference between revisions
Qwertyxp2000 (talk | contribs) not all modes that disable income are chimps and deflation, maybe some quests are like this too |
Qwertyxp2000 (talk | contribs) No edit summary |
||
| (3 intermediate revisions by the same user not shown) | |||
| Line 1: | Line 1: | ||
{{for|other uses|Bloon Trap (disambiguation)}} | {{for|other uses|Bloon Trap (disambiguation)}} | ||
{{cleanup|Mechanics section and lede seem to clash with each other in formatting purposes}} | |||
{{research|Does selling the Bloon Trap Engineer refund the trap money (similar to Monkey Bank's bank balance)?}} | {{research|Does selling the Bloon Trap Engineer refund the trap money (similar to Monkey Bank's bank balance)?}} | ||
{{BTD6 upgrade info | {{BTD6 upgrade info | ||
| Line 18: | Line 19: | ||
|xp =11000 | |xp =11000 | ||
}} | }} | ||
'''Bloon Trap''' is the [[Engineer Monkey (BTD6)|Engineer Monkey]]'s path 3 tier 4 [[upgrade]] in ''[[Bloons TD 6]]''. | '''Bloon Trap''' is the [[Engineer Monkey (BTD6)|Engineer Monkey]]'s path 3 tier 4 [[upgrade]] in ''[[Bloons TD 6]]''. <section begin="lede" />The Engineer now creates a trap that collects and insta-kill Bloons. Each trap holds up to 500 [[RBE]] of Bloons (530 with {{BTD6 mk|Big Traps}}), and once full or overflowed, the trap can be collected for cash. Outside of modes that disable income (e.g. [[CHIMPS]] and [[Deflation (BTD6)|Deflation]]), the Bloon Trap provides +100% more cash than usual from Bloons that it collects. After the trap is collected, the Engineer takes a short cooldown before it creates a new trap. The traps do not affect [[MOAB-Class Bloon|MOAB-Class Bloons]], nor [[Camo Bloon (BTD6)|Camo Bloon]]s unless the Engineer Monkey could [[Camo detection|detect Camo Bloons]] prior to deploying the trap. Trap deployment ignores obstacles, allowing traps to be placed behind obstacles. Selling or sacrificing the Engineer removes its trap. | ||
Crosspathing with [[Larger Service Area (BTD6)|Larger Service Area]] allows traps to be repositioned and autocollected before getting full, [[Deconstruction (BTD6)|Deconstruction]] lets new traps strip [[Fortified Bloon (BTD6)|Fortified Bloon]] properties before insta-killing Bloons, and [[Faster Engineering (BTD6)|Faster Engineering]] decreases the cooldown to deploy a new trap by 50% and the delay between new traps by 25%.<!--12 vs 9, 2.8 vs 2.1--> | Crosspathing with [[Larger Service Area (BTD6)|Larger Service Area]] allows traps to be repositioned and autocollected before getting full, [[Deconstruction (BTD6)|Deconstruction]] lets new traps strip [[Fortified Bloon (BTD6)|Fortified Bloon]] properties before insta-killing Bloons, and [[Faster Engineering (BTD6)|Faster Engineering]] decreases the cooldown to deploy a new trap by 50% and the delay between new traps by 25%.<!--12 vs 9, 2.8 vs 2.1--><section end="lede" /> | ||
== Mechanics == | == Mechanics == | ||
| Line 26: | Line 27: | ||
Bloon Traps are track items that are, by default, deployed at the closest region of track to the Engineer Monkey, insta-killing Bloons that touch it. If no part of the track is within its range, the Engineer Monkey will not deploy a trap unless given the [[Larger Service Area (BTD6)|Larger Service Area]] upgrade and the trap is retargeted. Each trap has 10 radius, and cannot target [[MOAB-Class Bloon]]s, nor [[Camo Bloon (BTD6)|Camo Bloon]]s if the Engineer did not have [[Camo detection]] at the time of deploying it. Each Engineer is only allowed to have one trap on the map at a time, and can only deploy a new trap after the old one is collected. | Bloon Traps are track items that are, by default, deployed at the closest region of track to the Engineer Monkey, insta-killing Bloons that touch it. If no part of the track is within its range, the Engineer Monkey will not deploy a trap unless given the [[Larger Service Area (BTD6)|Larger Service Area]] upgrade and the trap is retargeted. Each trap has 10 radius, and cannot target [[MOAB-Class Bloon]]s, nor [[Camo Bloon (BTD6)|Camo Bloon]]s if the Engineer did not have [[Camo detection]] at the time of deploying it. Each Engineer is only allowed to have one trap on the map at a time, and can only deploy a new trap after the old one is collected. | ||
Traps do not give [[cash]] from Bloons immediately. Each trap can hold 500 [[RBE]] (530 with {{BTD6 mk|Big Traps}}), and is able to overflow capacity. Once full, the trap no longer pops Bloons, and is ready for collection. Collectible traps will shake and emit brief yellow auras, and can be collected by moving the cursor over them, which pull towards it within 100 units,<!--value unsure--> or collected automatically after about 15 seconds.<!--value unsure--> Once collected, the trap provides the player with as much cash as all the trapped Bloons are worth, plus an additional 100% cash value if not | Traps do not give [[cash]] from Bloons immediately. Each trap can hold 500 [[RBE]] (530 with {{BTD6 mk|Big Traps}}), and is able to overflow capacity. Once full, the trap no longer pops Bloons, and is ready for collection. Collectible traps will shake and emit brief yellow auras, and can be collected by moving the cursor over them, which pull towards it within 100 units,<!--value unsure--> or collected automatically after about 15 seconds.<!--value unsure--> Once collected, the trap provides the player with as much cash as all the trapped Bloons are worth, plus an additional 100% cash value if income generation is not disabled, and will inherit additional income buffs such as [[Monkey Town (BTD6)|Monkey Town]], [[Monkey City (BTD6)|Monkey City]], and [[Rubber to Gold (BTD6)|Rubber to Gold]]. Traps can also be collected by [[Banana Farmer (BTD6)|Banana Farmers]] and [[Monkey Wall Street (BTD6)|Monkey Wall Street]]. | ||
The Engineer Monkey deploys a new trap 12 seconds after a trap is collected, which can be decreased by attack speed buffs but cannot be decreased below the minimum trap delay of 2.8s. With the [[Faster Engineering (BTD6)|Faster Engineering]] upgrade, the deploy speed is reduced to 6s and the minimum trap delay is decreased to 2.1s. | The Engineer Monkey deploys a new trap 12 seconds after a trap is collected, which can be decreased by attack speed buffs but cannot be decreased below the minimum trap delay of 2.8s. With the [[Faster Engineering (BTD6)|Faster Engineering]] upgrade, the deploy speed is reduced to 6s and the minimum trap delay is decreased to 2.1s. | ||
| Line 46: | Line 47: | ||
To maximize trap income, ensure as many Bloons as possible are collected by the trap instead of from other towers or even the Engineer Monkey's own nail gun. The most effective way to do this is the [[Larger Service Area (BTD6)|Larger Service Area]] upgrade, and targeting the trap as close to the entrance as possible. This upgrade also allows retargeting the trap to catch any Bloons that make it farther down the track after the first trap is full, and to replenish traps between rounds. When using Bloon Trap for income, avoid infinite-range towers such as [[Sniper Monkey (BTD6)|Sniper]] or [[Druid of the Jungle (BTD6)|Druid of the Jungle]], which will pop Bloons before they can enter the trap. | To maximize trap income, ensure as many Bloons as possible are collected by the trap instead of from other towers or even the Engineer Monkey's own nail gun. The most effective way to do this is the [[Larger Service Area (BTD6)|Larger Service Area]] upgrade, and targeting the trap as close to the entrance as possible. This upgrade also allows retargeting the trap to catch any Bloons that make it farther down the track after the first trap is full, and to replenish traps between rounds. When using Bloon Trap for income, avoid infinite-range towers such as [[Sniper Monkey (BTD6)|Sniper]] or [[Druid of the Jungle (BTD6)|Druid of the Jungle]], which will pop Bloons before they can enter the trap. | ||
[[Faster Engineering (BTD6)|Faster Engineering]] usually hinders income unless the Engineer Monkey is placed behind an obstacle, because the Engineer Monkey will deploy sentries that pop Bloons, reducing the income from the trap. | [[Faster Engineering (BTD6)|Faster Engineering]] usually hinders income unless the Engineer Monkey is placed behind an obstacle, because the Engineer Monkey will deploy sentries that pop Bloons, reducing the income from the trap. [[Deconstruction (BTD6)|Deconstruction]] is not necessary for income purposes but makes it easier to handle [[Dreadbloon (BTD6)|Dreadbloon]]'s modified rounds. | ||
Trap income is significantly increased by the [[Monkey Town (BTD6)|Monkey Town]] and [[Monkey City (BTD6)|Monkey City]] Village upgrades, generating approximately 68% more income when under Monkey City. [[Rubber to Gold (BTD6)|Rubber to Gold]] is also recommended to improve cash generation per pop in combination, with the Alchemist placed | Trap income is significantly increased by the [[Monkey Town (BTD6)|Monkey Town]] and [[Monkey City (BTD6)|Monkey City]] Village upgrades, generating approximately 68% more income when under Monkey City. [[Rubber to Gold (BTD6)|Rubber to Gold]] is also recommended to improve cash generation per pop in combination, with the Alchemist placed backwards along the track before the trap. | ||
Bloon Trap is a poor choice in CHIMPS and Deflation Modes, as it generates no additional income and the trap is outclassed by most other towers in terms of damage or protecting exits. | Bloon Trap is a poor choice in CHIMPS and Deflation Modes, as it generates no additional income and the trap is outclassed by most other towers in terms of damage or protecting exits. | ||
Latest revision as of 06:58, 15 September 2026

|
This article or section needs cleanup, either to improve the way it presents information and/or comply with the style guide. You can help out by editing this article. The editor who added this notice elaborates: Mechanics section and lede seem to clash with each other in formatting purposes |

|
This article is in need of research. You can help out by editing this article or discussing your findings on the talk page. The editor who added this notice elaborates: Does selling the Bloon Trap Engineer refund the trap money (similar to Monkey Bank's bank balance)? |

|
 Bloon trap captures Bloons until full. Select to empty full trap for cash. Bloon trap captures Bloons until full. Select to empty full trap for cash.
|
| Tower | Engineer Monkey — Path 3 — Tier 4 | |
|---|---|---|
| XP cost | 11,000 | |
| Cash cost | $3,060 — Easy $3,600 — Medium $3,890 — Hard $4,320 — Impoppable | |
Bloon Trap is the Engineer Monkey's path 3 tier 4 upgrade in Bloons TD 6. The Engineer now creates a trap that collects and insta-kill Bloons. Each trap holds up to 500 RBE of Bloons (530 with  Big Traps), and once full or overflowed, the trap can be collected for cash. Outside of modes that disable income (e.g. CHIMPS and Deflation), the Bloon Trap provides +100% more cash than usual from Bloons that it collects. After the trap is collected, the Engineer takes a short cooldown before it creates a new trap. The traps do not affect MOAB-Class Bloons, nor Camo Bloons unless the Engineer Monkey could detect Camo Bloons prior to deploying the trap. Trap deployment ignores obstacles, allowing traps to be placed behind obstacles. Selling or sacrificing the Engineer removes its trap.
Crosspathing with Larger Service Area allows traps to be repositioned and autocollected before getting full, Deconstruction lets new traps strip Fortified Bloon properties before insta-killing Bloons, and Faster Engineering decreases the cooldown to deploy a new trap by 50% and the delay between new traps by 25%.
Mechanics
[edit | edit source]
|
This article or section needs more screenshots. See the screenshot guidelines for more information on what screenshots are needed and how to add them. The editor that added this notice elaborates: Trapping bloons with trap? |
Bloon Traps are track items that are, by default, deployed at the closest region of track to the Engineer Monkey, insta-killing Bloons that touch it. If no part of the track is within its range, the Engineer Monkey will not deploy a trap unless given the Larger Service Area upgrade and the trap is retargeted. Each trap has 10 radius, and cannot target MOAB-Class Bloons, nor Camo Bloons if the Engineer did not have Camo detection at the time of deploying it. Each Engineer is only allowed to have one trap on the map at a time, and can only deploy a new trap after the old one is collected.
Traps do not give cash from Bloons immediately. Each trap can hold 500 RBE (530 with Big Traps), and is able to overflow capacity. Once full, the trap no longer pops Bloons, and is ready for collection. Collectible traps will shake and emit brief yellow auras, and can be collected by moving the cursor over them, which pull towards it within 100 units, or collected automatically after about 15 seconds. Once collected, the trap provides the player with as much cash as all the trapped Bloons are worth, plus an additional 100% cash value if income generation is not disabled, and will inherit additional income buffs such as Monkey Town, Monkey City, and Rubber to Gold. Traps can also be collected by Banana Farmers and Monkey Wall Street.
The Engineer Monkey deploys a new trap 12 seconds after a trap is collected, which can be decreased by attack speed buffs but cannot be decreased below the minimum trap delay of 2.8s. With the Faster Engineering upgrade, the deploy speed is reduced to 6s and the minimum trap delay is decreased to 2.1s.
If upgraded to Larger Service Area, the Engineer Monkey's trap location may be re-targeted to anywhere within its range, including over walls and off the track. After re-targeting its position, the trap autocollects if the trap's cooldown has passed. If upgraded to Deconstruction, the trap will de-fortify any Fortified Bloons before collecting them, saving more space in the trap.
Upon reloading a save file, any traps that existed when the game was saved will remain. However, buffs such as Monkey City and Camo detection will not be saved for traps.
Stats
[edit | edit source]| Tower | ||||||
|---|---|---|---|---|---|---|
| ||||||
| Attack | |||||||||||||||||||||||||
|---|---|---|---|---|---|---|---|---|---|---|---|---|---|---|---|---|---|---|---|---|---|---|---|---|---|
| |||||||||||||||||||||||||
|
| Bloon Trap | |||||||||||||||
|---|---|---|---|---|---|---|---|---|---|---|---|---|---|---|---|
| |||||||||||||||
| |||||||||||||||
|
1-0-4
| Spawner | ||||||||
|---|---|---|---|---|---|---|---|---|
| ||||||||
|
Sentry
| Tower | ||||||||
|---|---|---|---|---|---|---|---|---|
| ||||||||
| Attack | |||||||||||||||||||
|---|---|---|---|---|---|---|---|---|---|---|---|---|---|---|---|---|---|---|---|
| |||||||||||||||||||
|
2-0-4
| Spawner | ||
|---|---|---|
|
| Bloon Trap | ||
|---|---|---|
|
0-1-4
| Tower | ||
|---|---|---|
| ||
| Attack | ||
|---|---|---|
|
| Bloon Trap | ||||
|---|---|---|---|---|
|
0-2-4
| Attack | |||||||
|---|---|---|---|---|---|---|---|
|
| Bloon Trap | |||||
|---|---|---|---|---|---|
|
Costs and sell values
[edit | edit source]| Tiers | Total cost | Sell value | ||||||
|---|---|---|---|---|---|---|---|---|
| Easy | Medium | Hard | Impoppable | Easy | Medium | Hard | Impoppable | |
| 0-0-4 | $4,315 | $5,070 | $5,480 | $6,085 | $3,021 | $3,549 | $3,836 | $4,260 |
| 1-0-4 | $4,740 | $5,570 | $6,020 | $6,685 | $3,318 | $3,899 | $4,214 | $4,680 |
| 2-0-4 | $5,080 | $5,970 | $6,450 | $7,165 | $3,556 | $4,179 | $4,515 | $5,016 |
| 0-1-4 | $4,525 | $5,320 | $5,750 | $6,385 | $3,168 | $3,724 | $4,025 | $4,470 |
| 0-2-4 | $4,825 | $5,670 | $6,130 | $6,805 | $3,378 | $3,969 | $4,291 | $4,764 |
Strategy
[edit | edit source]Outside of CHIMPS and Deflation modes, Bloon Trap is an excellent money-making tower that also helps defend against the Bloons. It is most effective between rounds 34-60, because on round 61 onward the amount of cash per Bloon is drastically reduced, and in the very early rounds there are not enough Bloons to justify the trap's use. It tends to stand out on Boss Bloon Events, which heavily demands maximizing income over rounds.
To maximize trap income, ensure as many Bloons as possible are collected by the trap instead of from other towers or even the Engineer Monkey's own nail gun. The most effective way to do this is the Larger Service Area upgrade, and targeting the trap as close to the entrance as possible. This upgrade also allows retargeting the trap to catch any Bloons that make it farther down the track after the first trap is full, and to replenish traps between rounds. When using Bloon Trap for income, avoid infinite-range towers such as Sniper or Druid of the Jungle, which will pop Bloons before they can enter the trap.
Faster Engineering usually hinders income unless the Engineer Monkey is placed behind an obstacle, because the Engineer Monkey will deploy sentries that pop Bloons, reducing the income from the trap. Deconstruction is not necessary for income purposes but makes it easier to handle Dreadbloon's modified rounds.
Trap income is significantly increased by the Monkey Town and Monkey City Village upgrades, generating approximately 68% more income when under Monkey City. Rubber to Gold is also recommended to improve cash generation per pop in combination, with the Alchemist placed backwards along the track before the trap.
Bloon Trap is a poor choice in CHIMPS and Deflation Modes, as it generates no additional income and the trap is outclassed by most other towers in terms of damage or protecting exits.
Update history
[edit | edit source]
|
This article or section uses Cargo to generate its content. It will automatically fill up as other articles are completed. To add to this section, create the articles it is looking up. Do not add content to this section manually and do not remove this notice until you are sure this section is complete. |
 Traps no longer collect for reduced cash when under a Monkey Town (bug fix)
 Traps should collect for the correct amounts after resuming save (bug fix)
- Traps will no longer allow bonus traps to be placed when reloading save (bug fix)
— Update notes
- 1-0-4, 2-0-4
- Oversize Nails now allows Sentries to pop frozen Bloons
- Oversize Nails now increases Sentry pierce by 1
— Update notes
- Can now spawn multiple traps per round, at a cooldown of 20 seconds for a new trap
— Update notes
- Trap attack: Maximum delay reduced ― 20s → 15s
- 2-0-4
- Faster Engineering reduces the delay of the trap attack more ― -20% → -40%
— Update notes
- Trap attack: Base cooldown reduced ― 15s → 12s
- With 2-X-X Faster Engineering crosspath ― 9s → 7.2s
— Update notes
- Overall cost reduced by $50 (due to cost changes for previous tiers)
- 0-1-4, 0-2-4
- Trap attack: Manual targeting option added
— Update notes
- 0-1-4, 0-2-4
 Trap attack: Changing the target point now destroys the current trap and places a new one
- Bloon Trap issue resolved on Sunken Columns with Bloontraps falling under the map in certain location (bug fix)
- 0-1-4, 0-2-4
- Bloon Trap issue resolved with certain conditions causing Bloontraps to repeatedly auto-collect even while empty (bug fix)
— Update notes
- 0-2-4
- Deconstruction now allows traps to defortify anything it consumes prior to capturing
— Update notes
- Trap attack: Collecting traps now distributes some of their cash among all players in Co-op, equal to the cash that the captured Bloons would have distributed among all players if popped outside of a trap, while still giving the owner all of the extra cash generated
— Update notes
- Upgrade cost increased ― $3,500 → $3,600
- Overall cost is unchanged (due to cost changes for previous tiers)
— Update notes
- Trap: Disappears when the Engineer is sold or sacrificed. No cash will be collected from the trap. (bug)
- Note: This behavior is intended for Tier 5 but not for Tier 4
- 1-0-4, 2-0-4
- Double Gun Sentries now shoot two projectiles at once
- 1-0-4, 2-0-4
- Double Guns no longer reduces Sentry pierce by 1 (bug fix)
- 0-1-4, 0-2-4
- Bloontrap cooldown should no longer break depending on upgrade order (bug fix)
- Note: Larger Service Area no longer bypasses minimum trap delay (2.8s)
— Update notes
- 2-0-4
- Faster Engineering reduces the trap attack's maximum delay more ― -40% → -50%
- X-1-4, X-2-4
- Bloon Trap now correctly moves on target point set after loading a save (bug fix)
Gallery
[edit | edit source]Screenshots
[edit | edit source]|
|
This article or section needs more screenshots. See the screenshot guidelines for more information on what screenshots are needed and how to add them. The editor that added this notice elaborates: Bloon Trap trap deployment ignoring obstacles |
-
 Bloon Trap with no crosspath
 -
 Bloon Trap with 014 crosspath
 -
 Bloon Trap with 024 crosspath
 -
 Bloon Trap with 104 crosspath
 -
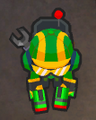 Bloon Trap with 204 crosspath
 -
 Bloon Trap insta-killing a bloon
 -
 Bloon Trap becoming full
 -
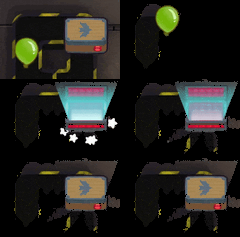 Bloon Trap insta-killing a bloon with Vampire Hunter cosmetic
 -
 Bloon Trap becoming full with Vampire Hunter cosmetic


Assets
[edit | edit source]-
 Portrait
 -
 Upgrade icon
 -
 Insta Monkey icon

In other languages
[edit | edit source]| Language | Name / Description | Notes | |
|---|---|---|---|
| Arabic | مصيدة البالونات مصيدة بالونات تلتقط بالونات حتى تمتلئ. تحديد لتفريغ المصيدة الكاملة مقابل النقود. |
— | |
| Danish | Bloon-fælde Bloonfælden fanger bloons til den er fyldt. Tøm den fyldte fælde for at få pengegevinster. |
— | |
| German | Bloon-Falle Die Bloon-Falle fängt Bloons, bis sie voll ist. Wähle sie zum Leeren der vollen Falle für Geld. |
— | |
| Spanish | Trampa para bloons La trampa para bloons los captura hasta llenarse. Selecciona una trampa llena para vaciarla a cambio de dinero. |
— | |
| Spanish (LA) | Trampa para bloons La trampa para bloons los captura hasta llenarse. Selecciona una trampa llena para vaciarla a cambio de dinero. |
— | |
| Finnish | Blooniansa Blooniansa kaappaa blooneja, kunnes se täyttyy. Valitse ansa tyhjentääksesi sen, jolloin saat käteistä. |
— | |
| French | Piège à Bloons Le piège à Bloons capture des Bloons jusqu'à ce qu'il soit plein. Sélectionner pour vider le piège plein pour de l'argent. |
— | |
| Italian | Trappola per bloon La trappola per bloon cattura bloon fino a riempirsi. Seleziona per svuotarla in cambio di contante. |
— | |
| Japanese | ブルーントラップ 満杯になるまで、ブルーントラップがブルーンをとらえる。一杯になったトラップを選択するとキャッシュがもらえる。 |
— | |
| Korean | 풍선 함정 풍선 함정이 가득 찰 때까지 풍선을 가둡니다. 누르면 함정을 비워서 캐시를 얻습니다. |
— | |
| Dutch | Bloon-val Bloon-val vangt Bloons tot deze vol is. Selecteer om volle val te legen voor geld. |
— | |
| Norwegian | Bloon-felle Bloonfelle fanger bloons til den blir full. Velg fellen for å tømme den mot penger. |
— | |
| Polish | Blonowa pułapka Blonowa pułapka chwyta blony, dopóki się nie wypełni. Wybierz, by opróżnić pełną pułapkę za gotówkę. |
— | |
| Portuguese (Brazil) | Armadilha Bloon Armadilha Bloon os captura até encher. Selecione para esvaziar a armadilha cheia para ganhar dinheiro. |
— | |
| Russian | Шаролов Шаролов ловит шары, пока не наполнится. Нажмите на шаролов, чтобы опорожнить его и получить деньги. |
— | |
| Swedish | Bloonfälla Bloonfällan fångar Bloons till den är full. Tryck på fällan för att tömma den mot pengar. |
— | |
| Thai | กับดักลูกโป่ง กับดักบลูนดักจับบลูนจนกว่าจะเต็ม เลือกเพื่อเคลียร์กับดักที่เต็มให้ว่างและรับเงิน |
— | |
| Turkish | Bloon Tuzağı Bloon tuzağı tam dolana kadar Bloon’ları yakalar. Nakit için dolan tuzağı boşaltmak üzere seç. |
— | |
| Chinese (simplified) | 气球陷阱 气球陷阱可捕获气球,直到装满为止。选择清空装满气球的陷阱可获取现金。 |
— | |
| Chinese (traditional) | 氣球陷阱 氣球陷阱捕獲氣球直到滿了為止。選擇清空裝滿了的陷阱,獲得現金。 |
— | |
| This list was last updated for: version 43.1 | |||
Navigation
[edit | edit source]| Engineer Monkey in Bloons TD 6 | ||||||||
|---|---|---|---|---|---|---|---|---|
| ||||||||
| Stats • Strategies • Update history |