Submerge and Support (BTD6): Difference between revisions
mNo edit summary |
Qwertyxp2000 (talk | contribs) lede thing tags or something, anything I guess, no one will see I guess? |
||
| (27 intermediate revisions by 9 users not shown) | |||
| Line 1: | Line 1: | ||
{{for|other uses|Submerge and Support (disambiguation)}} | {{for|other uses|Submerge and Support (disambiguation)}} | ||
{{BTD6 upgrade info | {{BTD6 upgrade info | ||
|id=Submerge and Support | |id=Submerge and Support | ||
| Line 18: | Line 17: | ||
|xp =2250 | |xp =2250 | ||
}} | }} | ||
'''Submerge and Support''' is the [[Monkey Sub (BTD6)|Monkey Sub]]'s path 1 tier 3 [[upgrade]] in ''[[Bloons TD 6]]''. | '''Submerge and Support''' is the [[Monkey Sub (BTD6)|Monkey Sub]]'s path 1 tier 3 [[upgrade]] in ''[[Bloons TD 6]]''. <section begin="lede" />When purchased, the Monkey Sub gains the Submerge targeting option and switches to this option, which can be toggled (with a cooldown of 0.5 seconds). While submerged, the Monkey Sub stops its usual attacks, and instead periodically creates an aura in its range that removes the [[Camo Bloon (BTD6)|Camo]] property of Bloons inside it. This decamo aura deals no damage, activates every 1.35 seconds, and has a [[pierce]] of 100. | ||
Crosspaths upgrade the aura. [[Twin Guns (BTD6)|Twin Guns]] increases the [[attack speed]] of the aura by ~42.3%, and [[Barbed Darts (BTD6)|Barbed Darts]] increases its [[pierce]] by 50. [[Heat-tipped Darts (BTD6)|Heat-tipped Darts]] and [[Airburst Darts (BTD6)|Airburst Darts]] provide no further benefit to a submerged sub.<section end="lede" /> | |||
==Stats== | ==Stats== | ||
{{BTD6 stat list by | {{BTD6 stat list by tiers|Monkey Sub|300}} | ||
==Costs and sell values== | ==Costs and sell values== | ||
{{BTD6 cost list by upgrade|Monkey Sub|1|3}} | {{BTD6 cost list by upgrade|Monkey Sub|1|3}} | ||
==Strategy== | |||
{{BTD6 last updated|54.3|section=y}} | |||
Submerge and Support is a cheap and solid de-camo tower, working best around bends. On maps without bends or with far-apart lanes, a global de-camo such as {{BTD6|Signal Flare}} is better. Additionally, Submerge and Support can be unreliable against {{BTD6|DDT}}s. Lastly, its value can be maximized by unsubmerging it on rounds without Camos. | |||
3-0-1 greatly improves its de-camo consistency against fast Bloons. 3-1-0's de-camo pierce bonus is minimal outside of a [[Race (BTD6)|Race]] context. Other crosspaths can be added for the unsubmerged Sub. | |||
==Update history== | ==Update history== | ||
| Line 32: | Line 39: | ||
{{main gallery|Monkey Sub}} | {{main gallery|Monkey Sub}} | ||
===Screenshots=== | ===Screenshots=== | ||
<gallery> | |||
BTD6 Submerge And Support 300 Unsubmerged.png|300 Sub unsubmerged | |||
BTD6 Submerge And Support 301 Unsubmerged.png|301 Sub unsubmerged | |||
BTD6 Submerge And Support 302 Unsubmerged.png|302 Sub unsubmerged | |||
BTD6 Submerge And Support 310 Unsubmerged.png|310 Sub unsubmerged | |||
BTD6 Submerge And Support 320 Unsubmerged.png|320 Sub unsubmerged | |||
BTD6 Submerge And Support 300 Submerged.gif|Submerge and Support aura | |||
BTD6 sns bottom.png|300 sub submerged, but visible above water due to selling a Lord of the Abyss while the dam is flooding. | |||
BTD6 angry sub bottom.png|320 sub submerged but visible. | |||
BTD6 Flooded Valley water levels.png|The different water levels of Flooded Valley, demonstrated by submerged Monkey Subs | |||
</gallery> | |||
=== | ===Assets=== | ||
<gallery> | <gallery> | ||
BTD6 300-MonkeySub.png|Portrait | BTD6 300-MonkeySub.png|Portrait | ||
| Line 40: | Line 57: | ||
BTD6 300-MonkeySubInsta.png|[[Insta Monkey]] icon | BTD6 300-MonkeySubInsta.png|[[Insta Monkey]] icon | ||
</gallery> | </gallery> | ||
==Trivia== | |||
*Unlike its [[Submerge and Support (disambiguation)|previous iterations]], Submerge and Support in BTD6 automatically submerges the Sub upon upgrading. | |||
*The in-game appearance of the 3-2-0 Sub has led the community to jokingly refer to it as the "Angry Sub". Ninja Kiwi has acknowledged this term in the [https://www.reddit.com/r/btd6/comments/rbhs6d/bloons_td_6_update_notes_version_290/ 29.0 patch notes] with the line "making sub a little angrier". | |||
*After flooding [[Flooded Valley]], any submerged Sub placed on the left side does not visually submerge completely. | |||
==In other languages== | ==In other languages== | ||
Latest revision as of 05:37, 10 September 2026

|
 Adds Submerge targeting option that permanently reveals Camo Bloons in its radius but does not attack while submerged. Adds Submerge targeting option that permanently reveals Camo Bloons in its radius but does not attack while submerged.
|
| Tower | Monkey Sub — Path 1 — Tier 3 | |
|---|---|---|
| XP cost | 2,250 | |
| Cash cost | $595 — Easy $700 — Medium $755 — Hard $840 — Impoppable | |
Submerge and Support is the Monkey Sub's path 1 tier 3 upgrade in Bloons TD 6. When purchased, the Monkey Sub gains the Submerge targeting option and switches to this option, which can be toggled (with a cooldown of 0.5 seconds). While submerged, the Monkey Sub stops its usual attacks, and instead periodically creates an aura in its range that removes the Camo property of Bloons inside it. This decamo aura deals no damage, activates every 1.35 seconds, and has a pierce of 100.
Crosspaths upgrade the aura. Twin Guns increases the attack speed of the aura by ~42.3%, and Barbed Darts increases its pierce by 50. Heat-tipped Darts and Airburst Darts provide no further benefit to a submerged sub.
Stats
[edit | edit source]| Tower | ||||||
|---|---|---|---|---|---|---|
| ||||||
| Attack | |||||||||||||||||||||||
|---|---|---|---|---|---|---|---|---|---|---|---|---|---|---|---|---|---|---|---|---|---|---|---|
| |||||||||||||||||||||||
| |||||||||||||||||||||||
|
| Pulse (decamo) | |||||||||||||
|---|---|---|---|---|---|---|---|---|---|---|---|---|---|
| |||||||||||||
| |||||||||||||
|
3-1-0
| Attack | |||||
|---|---|---|---|---|---|
|
| Pulse (decamo) | |||||
|---|---|---|---|---|---|
|
3-2-0
| Attack | |||||
|---|---|---|---|---|---|
|
3-0-1
| Attack | ||||
|---|---|---|---|---|
|
| Pulse (decamo) | ||||
|---|---|---|---|---|
|
3-0-2
| Attack | ||||||||||||||||||||||||
|---|---|---|---|---|---|---|---|---|---|---|---|---|---|---|---|---|---|---|---|---|---|---|---|---|
|
Costs and sell values
[edit | edit source]| Tiers | Total cost | Sell value | ||||||
|---|---|---|---|---|---|---|---|---|
| Easy | Medium | Hard | Impoppable | Easy | Medium | Hard | Impoppable | |
| 3-0-0 | $1,405 | $1,655 | $1,785 | $1,985 | $984 | $1,159 | $1,250 | $1,390 |
| 3-1-0 | $1,790 | $2,105 | $2,270 | $2,525 | $1,253 | $1,474 | $1,589 | $1,768 |
| 3-2-0 | $2,045 | $2,405 | $2,595 | $2,885 | $1,432 | $1,684 | $1,817 | $2,020 |
| 3-0-1 | $1,790 | $2,105 | $2,270 | $2,525 | $1,253 | $1,474 | $1,589 | $1,768 |
| 3-0-2 | $2,640 | $3,105 | $3,350 | $3,725 | $1,848 | $2,174 | $2,345 | $2,608 |
Strategy
[edit | edit source]Submerge and Support is a cheap and solid de-camo tower, working best around bends. On maps without bends or with far-apart lanes, a global de-camo such as Signal Flare is better. Additionally, Submerge and Support can be unreliable against DDTs. Lastly, its value can be maximized by unsubmerging it on rounds without Camos.
3-0-1 greatly improves its de-camo consistency against fast Bloons. 3-1-0's de-camo pierce bonus is minimal outside of a Race context. Other crosspaths can be added for the unsubmerged Sub.
Update history
[edit | edit source]
|
This article or section uses Cargo to generate its content. It will automatically fill up as other articles are completed. To add to this section, create the articles it is looking up. Do not add content to this section manually and do not remove this notice until you are sure this section is complete. |
 Pierce increased ― 1 → 2
- No longer requires the center of the radius of MOAB-Class Bloons to be within range to target them (bug fix)
- "Optimized art for all submerged versions"
- Range increased ― 50 → 52
- 3-0-1
- Twin Guns now reduces the pulse attack's cooldown by 15%
- 3-0-2
- Airburst Darts now reduces the pulse attack's cooldown by 25%
- Overall reduces attack cooldown by 36.25% (due to changes to Twin Guns)
- Submerge and Support should no longer be possible to disconnect tower location from visible model (bug fix)
— Update notes
 Decamo pulse: Pierce reduced ― infinite → 100
- 3-1-0
- Barbed Darts now grants +20 pierce to the decamo pulse
- Base pierce is no longer infinite; overall pierce of this crosspath is reduced
- 3-2-0
- Barbed Darts now grants +30 pierce to the decamo pulse
- Base pierce is no longer infinite; overall pierce of this crosspath is reduced
- Now submerges correctly on Quarry (bug fix)
— Update notes
- Upgrade cost increased ― $500 → $700
 Submerge targeting is now mapped to Monkey Special 1
- 3-1-0
- Decamo pulse: Pierce increased ― 120 → 150
- 3-2-0
- Heat-tipped Darts no longer increases decamo pulse pierce by 30
- Overall pierce is unchanged (due to changes to the previous tier)
- 3-0-1
- Decamo pulse: Attack cooldown bonus increased ― -15% → -30%
- Overall attack cooldown reduced ― 1.275s → 1.05s
- 3-0-2
- Airburst Darts no longer reduces the attack cooldown of the decamo pulse
- Overall attack cooldown increased ― 0.95625s → 1.05s (due to changes to the previous tier)
- Submerge toggle now has a 1-second cooldown
- Retry Last Round no longer removes the submerge toggle (bug fix)
- Shared range no longer breaks after loading a save and then upgrading (bug fix)
— Update notes
- Submerge toggle: Cooldown reduced ― 1s → 0.5s
- No longer should have less range when targeting MOAB-Class Bloons (bug fix)
— Update notes
- Pulse (decamo): Attack cooldown reduced ― 1.5s → 1.35s (attack speed increased by 11.11%)
- Note: 4-X-X Bloontonium Reactor unchanged (0.28s)
- Stacks with X-X-1 Twin Guns crosspath ― 1.05s → 0.945s
Gallery
[edit | edit source]Screenshots
[edit | edit source]-
 300 Sub unsubmerged
 -
 301 Sub unsubmerged
 -
 302 Sub unsubmerged
 -
 310 Sub unsubmerged
 -
 320 Sub unsubmerged
 -
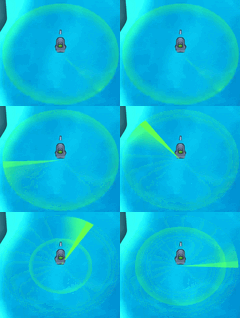 Submerge and Support aura
 -
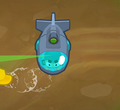 300 sub submerged, but visible above water due to selling a Lord of the Abyss while the dam is flooding.
 -
 320 sub submerged but visible.
 -
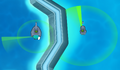 The different water levels of Flooded Valley, demonstrated by submerged Monkey Subs


Assets
[edit | edit source]-
 Portrait
 -
 Upgrade icon
 -
 Insta Monkey icon

Trivia
[edit | edit source]- Unlike its previous iterations, Submerge and Support in BTD6 automatically submerges the Sub upon upgrading.
- The in-game appearance of the 3-2-0 Sub has led the community to jokingly refer to it as the "Angry Sub". Ninja Kiwi has acknowledged this term in the 29.0 patch notes with the line "making sub a little angrier".
- After flooding Flooded Valley, any submerged Sub placed on the left side does not visually submerge completely.
In other languages
[edit | edit source]| Language | Name / Description | Notes | |
|---|---|---|---|
| Arabic | الغمر والدعم إضافة خيار الاستهداف أثناء الغمر تحت الماء والذي دائمًا ما يكشف عن البالونات المموهة في دائرة نصف قطر ولكنه لا يهاجم أثناء الغمر تحت الماء. |
— | |
| Danish | Undervandsstøtte Undervandsmålsøgning kan permanent se camo-bloons indenfor dens radius, men kan ikke angribe under vand. |
— | |
| German | Abtauchen und Unterstützen Fügt Untertauch-Zieloption hinzu, die dauerhaft Tarn-Bloons in deren Radius zeigt, aber im Untertauchmodus nicht angreift. |
— | |
| Spanish | Inmersión y apoyo Agrega la opción de apuntar sumergido, que revela de forma permanente a los camufloons en el radio y no ataca bajo el agua. |
— | |
| Spanish (LA) | Inmersión y apoyo Agrega la opción de apuntar sumergido, que revela de forma permanente a los camufloons en el radio y no ataca bajo el agua. |
— | |
| Finnish | Sukella ja tue Lisää tähtäykseen sukellusvalinnan, joka paljastaa pysyvästi maastokuvioidut bloonit alueellaan, mutta ei hyökkää sukelluksen aikana. |
— | |
| French | Immersion et appui Ajoute l'option de ciblage Immersion qui révèle les Bloons camouflés dans son rayon de façon permanente, mais n'attaque pas tant qu'il est immergé. |
— | |
| Italian | Immersione e supporto Aggiunge l'opzione Mira sommersa che consente di individuare permanentemente la presenza di bloon mimetizzati nel proprio raggio d'azione, ma non attacca in immersione. |
— | |
| Japanese | 潜水サポート 潜水中は攻撃しないが、半径内のカモフラージュブルーンを永久的に見えるようにする潜水照準オプションを加える。 |
— | |
| Korean | 수중 지원 잠수 중에는 공격을 멈추는 대신 반경 내 캐모 풍선을 영구적으로 드러내는 잠수 표적 옵션을 추가합니다. |
— | |
| Dutch | Steun uit de diepte Voegt de optie Onderwaterrichten toe, dat permanent Gecamoufleerde Bloons in het gebied onthult, maar niet aanvalt zolang hij onder water is. |
— | |
| Norwegian | Gå under vann Tilfører målrettingsalternativet Gå under, som permanent viser kamuflasjebloons innen rekkevidde, men angriper ikke mens man er under. |
— | |
| Polish | Zanurzenie i wsparcie Dodaje opcję celowania w zanurzeniu, która permanentnie ujawnia kamuflażowe blony w swoim promieniu, ale nie atakuje podczas zanurzenia. |
— | |
| Portuguese (Brazil) | Submersão e Suporte Adiciona a opção de mira submersa que revela permanentemente Bloons Camuflados no seu raio, mas não ataca enquanto submerso. |
— | |
| Russian | Погружение и поддержка Добавляет функцию постоянного обнаружения камуфлированных шаров в радиусе действия, но атаковать при погружении нельзя. |
— | |
| Swedish | Undervattensläge och Stöd Lägger till ett målsökningsalternativ i U-läge som avslöjar Kamobloons permanent inom dess radie, men attackerar inte från U-läge. |
— | |
| Thai | ดำน้ำและสนับสนุน เพิ่มตัวเลือกการเล็งเป้าหมาย "ดำน้ำ" ทำให้เปิดเผยลูกโป่งลายพรางในรัศมีได้อย่างถาวร แต่จะไม่โจมตี |
— | |
| Turkish | Suya batma ve Destek Yarıçapı içindeki Kamuflajlı Bloon’ları kalıcı olarak görünür hale getiren Suya Batık hedefleme seçeneği ekler ancak batıkken saldırıda bulunmaz. |
— | |
| Chinese (simplified) | 潜望支持 增加潜望锁定选项,可永久显示其半径内的迷彩气球,但在潜水时不进行攻击。 |
— | |
| Chinese (traditional) | 潛入和支援 增加潛入鎖定目標選項,可在其半徑內永久顯示偽裝氣球,但無法在潛入時進行攻擊。 |
— | |
| This list was last updated for: version 43.1 | |||
Navigation
[edit | edit source]| Upgrades in Bloons TD 6 | ||||||||||||||||||||||||||||||||||||||||||||||||||||||||||||||||||||||||||||||||||||||||||||||||||||||||||||||||||||||||||||||||||||||||||||||||||||||||||||||||||||||||||||||||||||||||||||||||||||||||||||||||||||||||||||||||||||||||||||||||||||||||||
|---|---|---|---|---|---|---|---|---|---|---|---|---|---|---|---|---|---|---|---|---|---|---|---|---|---|---|---|---|---|---|---|---|---|---|---|---|---|---|---|---|---|---|---|---|---|---|---|---|---|---|---|---|---|---|---|---|---|---|---|---|---|---|---|---|---|---|---|---|---|---|---|---|---|---|---|---|---|---|---|---|---|---|---|---|---|---|---|---|---|---|---|---|---|---|---|---|---|---|---|---|---|---|---|---|---|---|---|---|---|---|---|---|---|---|---|---|---|---|---|---|---|---|---|---|---|---|---|---|---|---|---|---|---|---|---|---|---|---|---|---|---|---|---|---|---|---|---|---|---|---|---|---|---|---|---|---|---|---|---|---|---|---|---|---|---|---|---|---|---|---|---|---|---|---|---|---|---|---|---|---|---|---|---|---|---|---|---|---|---|---|---|---|---|---|---|---|---|---|---|---|---|---|---|---|---|---|---|---|---|---|---|---|---|---|---|---|---|---|---|---|---|---|---|---|---|---|---|---|---|---|---|---|---|---|---|---|---|---|---|---|---|---|---|---|---|---|---|---|---|---|
| ||||||||||||||||||||||||||||||||||||||||||||||||||||||||||||||||||||||||||||||||||||||||||||||||||||||||||||||||||||||||||||||||||||||||||||||||||||||||||||||||||||||||||||||||||||||||||||||||||||||||||||||||||||||||||||||||||||||||||||||||||||||||||
| List of upgrades | ||||||||||||||||||||||||||||||||||||||||||||||||||||||||||||||||||||||||||||||||||||||||||||||||||||||||||||||||||||||||||||||||||||||||||||||||||||||||||||||||||||||||||||||||||||||||||||||||||||||||||||||||||||||||||||||||||||||||||||||||||||||||||