The Big One (BTD6): Difference between revisions
Qwertyxp2000 (talk | contribs) No edit summary |
Qwertyxp2000 (talk | contribs) prev edit was about adding the burn mention of DoT length bc people will wanna look at "big one" article and wonder how long its burn lasts for without just going to "burny stuff" article (because some just look for "big one" article first...). This time, I added bulletpointings. Strategy seems similar in 52.2 I suppose? also runon sentences suck. "stun blast" and "shockwave" are what I chose for the inner and outer blasts gained at shell shock |
||
| Line 14: | Line 14: | ||
| xp = 15000 | | xp = 15000 | ||
}} | }} | ||
'''The Big One''' is the [[Mortar Monkey (BTD6)|Mortar Monkey]]'s path 1 tier 4 [[upgrade]] in ''[[Bloons TD 6]]''. It | '''The Big One''' is the [[Mortar Monkey (BTD6)|Mortar Monkey]]'s path 1 tier 4 [[upgrade]] in ''[[Bloons TD 6]]''. It creates much larger explosions that pop more Bloons and stun longer. The outer shockwave gains the ability to pop all Bloon types, but the other explosions remain unable to pop [[Black Bloon (BTD6)|Black Bloons]]. | ||
*'''Main explosion''' Radius is increased by 20 (38 to 58), pierce increased from 45 to 85, and damage from 3 to 10. | |||
*'''Stun blast''': Radius increased by 30 (57 to 87), pierce increased from 45 to 85, and damage from 1 to 2 (with another +2 damage to [[Ceramic Bloon (BTD6)|Ceramics]]. | |||
*'''Shockwave''': Radius is increased by 10 (19 to 29), pierce increased from 45 to 85, and stun duration increased from 0.5 seconds to 0.75 seconds. | |||
With the 4-0-2 crosspath, the [[Burny Stuff (BTD6)|Burny Stuff]] burn damage is increased from 2 to 12. It still burns every 0.625 seconds (0.375 seconds with {{BTD6 mk|Extra Burny Stuff}}) and lasts up to 3.75 seconds. | With the 4-0-2 crosspath, the [[Burny Stuff (BTD6)|Burny Stuff]] burn damage is increased from 2 to 12. It still burns every 0.625 seconds (0.375 seconds with {{BTD6 mk|Extra Burny Stuff}}) and lasts up to 3.75 seconds. | ||
| Line 25: | Line 28: | ||
==Strategy== | ==Strategy== | ||
{{BTD6 last updated| | {{BTD6 last updated|52.2|section=y}} | ||
The Big One is a decent mid-game tower, being able to take down dense Ceramic clumps and do mild MOAB damage at a relatively high price. The main blast cannot pop Black Bloons, so [[Striker Jones (BTD6)|Striker Jones]] is strongly recommended for it. [[Ceramic Bloon (BTD6)#Super Ceramic Bloons|Super Ceramics]] start appearing on Round 81, greatly reducing the viability of The Big One starting there. It's a decent stepping stone to [[The Biggest One (BTD6)|The Biggest One]], provided MOAB-class Bloons are handled so it can be afforded by the mid-80s. | The Big One is a decent mid-game tower, being able to take down dense Ceramic clumps and do mild MOAB damage at a relatively high price. The main blast cannot pop Black Bloons, so [[Striker Jones (BTD6)|Striker Jones]] is strongly recommended for it. [[Ceramic Bloon (BTD6)#Super Ceramic Bloons|Super Ceramics]] start appearing on Round 81, greatly reducing the viability of The Big One starting there. It's a decent stepping stone to [[The Biggest One (BTD6)|The Biggest One]], provided MOAB-class Bloons are handled so it can be afforded by the mid-80s. | ||
4-2-0 is more reliable and is recommended on shorter or simultaneously multi-lane maps, | 4-2-0 is more reliable and is recommended on shorter or simultaneously multi-lane maps. In contrast, 4-0-2 does more raw damage, can take down all except round 81+ Fortified Super Ceramics<!--12d*6ticks=72totald, normal-s-ceram is 68--> in one hit with Burny Stuff, and is recommended in other cases. | ||
==Update history== | ==Update history== | ||
Revision as of 08:38, 11 February 2026

|
 Devastating explosions pop 10 layers. Increases Burny Stuff damage further. Devastating explosions pop 10 layers. Increases Burny Stuff damage further.
|
| Tower | Mortar Monkey — Path 1 — Tier 4 | |
|---|---|---|
| XP cost | 15,000 | |
| Cash cost | $5,950 — Easy $7,000 — Medium $7,560 — Hard $8,400 — Impoppable | |
The Big One is the Mortar Monkey's path 1 tier 4 upgrade in Bloons TD 6. It creates much larger explosions that pop more Bloons and stun longer. The outer shockwave gains the ability to pop all Bloon types, but the other explosions remain unable to pop Black Bloons.
- Main explosion Radius is increased by 20 (38 to 58), pierce increased from 45 to 85, and damage from 3 to 10.
- Stun blast: Radius increased by 30 (57 to 87), pierce increased from 45 to 85, and damage from 1 to 2 (with another +2 damage to Ceramics.
- Shockwave: Radius is increased by 10 (19 to 29), pierce increased from 45 to 85, and stun duration increased from 0.5 seconds to 0.75 seconds.
With the 4-0-2 crosspath, the Burny Stuff burn damage is increased from 2 to 12. It still burns every 0.625 seconds (0.375 seconds with  Extra Burny Stuff) and lasts up to 3.75 seconds.
Stats
| Tower | ||||
|---|---|---|---|---|
| ||||
| Attack | |||||||||||||||||||||||||||||||||||||||||||||||||||||||||||
|---|---|---|---|---|---|---|---|---|---|---|---|---|---|---|---|---|---|---|---|---|---|---|---|---|---|---|---|---|---|---|---|---|---|---|---|---|---|---|---|---|---|---|---|---|---|---|---|---|---|---|---|---|---|---|---|---|---|---|---|
| |||||||||||||||||||||||||||||||||||||||||||||||||||||||||||
| |||||||||||||||||||||||||||||||||||||||||||||||||||||||||||
|
4-1-0
| Attack | ||
|---|---|---|
|
4-2-0
| Attack | ||
|---|---|---|
|
4-0-1
| Attack | ||
|---|---|---|
|
4-0-2
| Attack | |||||||||||||||
|---|---|---|---|---|---|---|---|---|---|---|---|---|---|---|---|
|
Costs and sell values
| Tiers | Total cost | Sell value | ||||||
|---|---|---|---|---|---|---|---|---|
| Easy | Medium | Hard | Impoppable | Easy | Medium | Hard | Impoppable | |
| 4-0-0 | $7,840 | $9,225 | $9,965 | $11,070 | $5,488 | $6,458 | $6,976 | $7,749 |
| 4-1-0 | $8,180 | $9,625 | $10,395 | $11,550 | $5,726 | $6,738 | $7,277 | $8,085 |
| 4-2-0 | $8,605 | $10,125 | $10,935 | $12,150 | $6,024 | $7,088 | $7,655 | $8,505 |
| 4-0-1 | $8,010 | $9,425 | $10,180 | $11,310 | $5,607 | $6,598 | $7,126 | $7,917 |
| 4-0-2 | $8,350 | $9,825 | $10,610 | $11,790 | $5,845 | $6,878 | $7,427 | $8,253 |
Strategy
The Big One is a decent mid-game tower, being able to take down dense Ceramic clumps and do mild MOAB damage at a relatively high price. The main blast cannot pop Black Bloons, so Striker Jones is strongly recommended for it. Super Ceramics start appearing on Round 81, greatly reducing the viability of The Big One starting there. It's a decent stepping stone to The Biggest One, provided MOAB-class Bloons are handled so it can be afforded by the mid-80s.
4-2-0 is more reliable and is recommended on shorter or simultaneously multi-lane maps. In contrast, 4-0-2 does more raw damage, can take down all except round 81+ Fortified Super Ceramics in one hit with Burny Stuff, and is recommended in other cases.
Update history

|
This article or section uses Cargo to generate its content. It will automatically fill up as other articles are completed. To add to this section, create the articles it is looking up. Do not add content to this section manually and do not remove this notice until you are sure this section is complete. |
 Upgrade cost reduced ― $10,000 → $8,000
- "Blast radius increased"
- Can now damage DDTs when given Camo detection (bug fix)
- "Mortars should no longer display line of sight as they can ignore all blockers"
- "The mortar’s projectiles should no longer visually drop back down the barrel"
— Update notes
- Mortar base rate of fire increased ― 2.2s → 2s
 Random spread radius increased ― 18 → 30
 - Note: Random spread with X-X-1 Increased Accuracy is unchanged (8)
- 4-0-2
- Damage over time: Damage per tick increased ― 1 → 3
— Update notes
- Base accuracy increased ― 30 → 18
— Update notes
- Overall cost reduced by $350 (due to cost changes for previous tiers)
- Center AoE damage increased ― 5 → 7
- 4-0-2
- DoT: Damage rate increased ― 1.25s → 0.625s
- DoT: Duration reduced ― 3.75s → 1.875s
- DoT: Damage per tick increased ― 3 → 5
- Shockwave: Now deals +1 damage to Ceramics
— Update notes
- Stun duration for regular Bloons increased ― 0.5s → 0.75s
— Update notes
- Upgrade cost reduced ― $8,000 → $6,500
- Explosion: Damage increased ― 7 → 8
- Shockwave: Damage increased ― 1 → 2
- Explosion center: Damage type changed ― Normal → Explosion
- 4-0-2
- DoT: Damage per tick increased ― 5 → 7
— Update notes
- Upgrade cost increased ― $6,500 → $7,200
- Overall cost increased by $625 (due to cost changes for previous tiers)
- Shockwave: damage to Ceramics increased ― +1 → +2
- Description changed ― "Devastating explosions pop 8 layers of any Bloon type. Increases Burny Stuff damage further." → "Devastating explosions pop 8 layers. Increases Burny Stuff damage further."
- 4-0-2
- No longer has halved burn duration ― 1.875s → 3.75s
— Update notes
- Main blast: Damage increased ― 8 → 10
- Note: Does not affect The Biggest One
- 4-0-2
- DoT damage increased ― 7 → 12
- Description changed ― Devastating explosions pop 8 layers. Increases Burny Stuff damage further. → Devastating explosions pop 10 layers. Increases Burny Stuff damage further.
- Overall cost reduced by $150 (due to cost changes for previous tiers)
— Update notes
- Upgrade cost reduced ― $7,200 → $7,000
- Overall cost reduced by $400 (due to cost changes for previous tiers)
Gallery
Screenshots
-
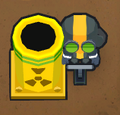 The Big One with no crosspath
 -
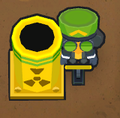 The Big One with 410 crosspath
 -
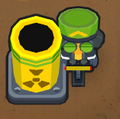 The Big One with 420 crosspath
 -
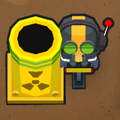 The Big One with 401 crosspath
 -
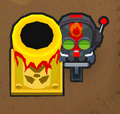 The Big One with 402 crosspath
 -
 The Big One explosion
 -
 The Big One explosion with Mortar Monkey Snow cosmetic


Assets
-
 Portrait
 -
 Upgrade icon
 -
 Insta Monkey icon

Trivia
- Its portrait does not include the radioactive symbol on its in-game model and Insta Monkey sprite.
- Its upgrade icon's file name has a typo:
TheBIgOne. - Its upgrade icon depicts a Fortified Zebra Bloon being popped. In previous versions, The Big One lacked the damage to instantly pop a Zebra. However, the icon is still erroneous as Zebras cannot be Fortified in BTD6.
In other languages
| Language | Name / Description | Notes | |
|---|---|---|---|
| Arabic | الكبرى انفجارات مدمرة من شأنها فرقعة 8 طبقات، حيث تزيد من ضرر المواد المحترقة بشكل أكبر. |
— | |
| Danish | Den Store Altødelæggende eksplosioner som springer 8 lag. Øger skaden af Brændende Sager. |
— | |
| German | Die Größte Vernichtende Explosionen lassen jeweils 8 Schichten platzen, plus noch mehr erhöhter Schaden durch Heißes Zeug. |
— | |
| Spanish | La grande Cada explosión devastadora explota 8 capas de bloons. Aumenta más el daño de Cosa quemadora. |
— | |
| Spanish (LA) | La grande Cada explosión devastadora explota 8 capas. Aumenta más el daño de Cosa quemadora. |
— | |
| Finnish | Valtava Tuhovoimaiset räjähdykset poksauttavat blooneista 8 pois kerrosta. Palava aines tekee entistä enemmän vahinkoa. |
— | |
| French | Méga explosion Des explosions dévastatrices font éclater 8 couches de Bloons. Les dégâts de Ça crame sont encore plus augmentés. |
— | |
| Italian | Bomba gigante Esplosioni devastanti fanno scoppiare 8 strati. Aumenta ulteriormente i danni da materiale infiammabile. |
— | |
| Japanese | ザ・ビッグ 破滅的な爆発で8層を割る。バーニースタッフのダメージをさらに増加させる。 |
— | |
| Korean | 빅 원 엄청난 폭발이 풍선 8겹을 터트립니다. 연소 물질의 공격력을 더욱더 증가합니다. |
— | |
| Dutch | De Grote Verwoestende explosies laten 8 lagen van Bloons knallen. Verhoogt de schade van Brandend spul verder. |
— | |
| Norwegian | Den store Ødeleggende eksplosjoner popper 8 lag. Øke Brennende saker-skade enda mer. |
— | |
| Polish | Coś wielkiego Dewastujące eksplozje przekłuwają 8 warstw blonów. Jeszcze bardziej zwiększają obrażenia od czegoś płonącego. |
— | |
| Portuguese (Brazil) | O Grandão Explosões devastadoras estouram 8 camadas. Aumenta ainda mais o dano de Parada Queimante. |
— | |
| Russian | Здоровяк Разрушительный взрыв пробивает 8 слоев шаров. Еще больше усиливает урон горючих материалов. |
— | |
| Swedish | Den Största Förödande explosioner smäller 8 Bloonlager. Ökar skadan för Brännstoff ytterligare. |
— | |
| Thai | ของใหญ่ ระเบิดอันรุนแรงทำลายบลูน 8 ชั้น อีกทั้งยังเพิ่มพลังทำลายล้างของกระสุนร้อนผ่าวยิ่งขึ้นไปอีก |
— | |
| Turkish | Büyük Olan Yıkıcı patlamaların her biri 8 katman patlatır. Yanıcı Madde hasarını daha da artırır. |
— | |
| Chinese (simplified) | 大家伙 强烈爆炸可击破8层气球。进一步增加燃烧物伤害。 |
— | |
| Chinese (traditional) | 大傢伙 毀天滅地的爆炸,可擊破8層氣球。進一步提高燃燒物的傷害。 |
— | |
| This list was last updated for: version 45.1 | |||
Navigation
| Mortar Monkey in Bloons TD 6 | ||||||
|---|---|---|---|---|---|---|
| ||||||
| Stats • Strategies • Update history |